Onboarding Microsoft 365 Users
Onboarding new users in Microsoft 365 is a crucial task for IT administrators. Whether you're dealing with new employees or contractors, it's essential to ensure they have the right access to tools and resources from the start. In this guide, we'll walk you through the process of onboarding users using both the Microsoft 365 Admin Center and Graph PowerShell. We'll cover the entire workflow—from account creation to assigning licenses and group memberships—keeping it simple and straightforward.
Why Automate the Onboarding Process?
Automation simplifies user onboarding by reducing the manual steps involved, eliminating errors, and ensuring consistency. Whether you're onboarding a few users or bulk-adding them, using tools like Graph PowerShell allows you to streamline the process, save time, and focus on other critical tasks. While the admin center is user-friendly, PowerShell offers flexibility and scalability for larger operations.
Step-by-Step Solution
Step 1: Preparing the Environment
Before you can start onboarding users, ensure you have the necessary permissions and tools:
- Admin Center: You need the "User Administrator" or "Global Administrator" role in Microsoft 365.
- Graph PowerShell: Install the Graph PowerShell module (and connect to it with the necessary permission) by running the following command in PowerShell
    Install-Module Microsoft.Graph
    Connect-MgGraph -Scopes "User.ReadWrite.All"
Step 2: Onboarding Users in Microsoft 365
Option 1: Using the Admin Center
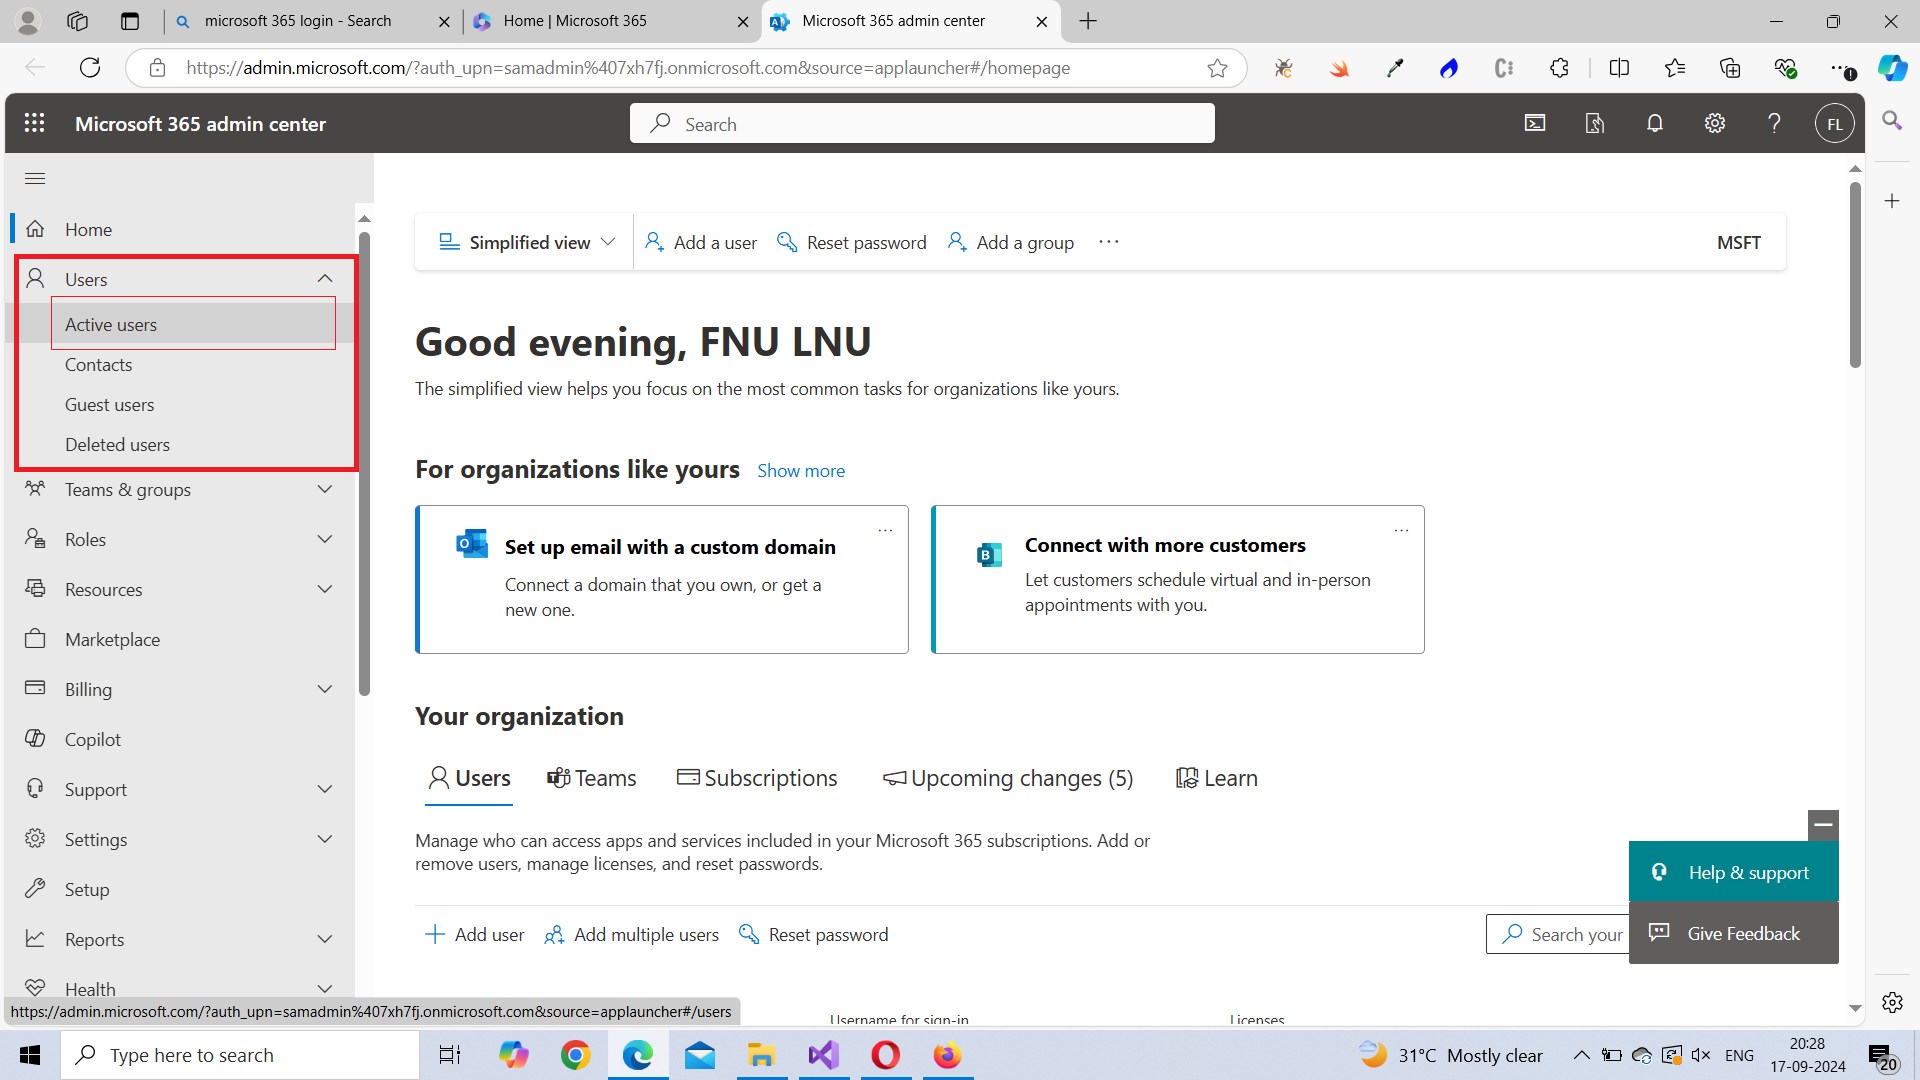
- Login to Microsoft 365 Admin Center: Go to admin.microsoft.com and log in using your admin credentials.
- Navigate to the 'Users' Section: From the left-hand panel, click on Show all > Users > Active Users.
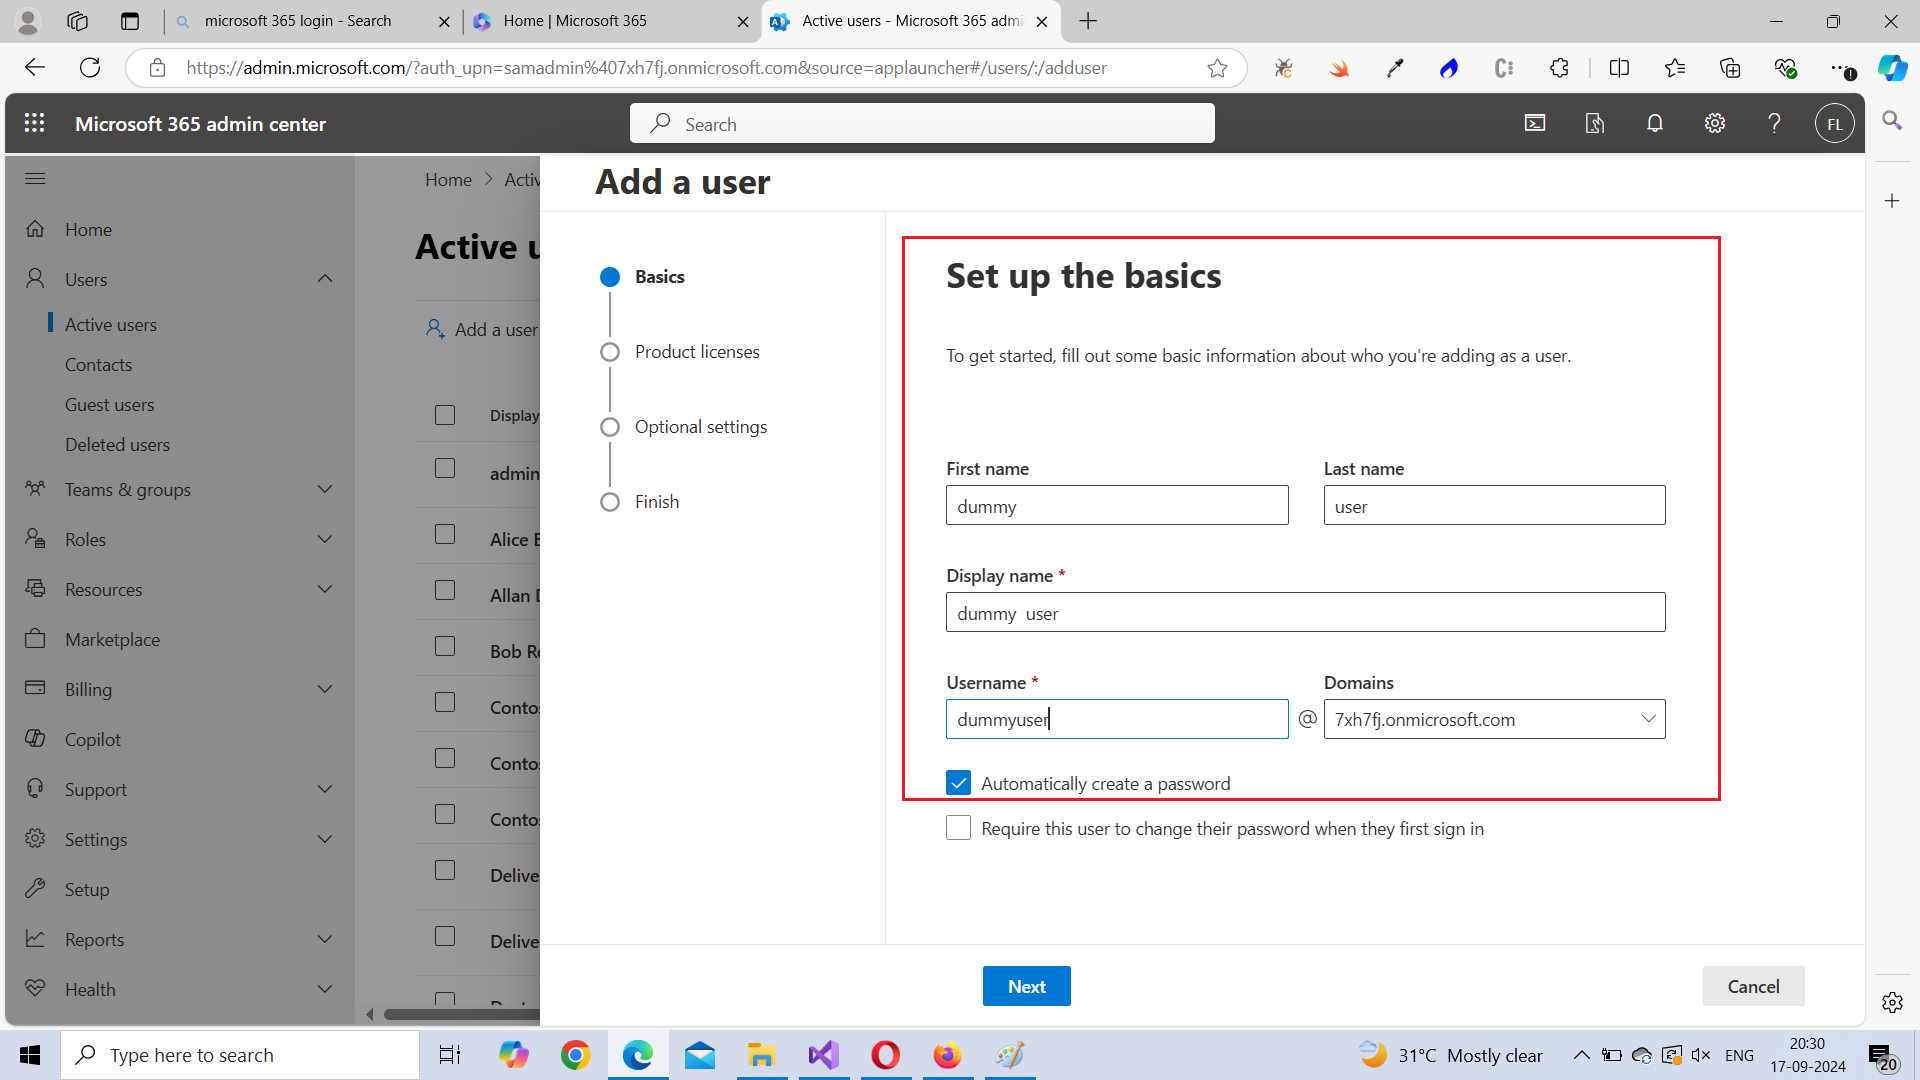
- Add a New User: Click on Add a user. Fill in the necessary details like the user's name, username, password, and location.
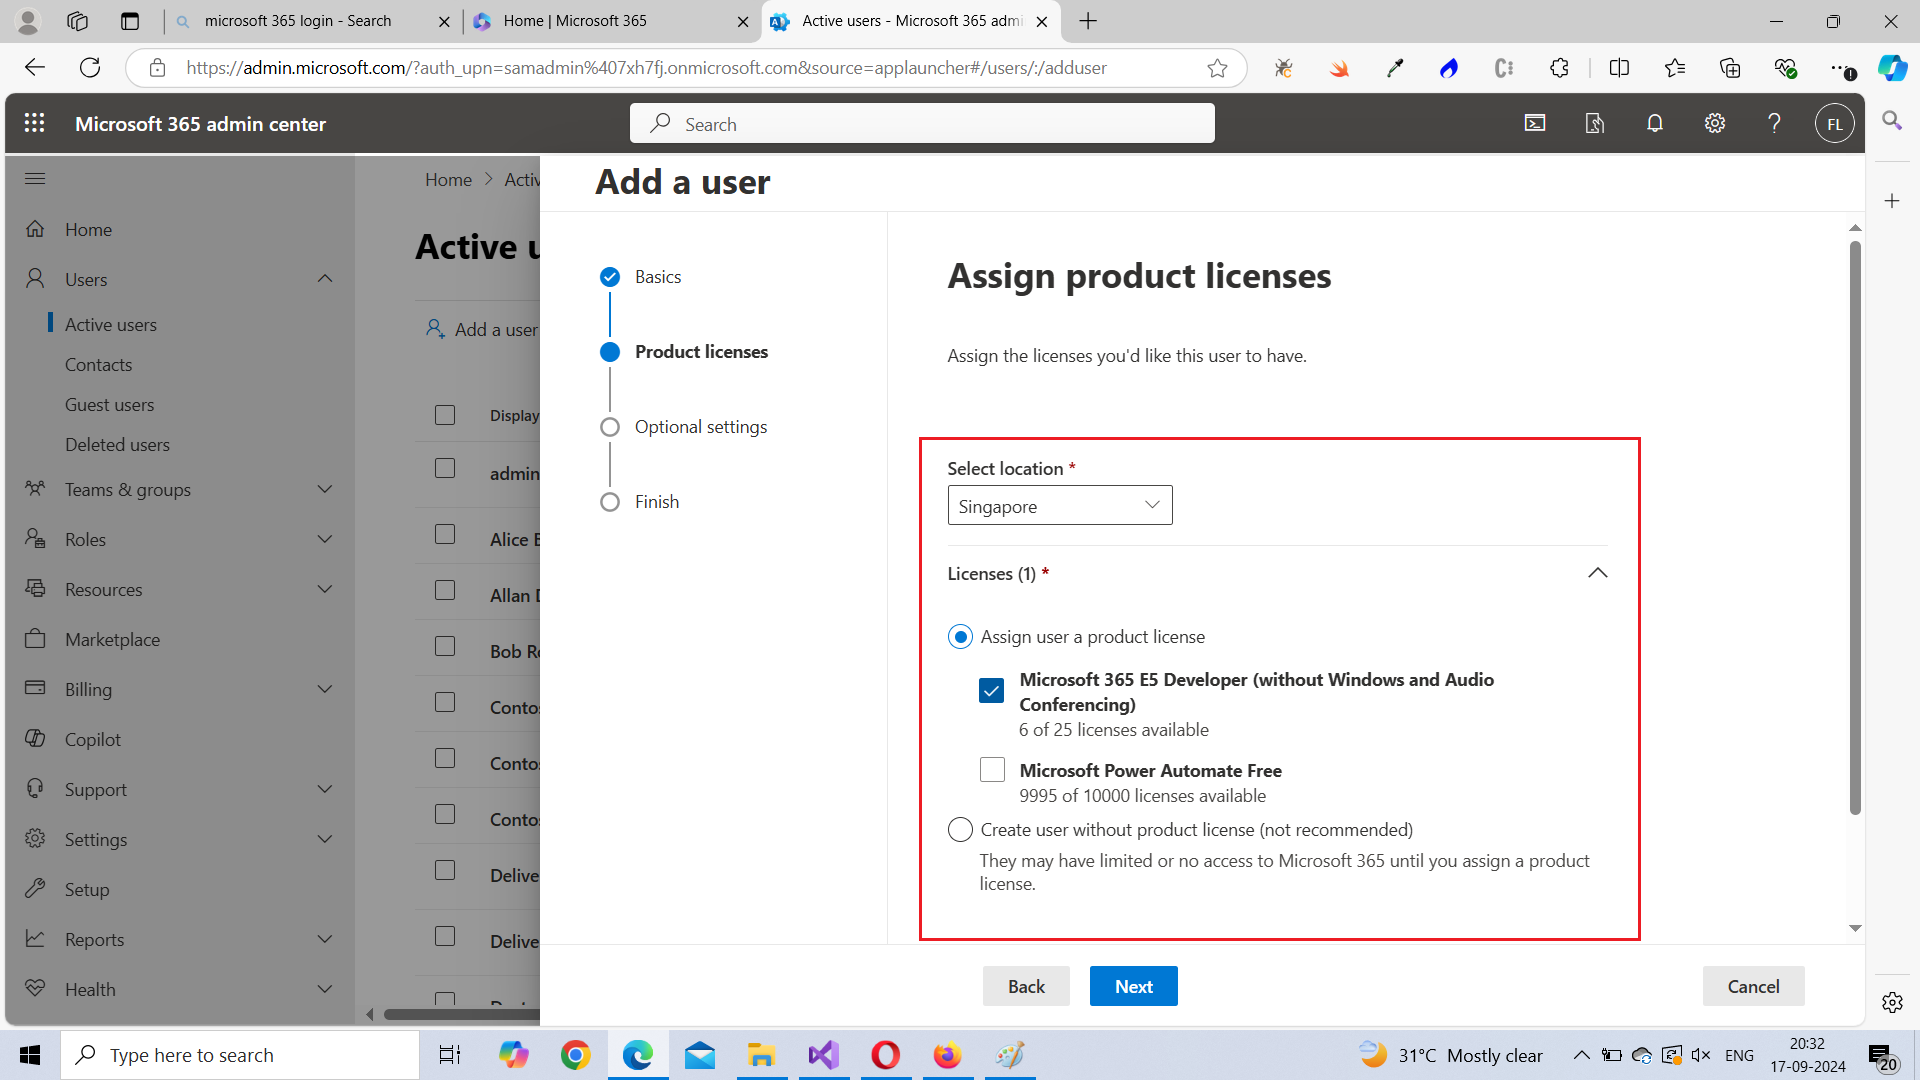
- Assign a License: After entering the user details, assign a Microsoft 365 license based on the user's needs (e.g., Office 365 E3, Business Premium, etc.).
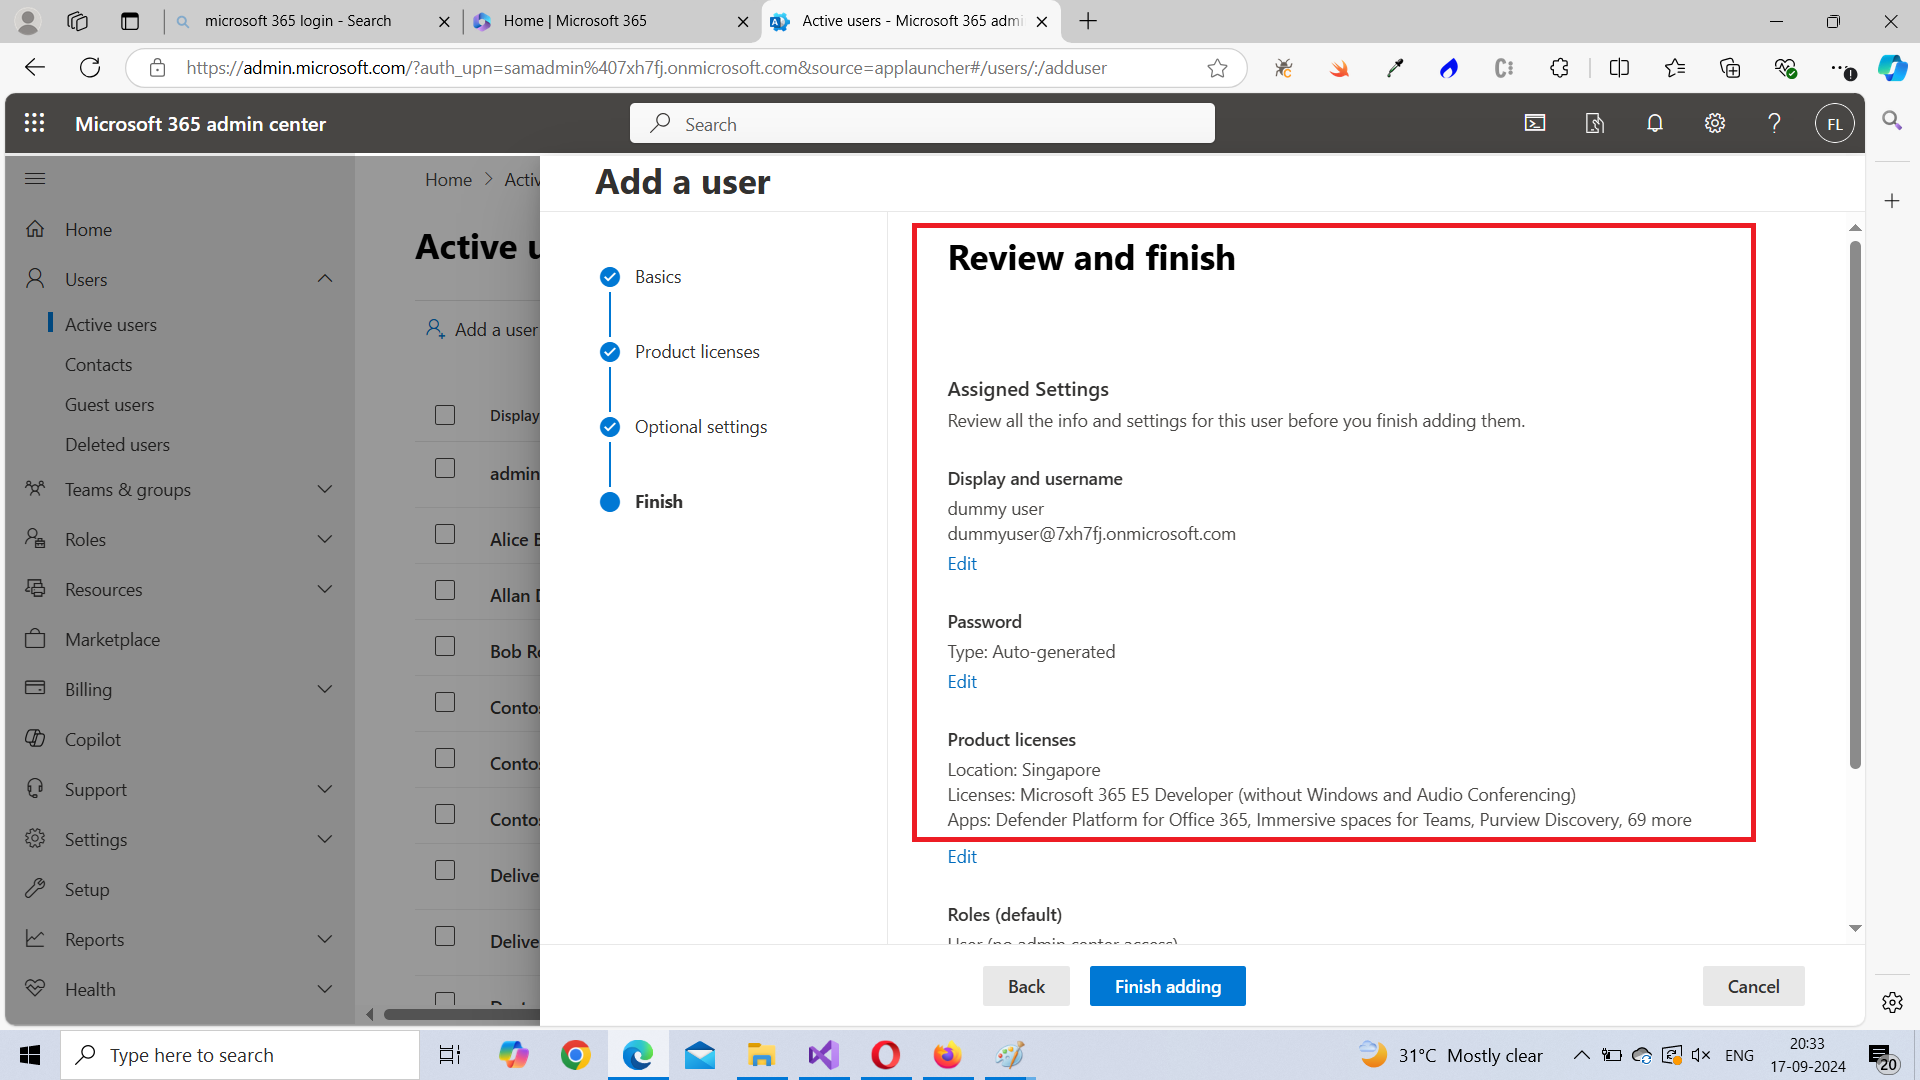
- Review and Finish: Review the details and click Finish to create the user account.
- Configure Group Membership: Add the user to relevant groups (e.g., HR, Sales, etc.) to ensure they have the necessary access to resources and tools. To add the user to a group, select the user > Manage groups > Assign Memberships


Option 2: Using Graph PowerShell
For admins managing multiple users, PowerShell is an efficient way to automate onboarding. Here's how you can do it.
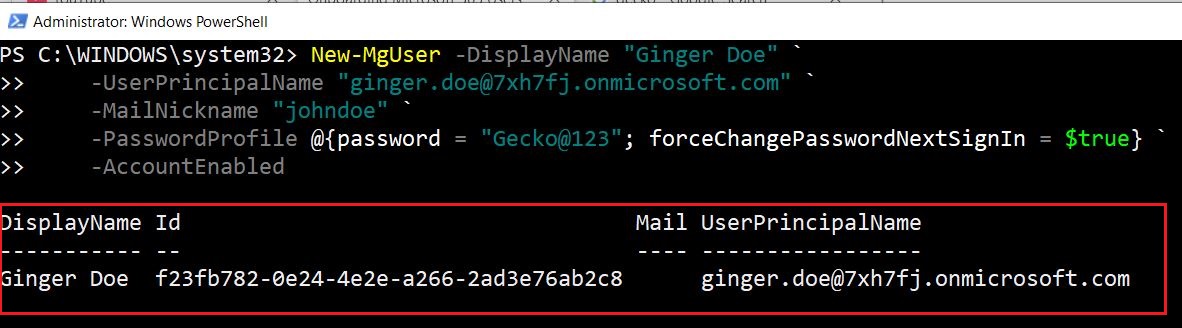
- Create a New User: Use the following script to create a new Microsoft 365 user:
- Assign a License: Assign a license to the user:
- Note: You should first assign usage location for the user. Without doing this, you won't be able to assign the license. Run the following command to assign usage location for a user.
- Note: You need to know the License ID to assign the license using PowerShell. Run the following command to get the license ID.
- Add the User to Groups: Add the user to a group to ensure they have the necessary access to resources and tools..
- Review and Finish: Verify that the user has been created and that their licenses and group memberships have been assigned.
    New-MgUser -DisplayName "John Doe" `
    -UserPrincipalName "john.doe@contoso.com" `
    -MailNickname "johndoe" `
    -PasswordProfile @{password = "User@123"; forceChangePasswordNextSignIn = $true} `
    -AccountEnabled
Update-MgUser -UserId "ginger.doe@7xh7fj.onmicrosoft.com" -UsageLocation "US"Get-MgSubscribedSku | Select-Object SkuId, SkuPartNumber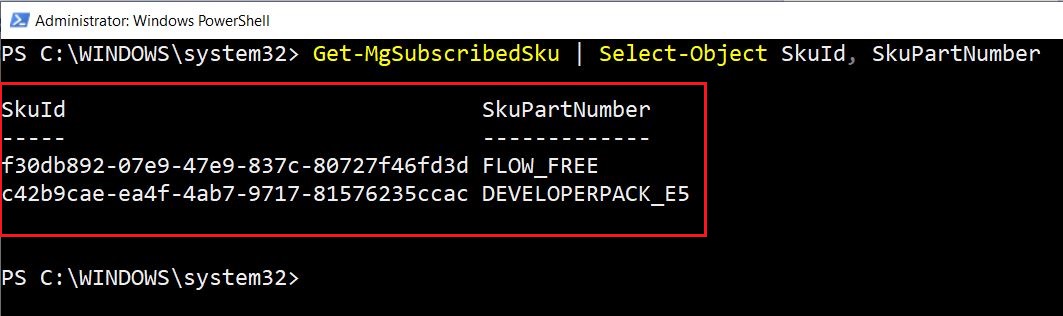
Script for assigning the license.
    $User = Get-MgUser -UserId "john.doe@contoso.com"
    $License = New-Object -TypeName Microsoft.Graph.PowerShell.Models.MicrosoftGraphAssignedLicense
    $License.SkuId = "ENTER-SKU-ID-HERE"  # Replace with your license SKU ID
    Set-MgUserLicense -UserId $User.Id -AddLicenses @($License) -RemoveLicenses @()
.JPG)
New-MgGroupMember -GroupId "GROUP-ID-HERE" -DirectoryObjectId <user-id-goes-here>Note:: Use Get-MgGroup and Get-MgUser to obtain the group id and user id respectively.
Step 3: Verifying the Results
Option 1: Using the Admin Center:
- Login to Microsoft 365 Admin Center: Go to admin.microsoft.com and log in using your admin credentials.
- Navigate to 'Users' Section: Under Users > Active Users, find the newly created user. Verify that their details, license, and group memberships are correct.
.png)
.png)
Option 2: Using Graph PowerShell:
- Verify User Creation: You can verify that the user was created by running:
- Verify License Assignment Check if the license was assigned:
-
Verify Group Membership
Run the following command. The command returns the IDs of groups the user is part of.
Get-MgUserMemberOf -userid "ginger.doe@7xh7fj.onmicrosoft.com"
Get-MgUser -UserId "john.doe@contoso.com" | Select DisplayName, UserPrincipalName, AccountEnabled.JPG)
Get-MgUserLicenseDetail -UserId $User.Id.JPG)
Advanced Tips (Optional)
- Bulk User Onboarding: Use a CSV file to import multiple users in one go via PowerShell.
- Automating Welcome Emails: Automate sending a welcome email after user creation using New-MgUserMessage.
Common Errors & Troubleshooting
- Error: User Creation Failed
- Cause: Incorrect user details or lack of permissions.
- Solution: Double-check the username format and ensure you have the necessary permissions.
- Error: License Assignment Failed
- Cause: The SKU ID may be incorrect or insufficient licenses are available.
- Solution: Verify the SKU ID and license availability in your tenant.
- Error: Group Membership Not Added
- Cause: Invalid Group ID or permissions issue.
- Solution: Confirm the group exists and that the user has the required permissions to modify groups.
Conclusion
Onboarding new Microsoft 365 users can be made much simpler and more efficient with automation using Graph PowerShell or through the Microsoft 365 Admin Center. Whether you're dealing with a single user or hundreds, automating this process saves time and ensures that all users are properly set up with the correct licenses and group memberships.
FAQs
- Can I automate license assignment based on the department?
- Yes, you can use PowerShell scripts to automate license assignment based on user attributes like department.
- Is there a way to bulk onboard users without PowerShell?
- Yes, the Microsoft 365 Admin Center allows for bulk onboarding via CSV imports.