🔧 New: User Management Graph PowerShell Toolkit
Simplify user tasks like bulk creation, updates, password resets, deletions, license checks & more — all from one place.
🚀 Launch ToolkitEnable-TransportRule: How to Enable Exchange Online Mail Flow Rules
Mail flow (transport) rules help organizations enforce compliance, block risky mail, and add disclaimers. When a rule is created or later turned off for maintenance, admins typically re-enable it with the Enable-TransportRule cmdlet.
Note:
- Microsoft Graph PowerShell does not support organization-level mail flow (transport) rule administration yet. You need to use Exchange Online PowerShell (EXO V2 module) organization level mail management.
- If you are create a mail flow rule using exchange admin center, it is not enabled by default. You’ll have to enable it after the mail flow rule is created. Or use Enable-TransportRule to enable it. But using New-TransportRule cmdlet creates and enables the rule at the same time.
Cmdlet Syntax
Enable-TransportRule -Identity <Identity Parameter> - -Identity (required): The unique identifier of the mail flow rule — can be the rule Name or its underlying Identity value.
How to find the Identity (or Name)
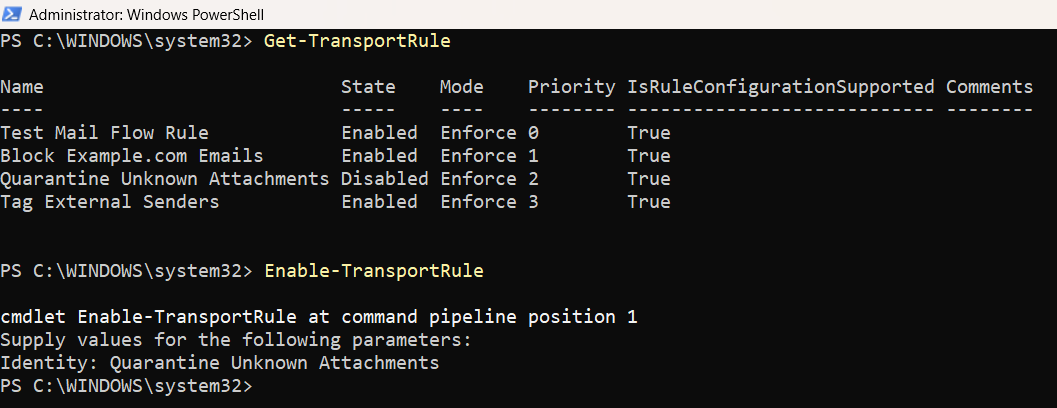
You can list existing rules and their identifiers with:
Get-TransportRule | Select-Object Name, IdentityUse the Name (string) or Identity value with -Identity.
Usage Examples
A) Enable a single mail flow rule (your reference)
Enable-TransportRule -Identity "Block Example.com Emails"
B) Enable multiple mail flow rules using CSV (CSV + script)
CSV file (rules.csv)
Create a CSV with a header named Identity and add the identity values of the mail flow rules that are to be enabled under it.
Identity
Block Example.com Emails
Quarantine Unknown Attachments
Tag External Senders
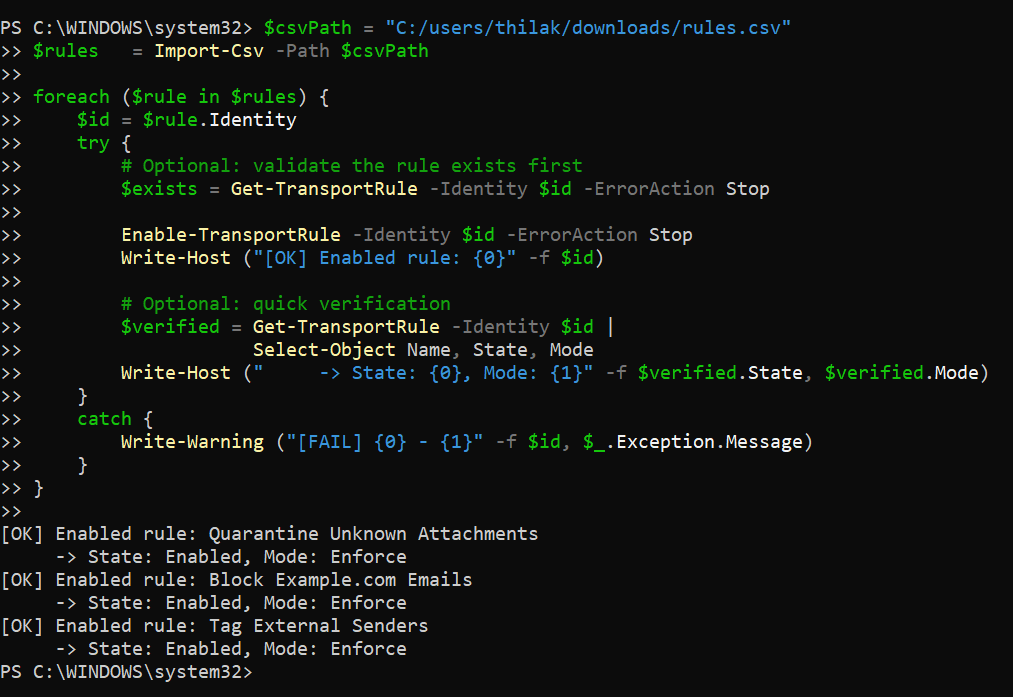
Script to bulk enable from CSV
# Connect to Exchange Online first (if not connected):
# Connect-ExchangeOnline

$csvPath = ".\rules.csv"
$rules   = Import-Csv -Path $csvPath

foreach ($rule in $rules) {
    $id = $rule.Identity
    try {
        # Optional: validate the rule exists first
        $exists = Get-TransportRule -Identity $id -ErrorAction Stop

        Enable-TransportRule -Identity $id -ErrorAction Stop
        Write-Host ("[OK] Enabled rule: {0}" -f $id)

        # Optional: quick verification
        $verified = Get-TransportRule -Identity $id |
                    Select-Object Name, State, Mode
        Write-Host ("     -> State: {0}, Mode: {1}" -f $verified.State, $verified.Mode)
    }
    catch {
        Write-Warning ("[FAIL] {0} - {1}" -f $id, $_.Exception.Message)
    }
}

Tip: To do a dry run first, add -WhatIf to Enable-TransportRule and review the output.
Cmdlet Tips
- Graph vs Exchange: Organization-level transport rules are not exposed in Graph PowerShell. Use Enable-TransportRule in Exchange Online PowerShell.
- Identity is mandatory: -Identity is required. If you’re unsure of the exact text, run:
Get-TransportRule | Select Name, IdentityGet-TransportRule -Identity "" | Select Name, State, Mode, Priority Possible Errors & Solutions
| Error | Cause | Solution |
|---|---|---|
| “Cannot find a transport rule with the identity …” | The -Identity value doesn’t match an existing rule (typo, wrong tenant, or wrong rule name). | Run `Get-TransportRule |
| “You don’t have sufficient permissions to perform this operation.” | Your account lacks required Exchange roles. | Ensure your account is assigned a role that can manage transport rules (e.g., Organization Management or a custom role that includes Transport Rules). Reconnect after role assignment propagates. |
| “The operation couldn’t be performed because … object has been modified.” | A concurrent change happened (another admin or process modified the rule). | Retry after a few seconds. If it persists, pull the latest state with Get-TransportRule, verify no pending changes, then try again. |
| Already enabled (no change) | The rule is already enabled. | No action needed. You can verify with `Get-TransportRule -Identity " |
| Parameter binding or null reference errors | CSV row is blank or the header doesn’t match your script (e.g., using Name header while the script expects Identity). | Ensure the CSV header is Identity and every row contains a valid value. Add input validation in the loop (skip empty rows). |
| Transient service errors / throttling | Exchange Online throttling under load. | Add Start-Sleep -Seconds 1 between operations in large batches, and implement try/catch with minimal retries. |
Conclusion
- Enable-TransportRule is the authoritative way to turn mail flow (transport) rules back on in Exchange Online.
- Graph PowerShell currently doesn’t support org-level transport rule management, so Exchange Online PowerShell is your only option here.
- Always provide a valid -Identity (found via Get-TransportRule | Select Name, Identity), verify post-change status, and follow change-management best practices — especially when batch-enabling rules from CSV.