Note: Most of the images contained within this article are gifs. Click them to understand how Microsoft Groups work better.
How to create Microsoft 365 Distribution Group?
- Sign in to your Microsoft 365 tenant.
- Go to Microsoft 365 admin center by selecting the Admin tab.
- Go to Teams & groups --> Active teams & groups.
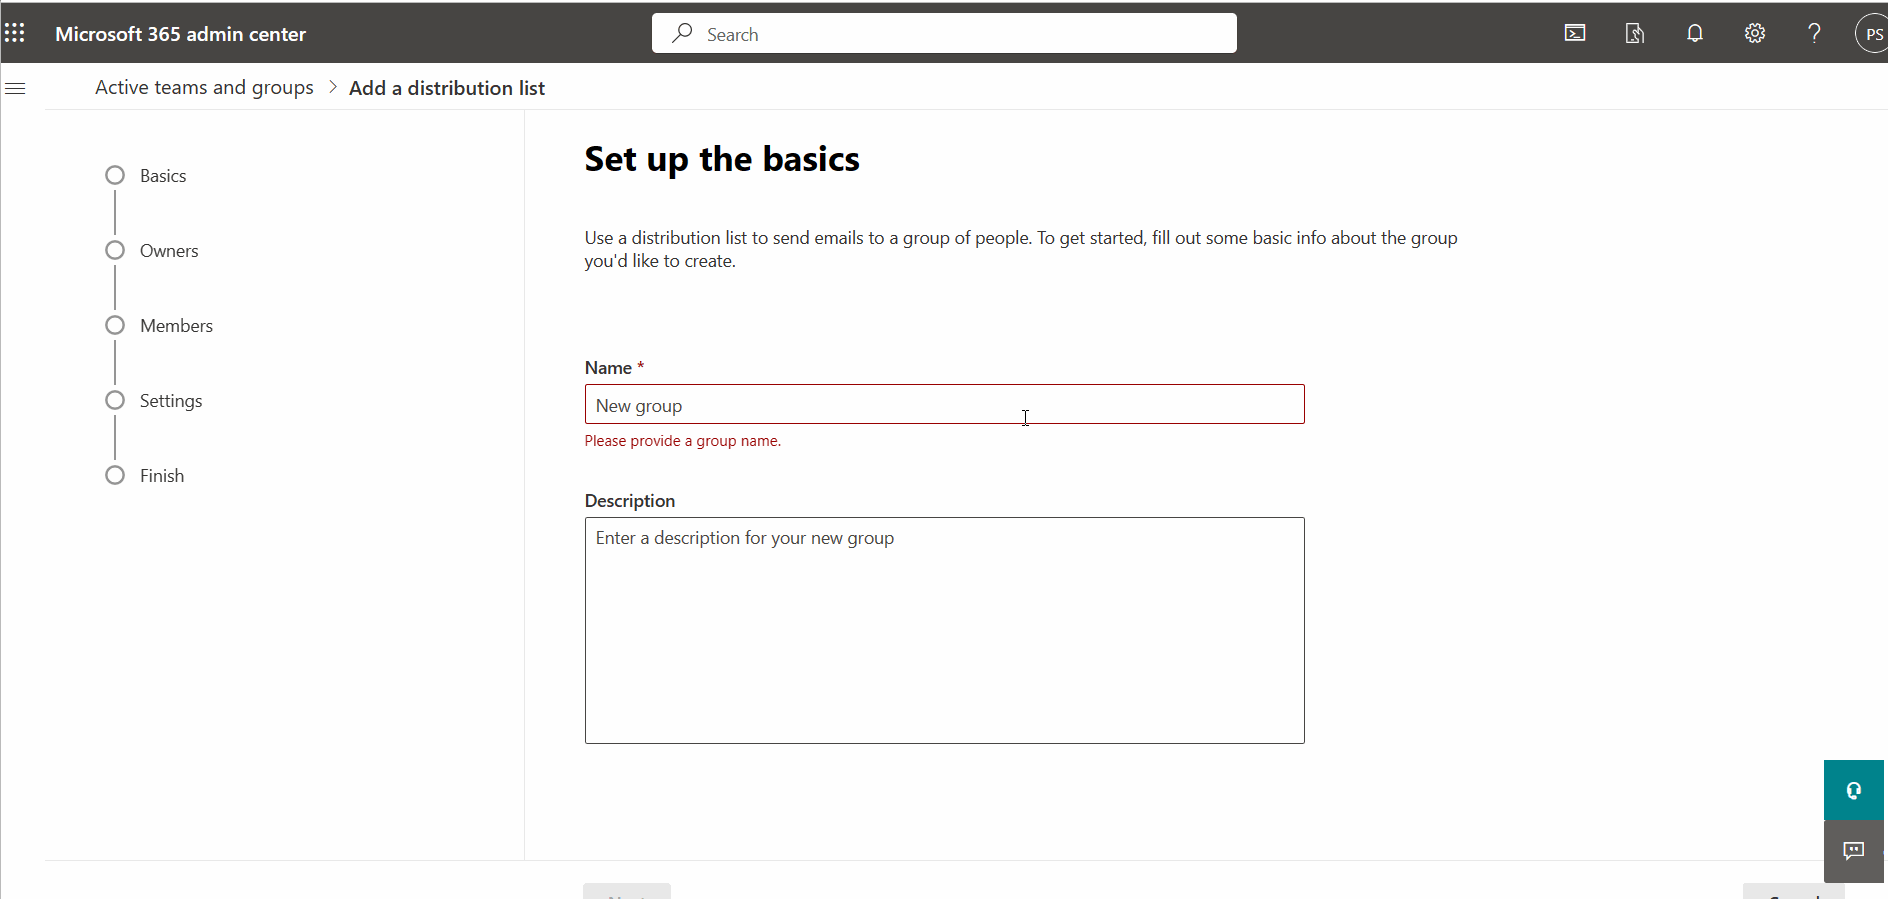
- Select Distribution list --> Add a distribution list option. The ‘Add a distribution list’ pane opens as shown in the image.
- Provide a name and description for the distribution group you are creating, then click Next.
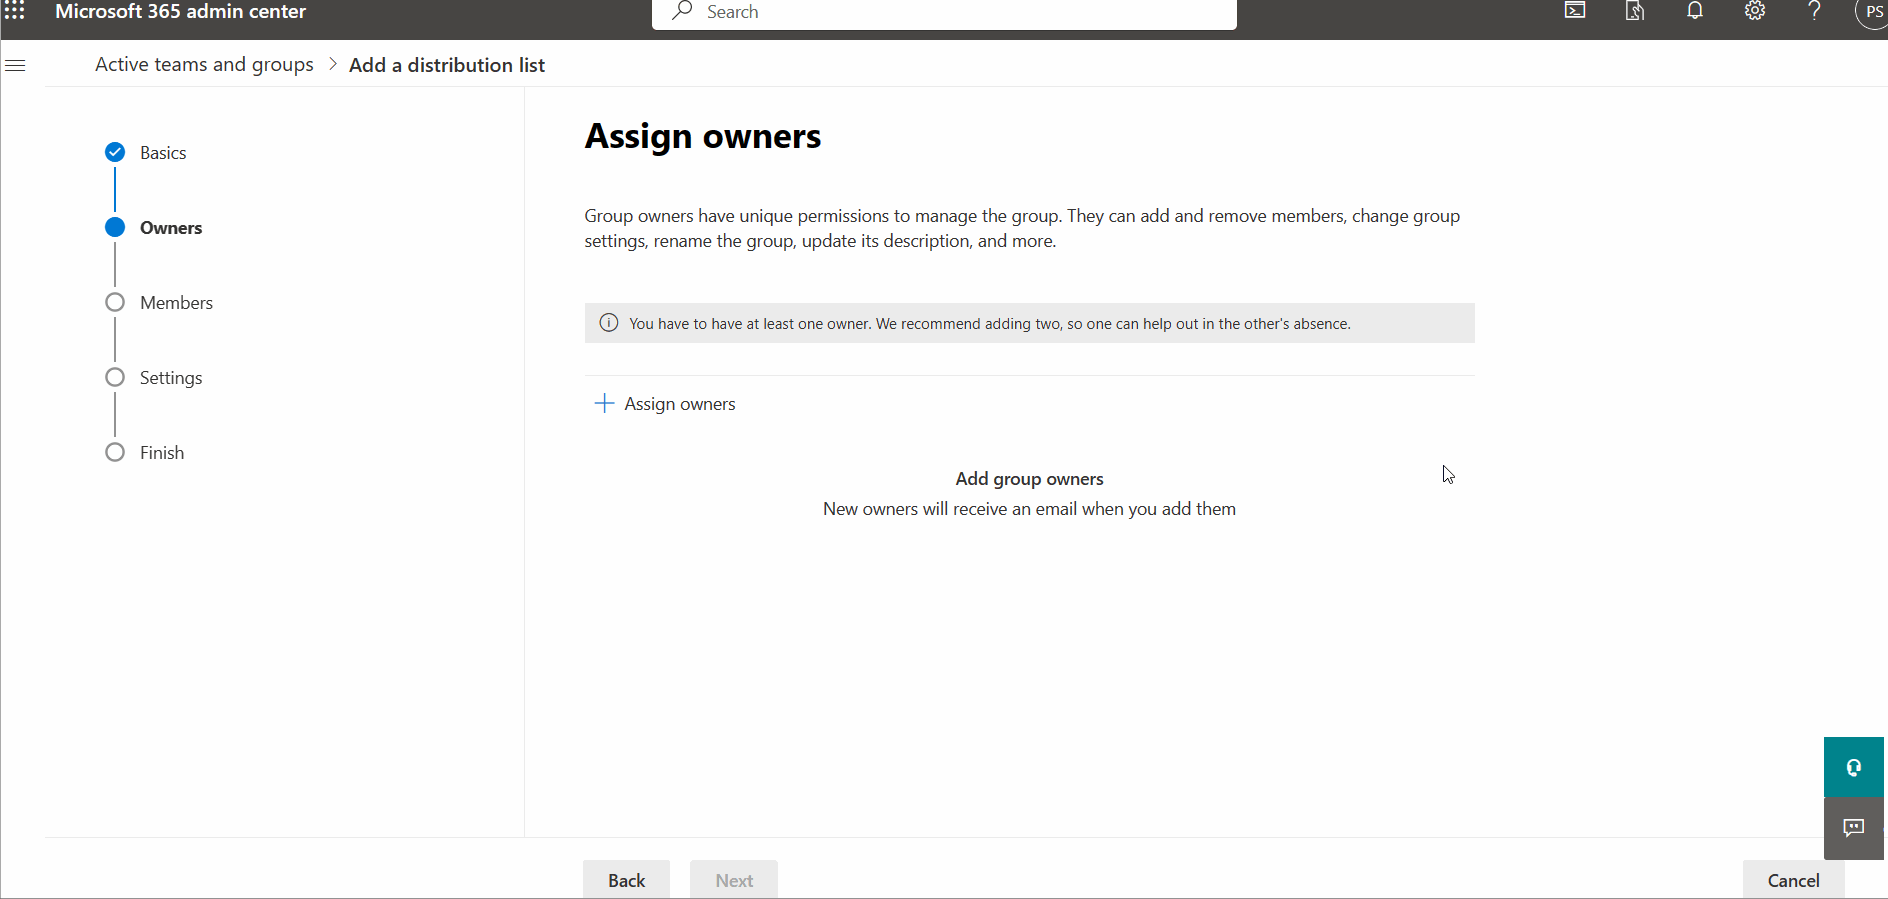
- Click Assign owners button to select owners for the distribution group. You can add up to 20 users as owners of a distribution group. Click Next after selecting the owners.
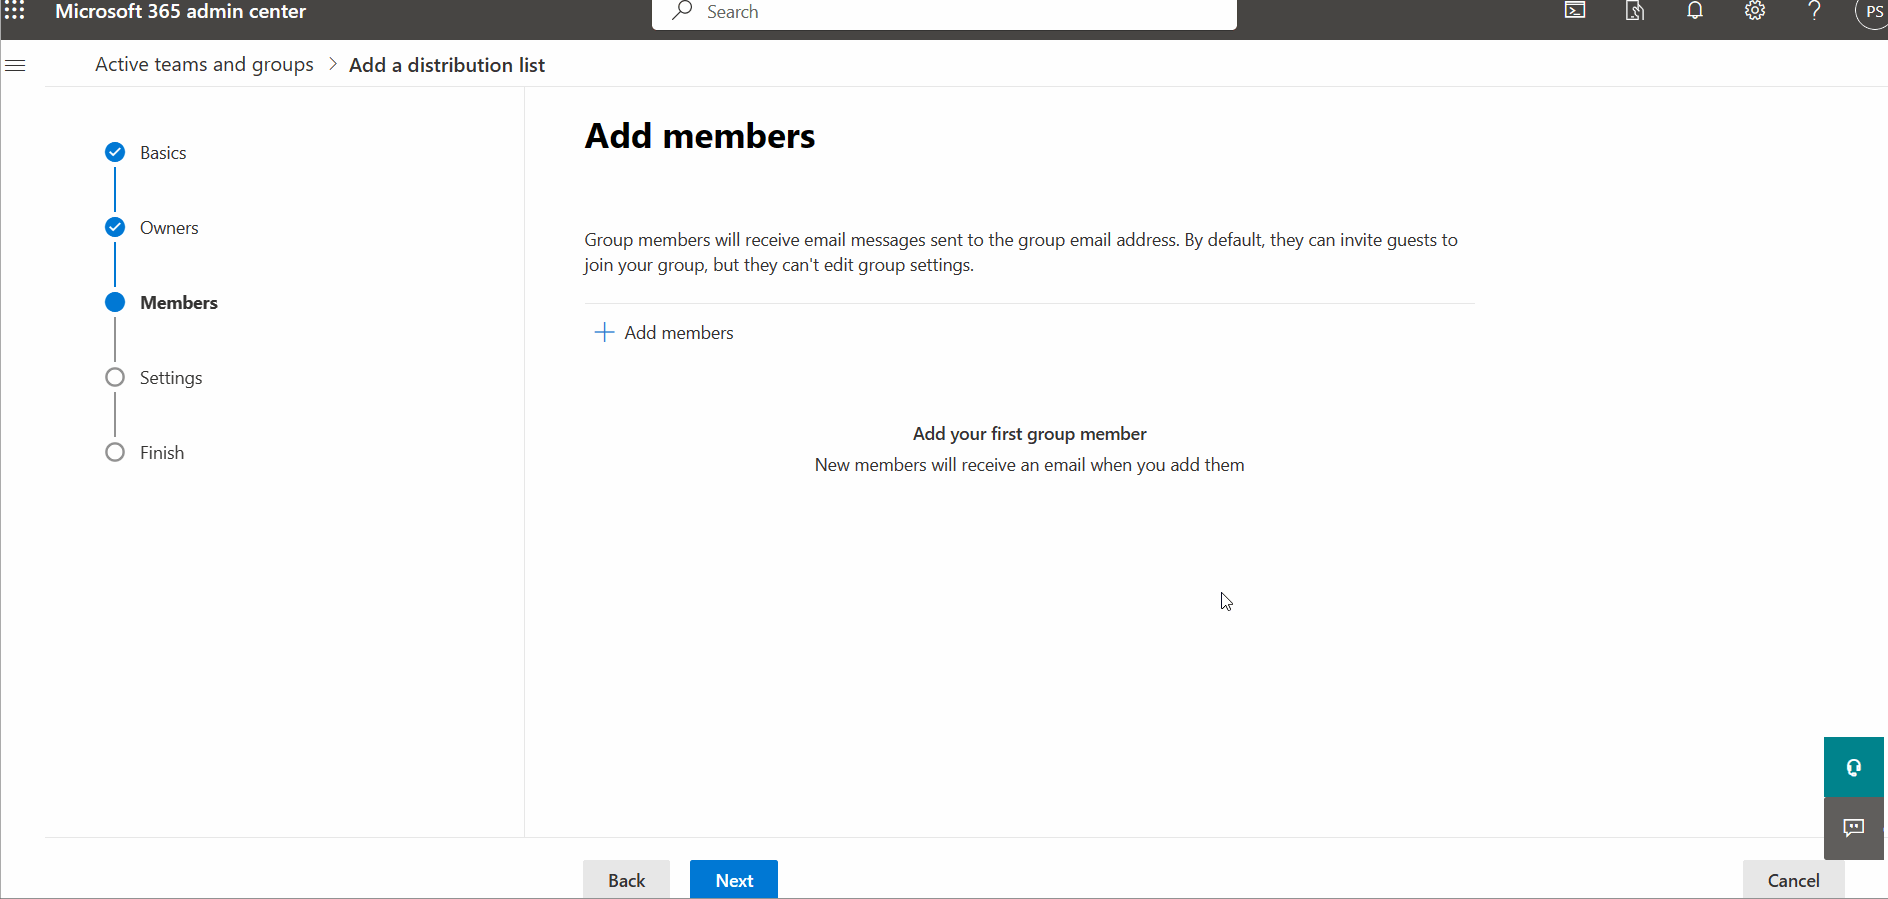
- Click Assign members button to select members for the distribution group. You can add up to 20 users as members of a distribution group. Click Next after selecting the members.
- Add a group email address for the distribution group and click Next. (You can also enable ‘Allow people outside of my organization…..’ checkbox to enable people outside of your organization to send mails to the distribution group).
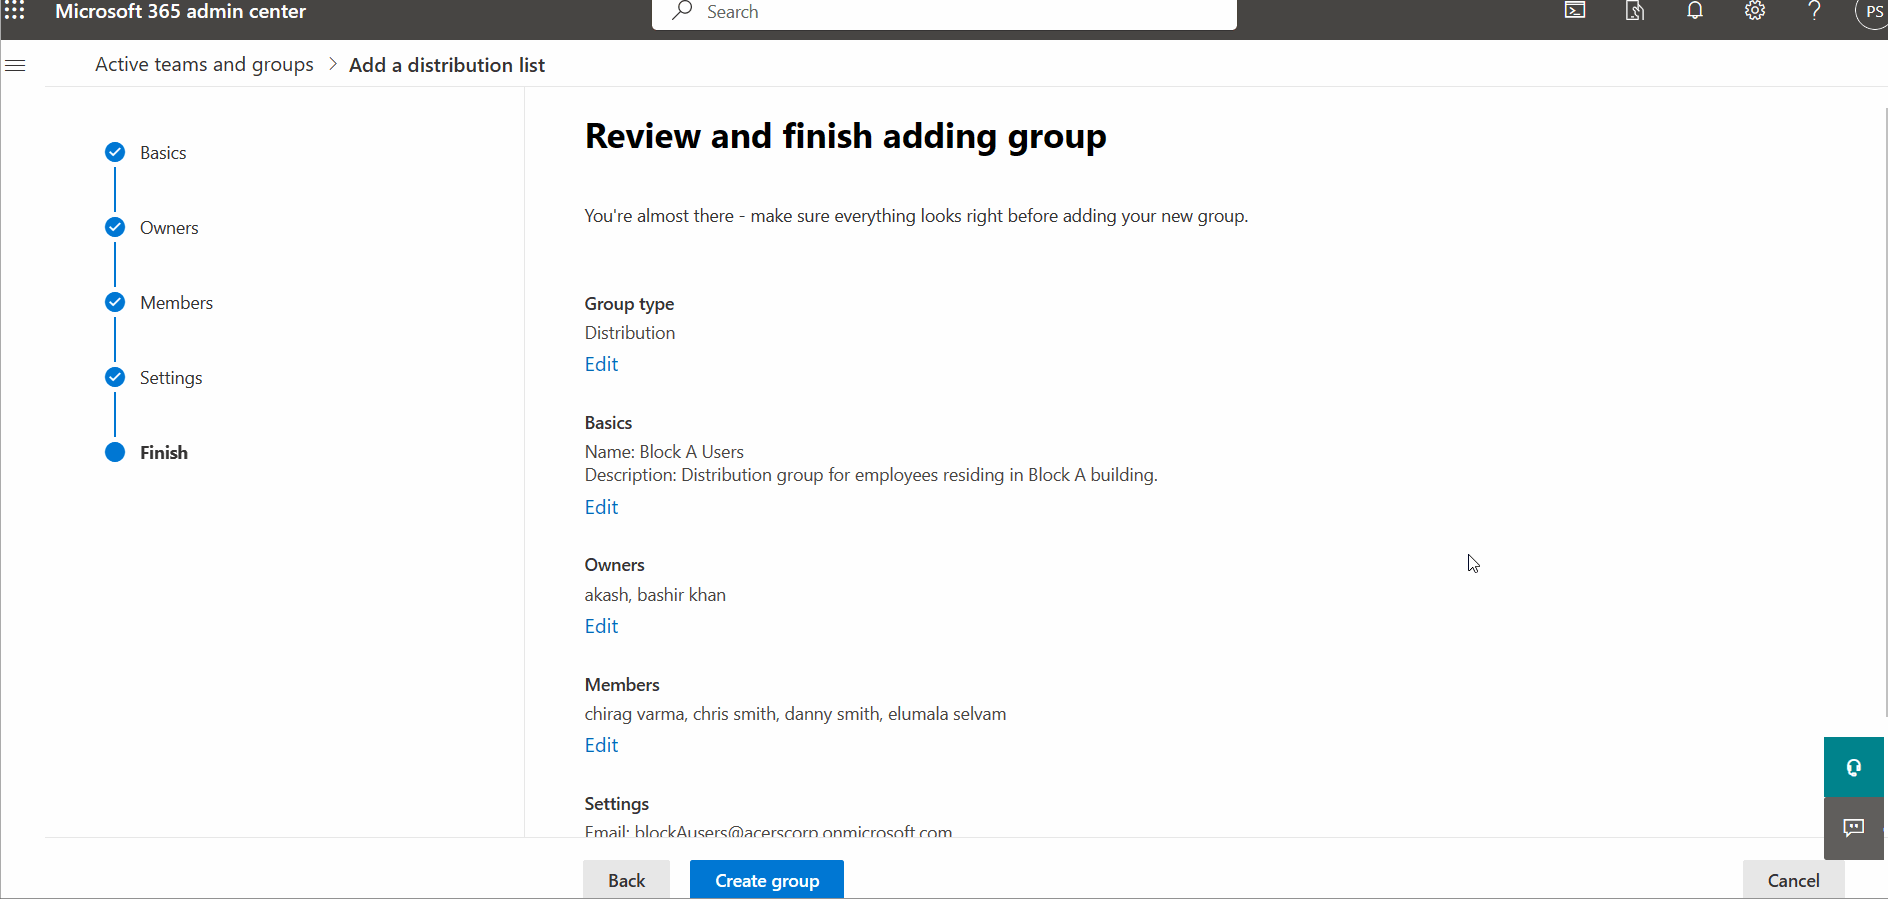
- Finally, review the distribution group details and click Create group button. The distribution group is created. (You can edit the distribution group details, if needed, by clicking on the respective Edit buttons).
The above procedure is explained in the form of click-and-play GIFs below, with each GIF representing a numbered step.


Testing whether the Distribution Group works or not
- Send a test mail to the distribution group from your user account.
- Login to your Microsoft 365 tenant as one of the distribution group members.
- Check the mail. The test mail you sent should appear in the inbox (since the user is a member of the distribution group).