Using Microsoft Planner in Microsoft 365
Note: Most of the images contained within this article are gifs. Click them to understand how Microsoft Planner works better.
The planner app in Microsoft 365 helps you create plans, add tasks to them, group similar tasks under a common label, and invite members so that you can collaborate with them and work on the plan. Planner app is very useful for already existing Microsoft 365 groups and teams to execute their plans.
In this article, let’s understand how you can create a Microsoft 365 Planner and execute all the necessary steps required to put your plan into action.
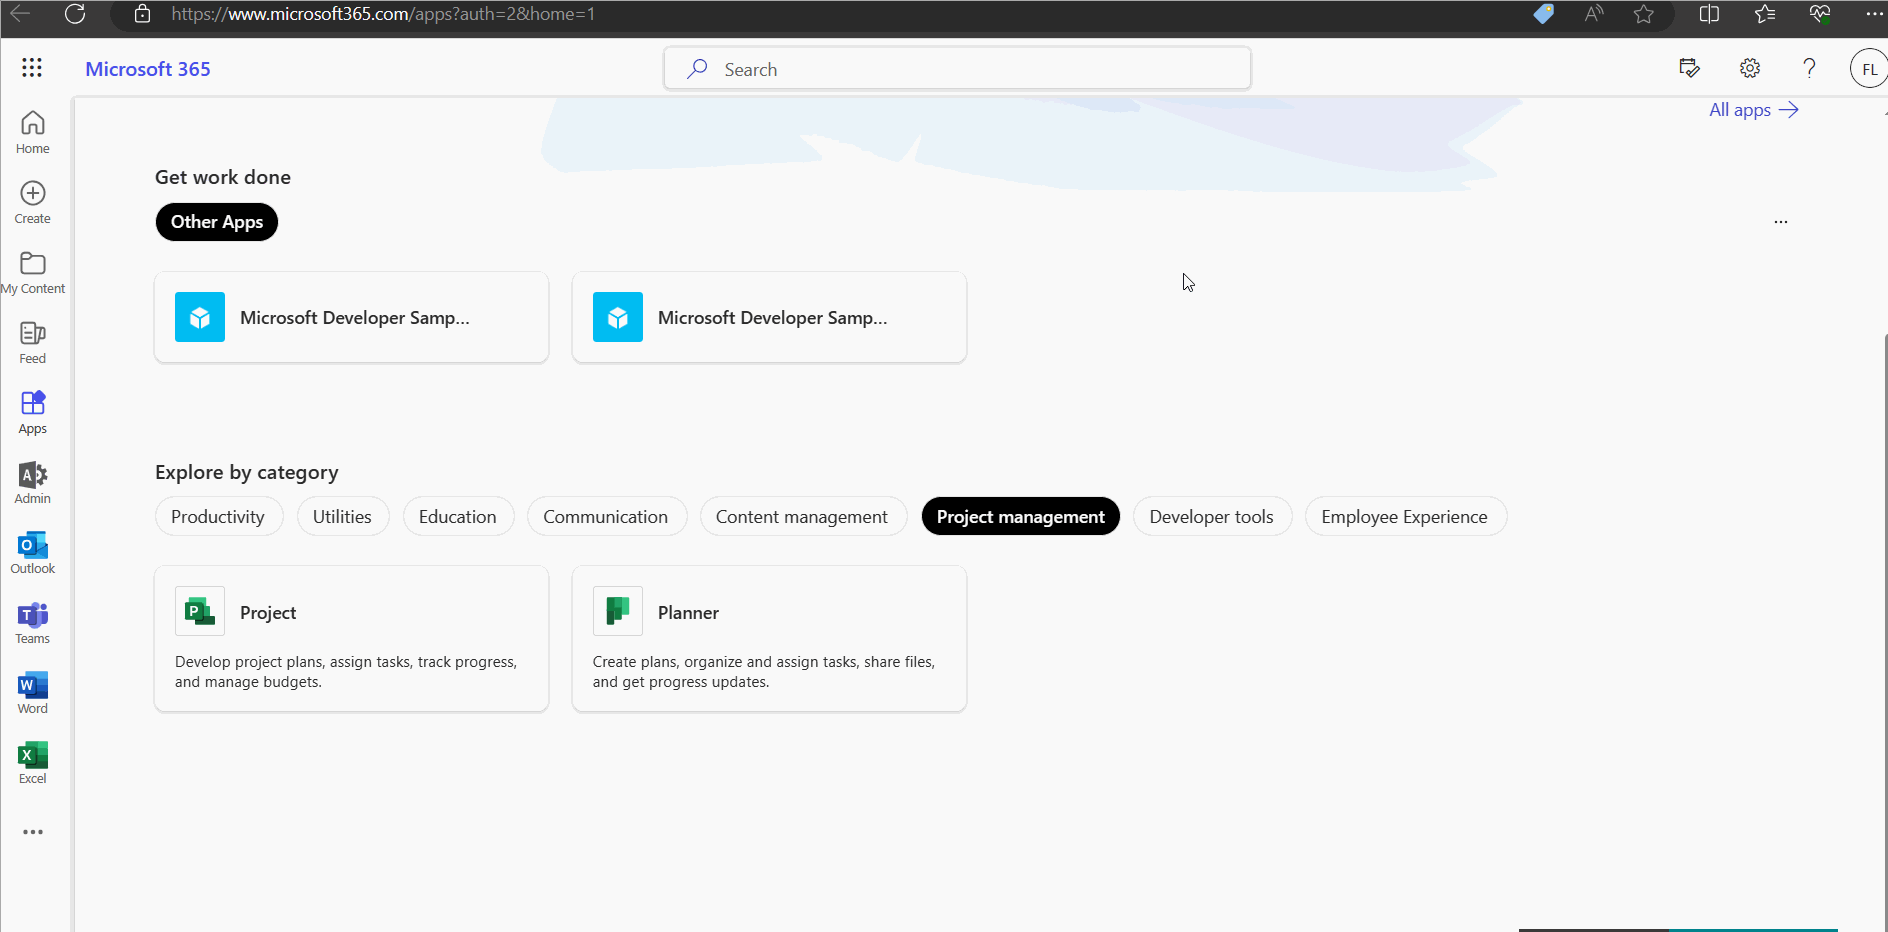
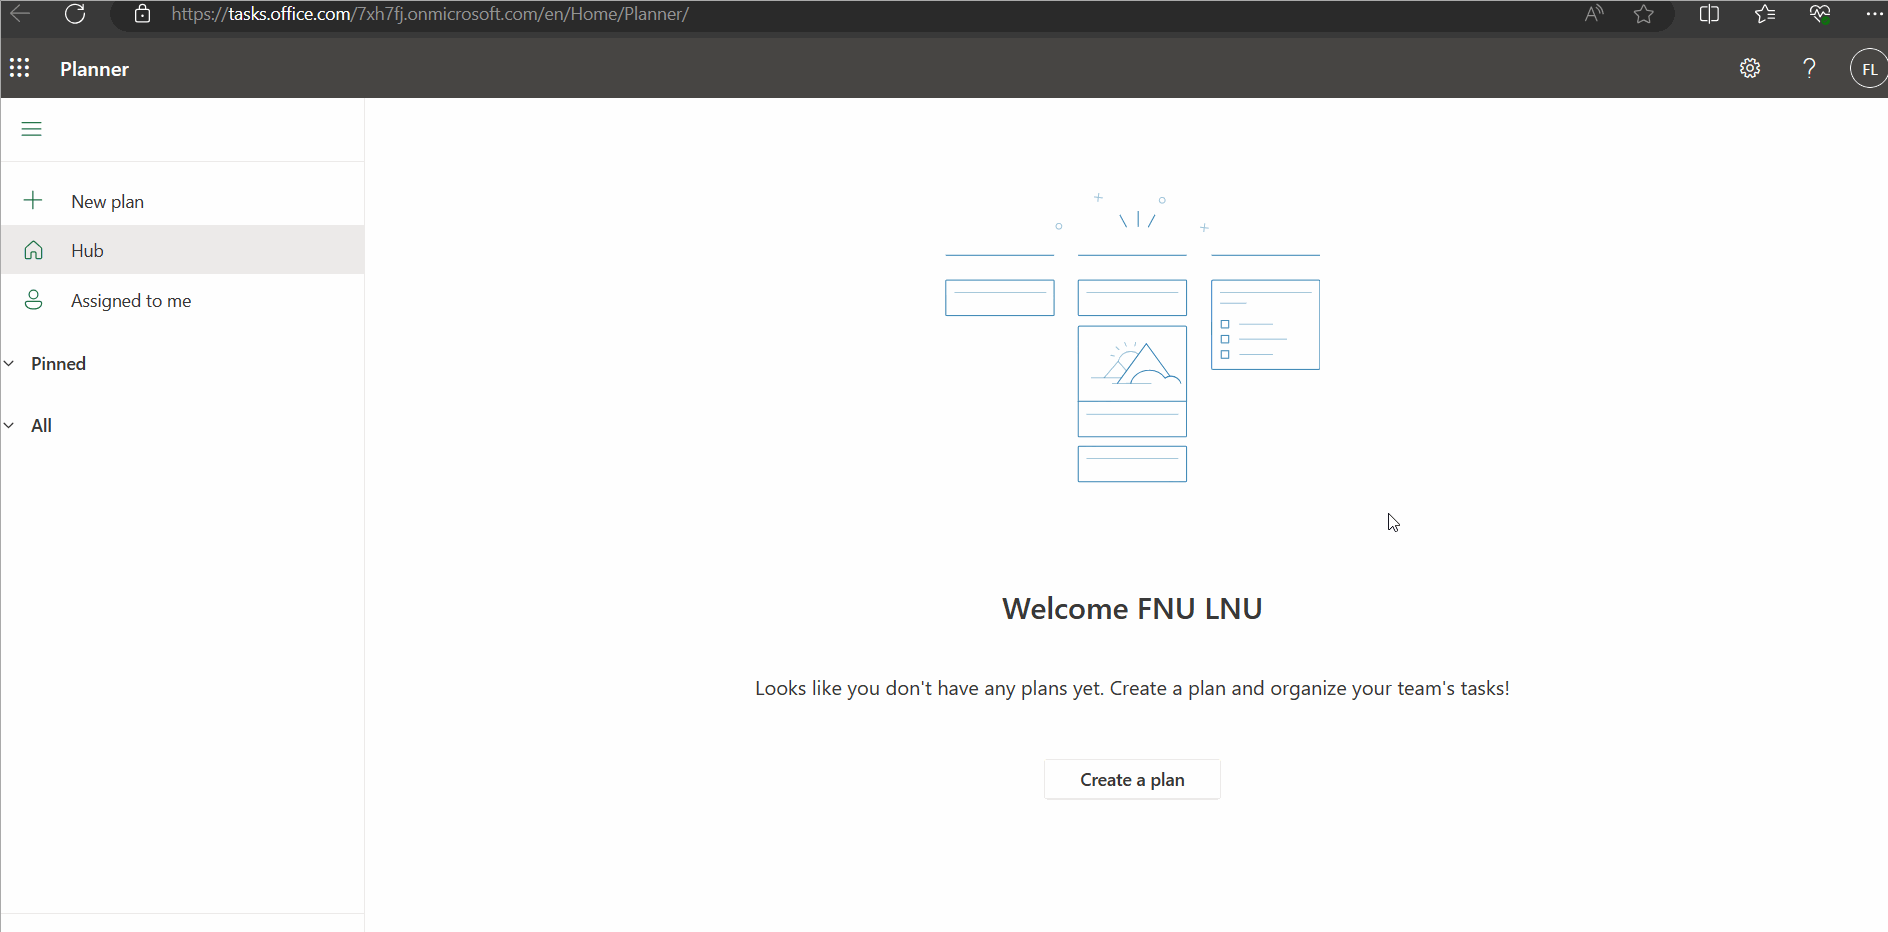
Accessing the planner app the first time
- Login to Microsoft 365 using your credentials. .
- Click App Launcher >> Select Explore all your Apps . Then choose Project Management tab. The Planner app gets listed.
Note: After you access the Planner for the first time, it becomes available under the Apps launcher.
The above procedure is explained in the form of click-and-play GIFs below, with each GIF representing a numbered step.
Creating your first planner in Microsoft 365
- Select the Planner app. It opens in a separate tab.
- Click Create a plan button.
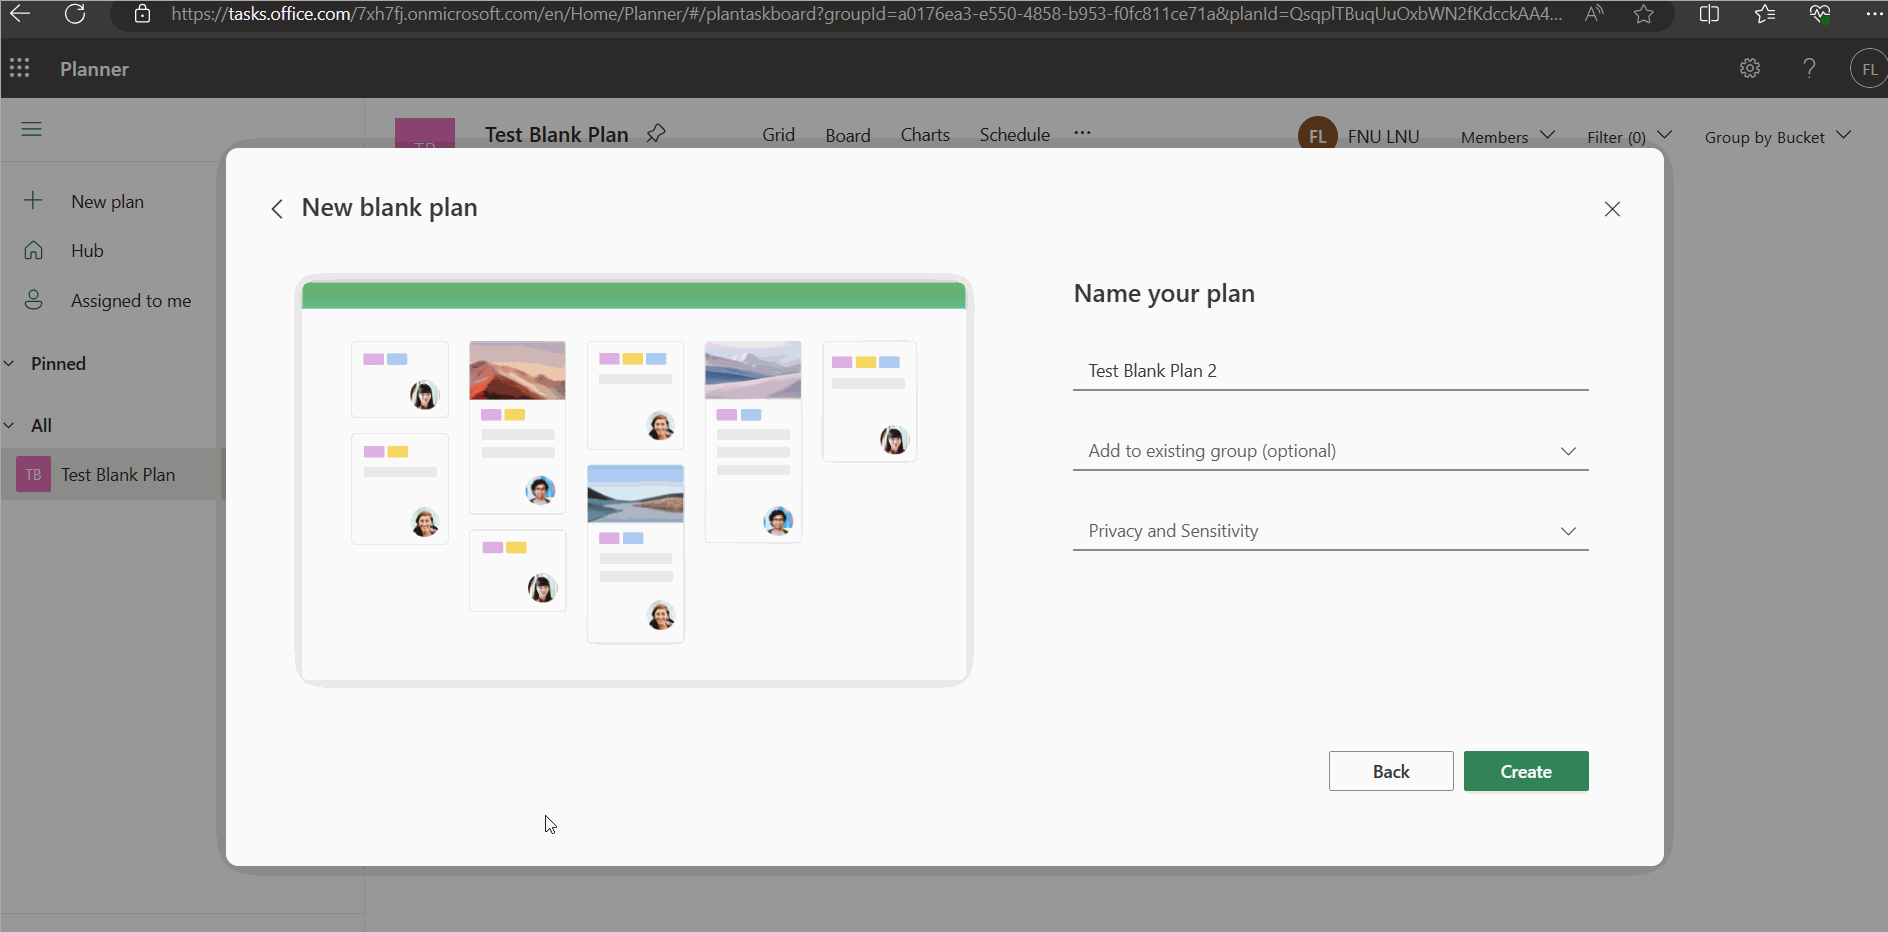
- Creating a New Blank Plan
- Select the New Blank Plan option
- Provide a title for the plan. Select or Set the Privacy and Sensitivity dropdown for the plan. Options available: Public or Private.
- Click the Create button.
- Note: If you select a group from the Add to existing group dropdown, then the Privacy and Sensitivity dropdown gets disabled. This is because the Group’s sensitivity applies for the plan too.
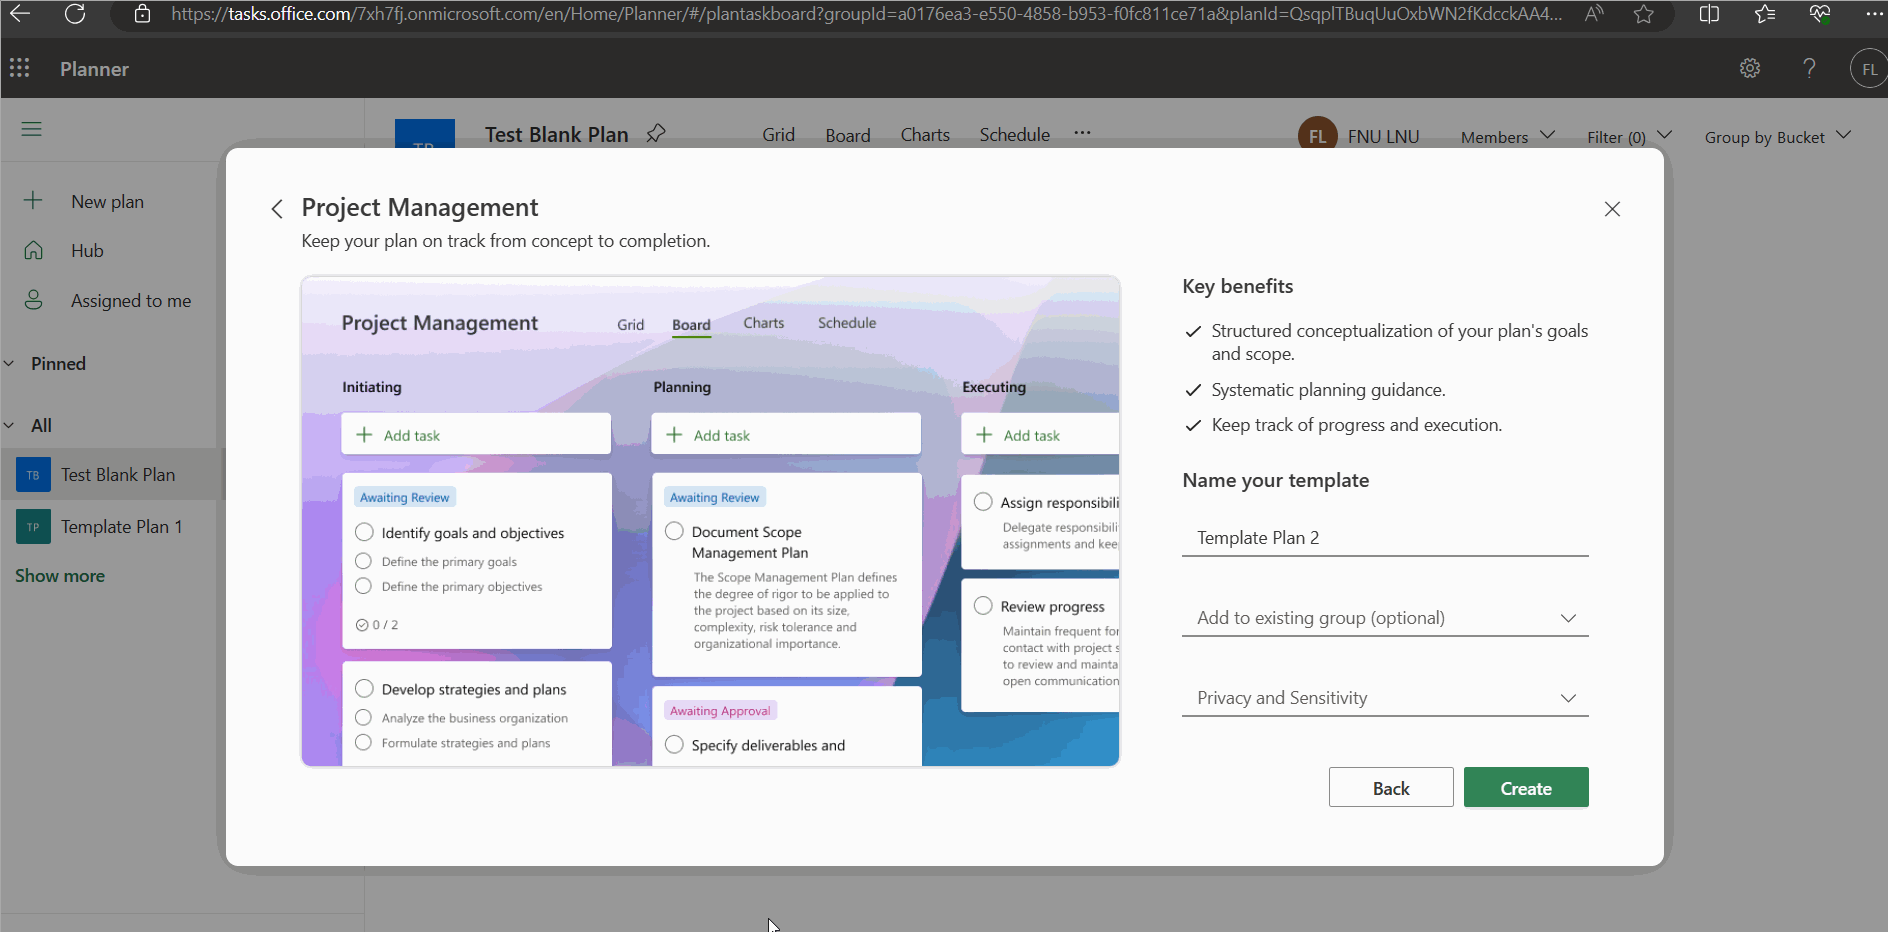
- Creating a plan from an existing template.
- Select the template using which you want to create the plan.
- Provide a title for the plan. Select or Set the Privacy and Sensitivity dropdown for the plan. Options available: Public or Private.
- Click the Create button.
- Note: If you select a group from the Add to existing group dropdown, then the Privacy and Sensitivity dropdown gets disabled. This is because the Group’s sensitivity applies for the plan too.
The above procedure is explained in the form of click-and-play GIFs below, with each GIF representing a numbered step.

Adding planner tasks and assigning them to users
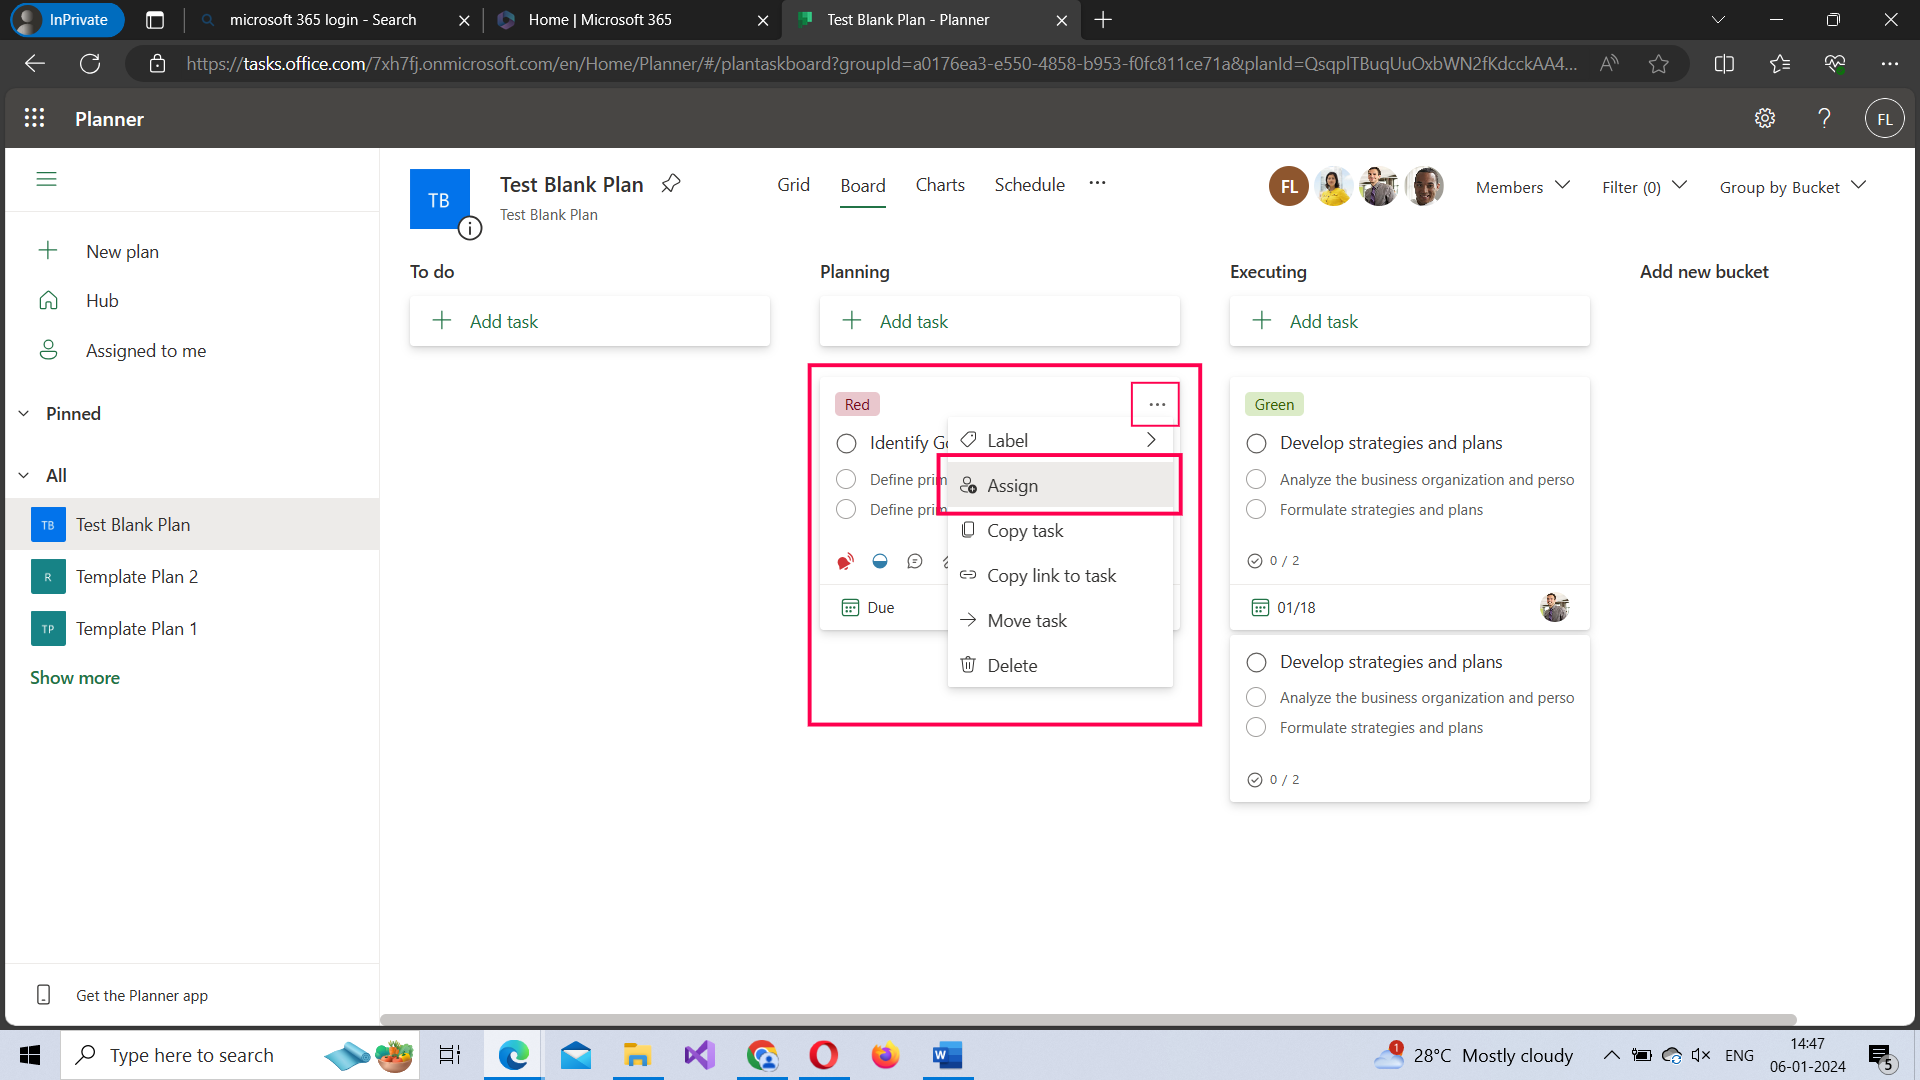
- Click Add task icon. The task form opens. Enter the task name, set the due date and assign the task to the user. Click Add task button. The task gets added.
- Note: You can also assign tasks from task card by clicking ‘…’ icon >> and selecting Assign option.
The above procedure is explained in the form of click-and-play GIFs below, with each GIF representing a numbered step.

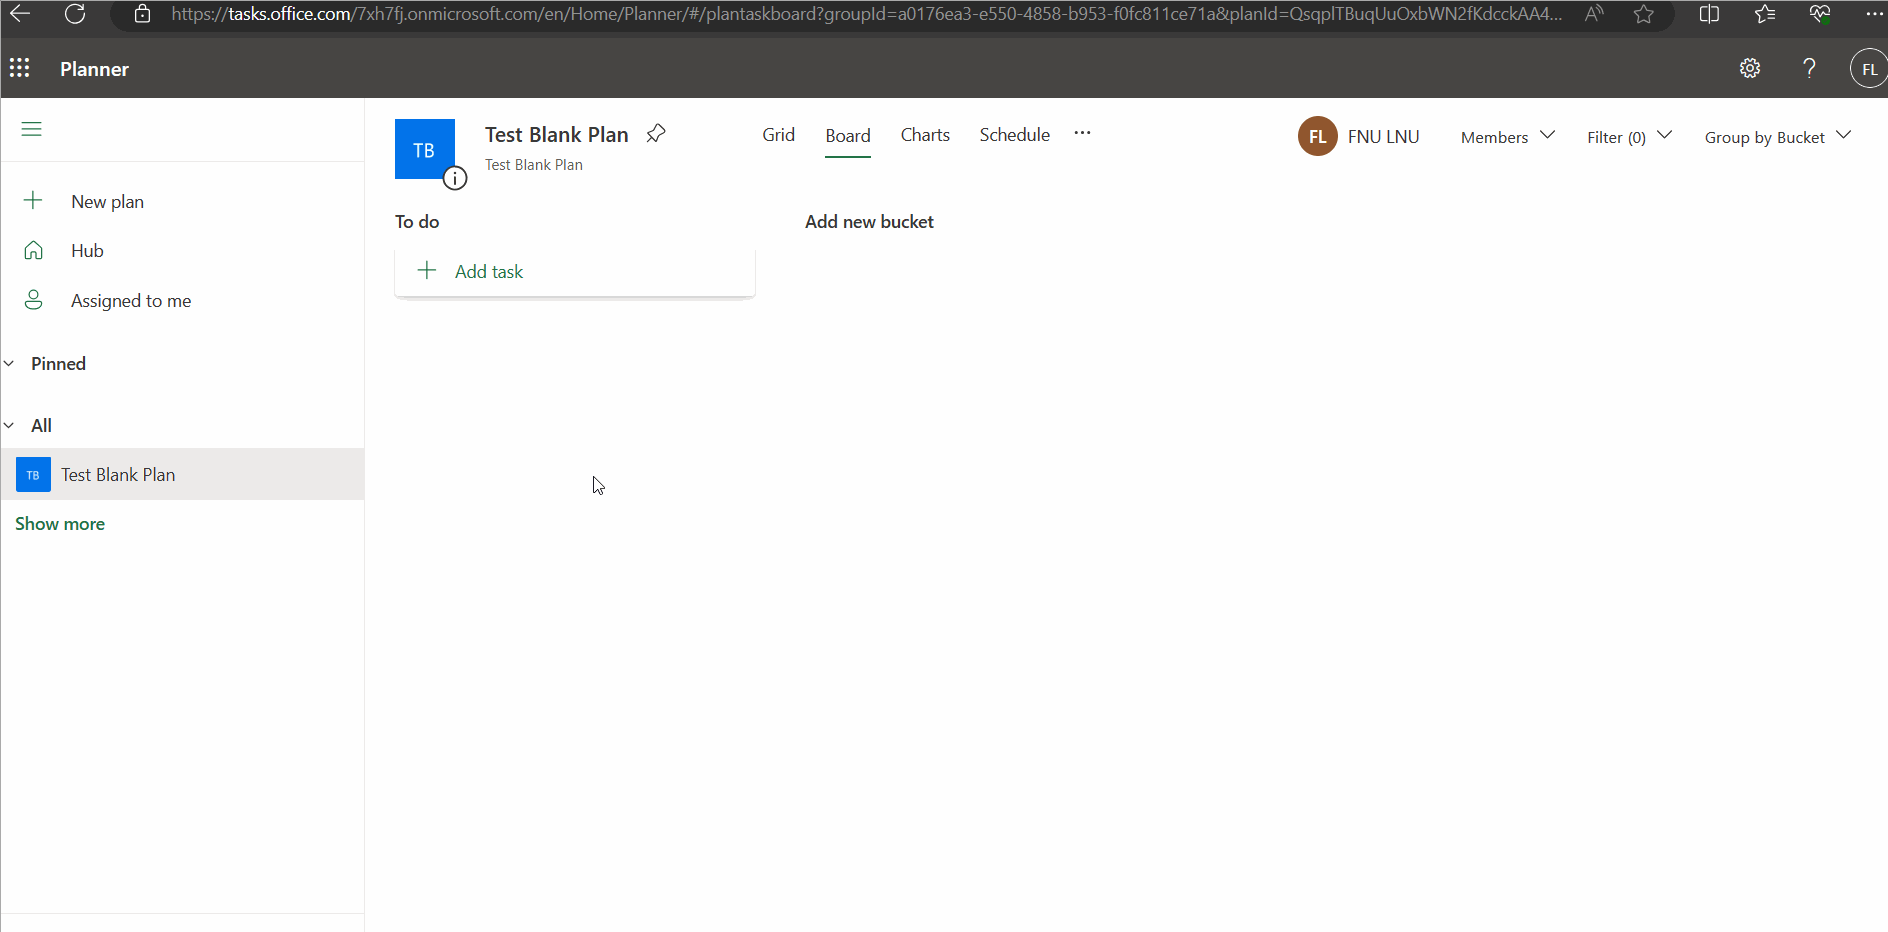
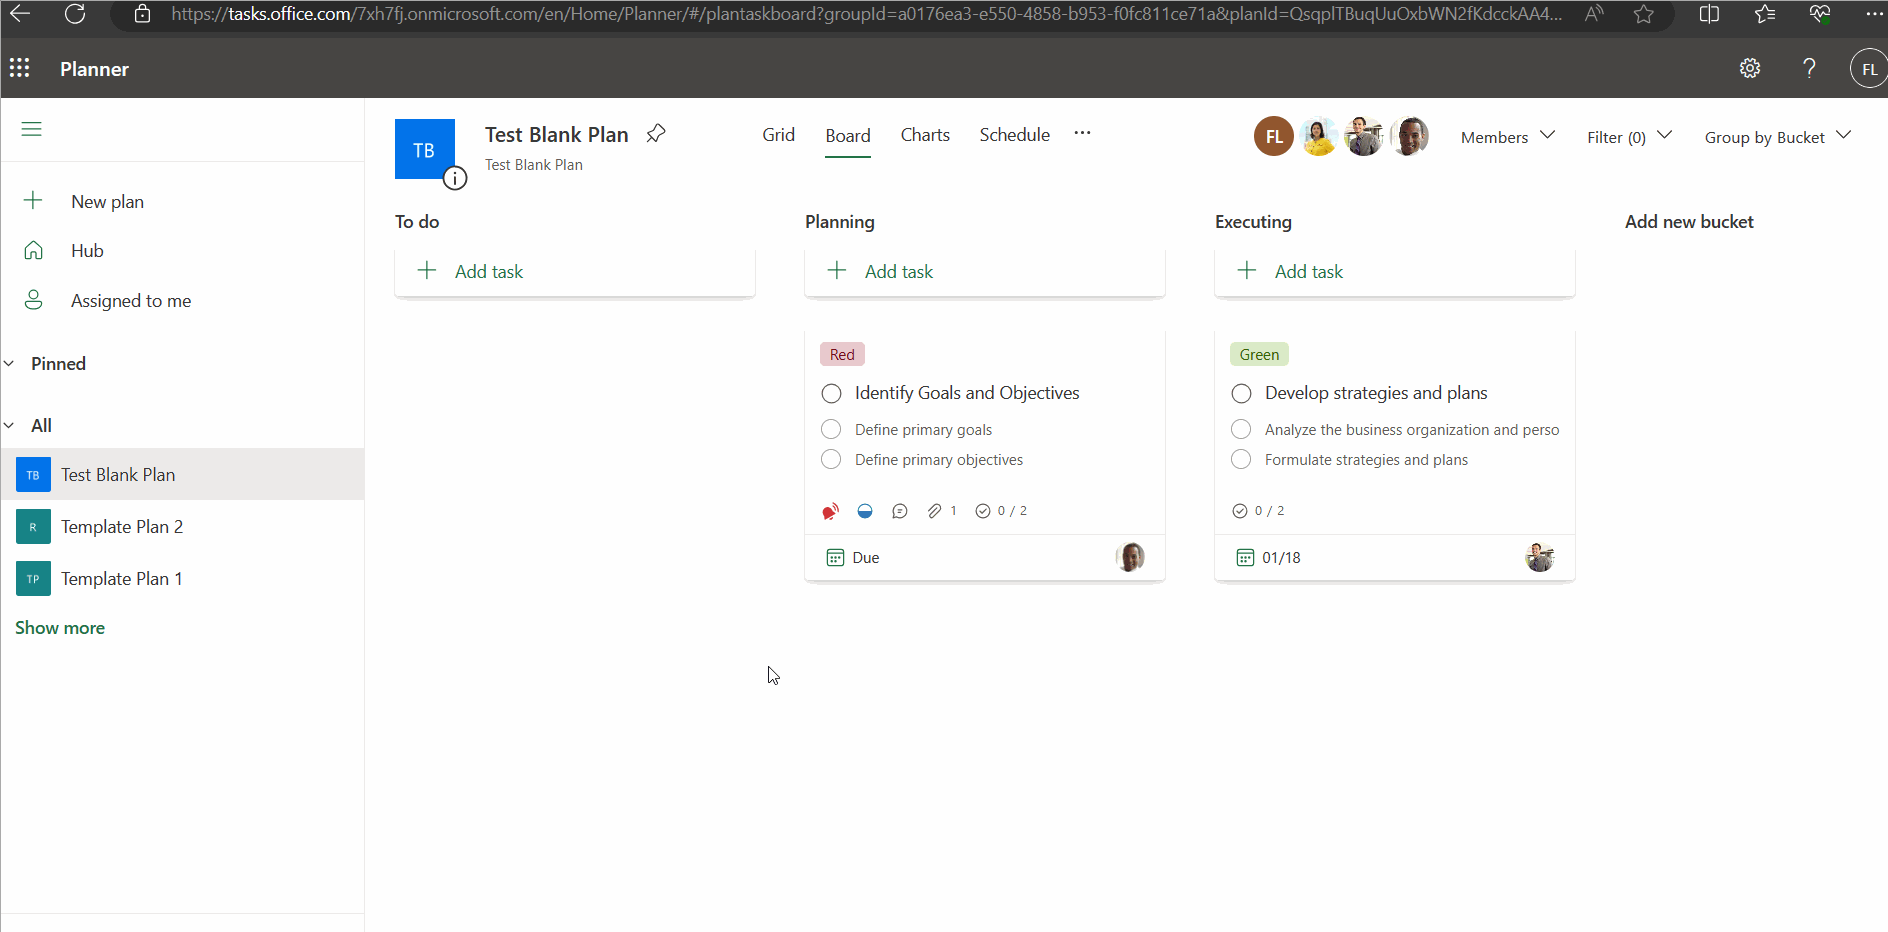
Adding planner buckets
Buckets help you group similar tasks. For example, all tasks belonging to ‘Planning’ phase of a project can be grouped under a separate bucket called ‘Planning’.
- Click the Add new bucket option. Enter the bucket name.Hit Enter key. The new bucket gets created.

Adding members to planner
You can add members in the following two ways:
- Click the Members dropdown. Type the name of the user going to be added as a member. The username pops up. Click on the username and the user gets added to the planner.
The above procedure is explained in the form of click-and-play GIF below.

[OR]
- Click the Assign option. Type in the username.
- Select the user from the pop up.
- Confirm the action. The user gets added to the planner as a member.
Add the user as a member of the planner while assigning the task to him/her.
Note: If the user is not a part of the plan already, then the user gets added the plan.
The above procedure is explained in the form of click-and-play GIF below.

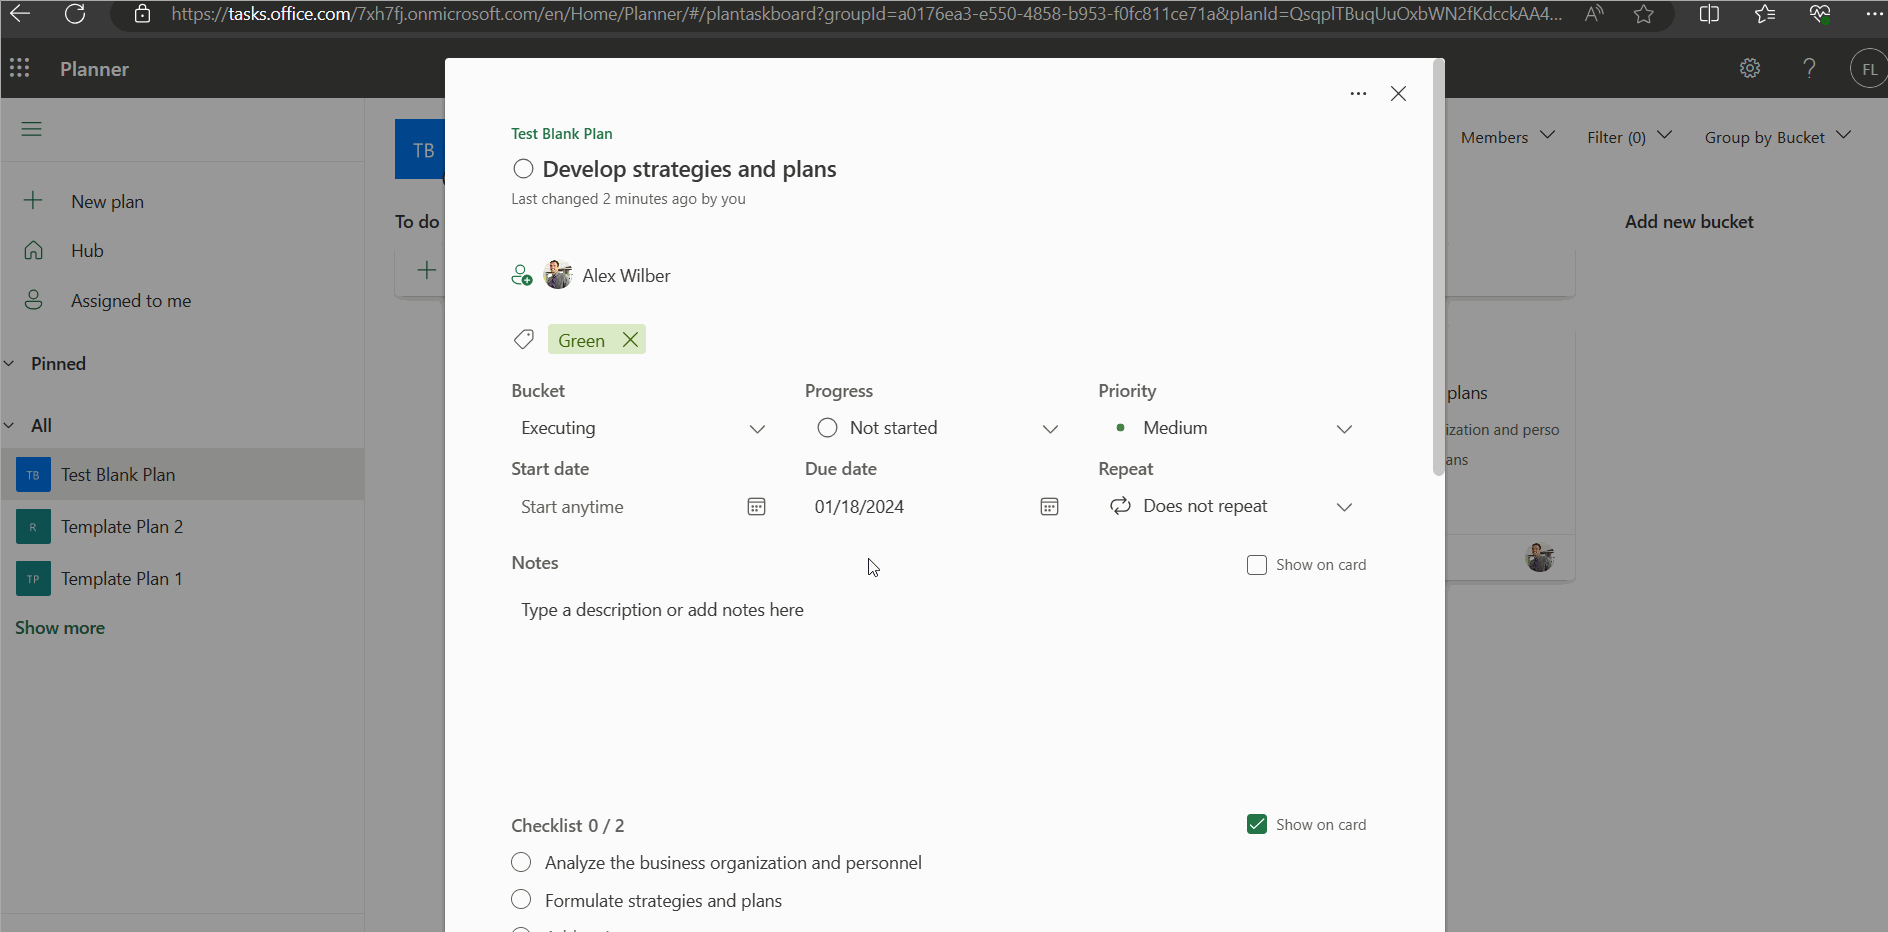
Adding task details like notes, checklist, attachments, comments
Adding notes:
- Just click the notes section and type your notes for the task.
Note: You also have the option of displaying the notes on the card itself by selecting the Show on card checkbox.
Adding Attachments:
- Click the Add attachment button. You have 3 options to choose from.
- From computer – for uploading files from your computer.
- From team files – for uploading files from your teams portal.
- A link to a URL - for sharing one-drive or SharePoint files in the form of URL.
- Select the file and click the Upload button. The file gets uploaded.
Adding Comments:
- In the Comments section, type your comment and click the Send button. The comment gets added.
The above procedures is explained in the form of click-and-play GIF below.

Moving task from one bucket to another, updating task status, assigning task priority
Moving task from one bucket to another
This could be done in two ways:
- From the task card: Click the … icon >> select the Move task option.
- From within the task details section: Click the Bucket dropdown >> Select the bucket you wish to move the task to.
The above procedure is explained in the form of click-and-play GIFs below, with each GIF representing a step.


Updating task status and Assigning task priority
- From within the task details section: Select the desired progress level from the Progress dropdown and the desired status from the Priority dropdown.

Copy task, Copy link to task and Delete task
Copy task
This could be done in two ways:
- From the task card: Click the … icon >> select the Copy task option. Specify whether you would like to clone the task or choose specific elements from it and click Copy button. The task gets copied.
- From within the task details section: Click the ‘…’ icon (from the top right corner) >> Select the Copy task option. Specify whether you would like to clone the task or choose specific elements from it and click Copy button. The task gets copied.
The above procedure is explained in the form of click-and-play GIFs below, with each GIF representing a step.
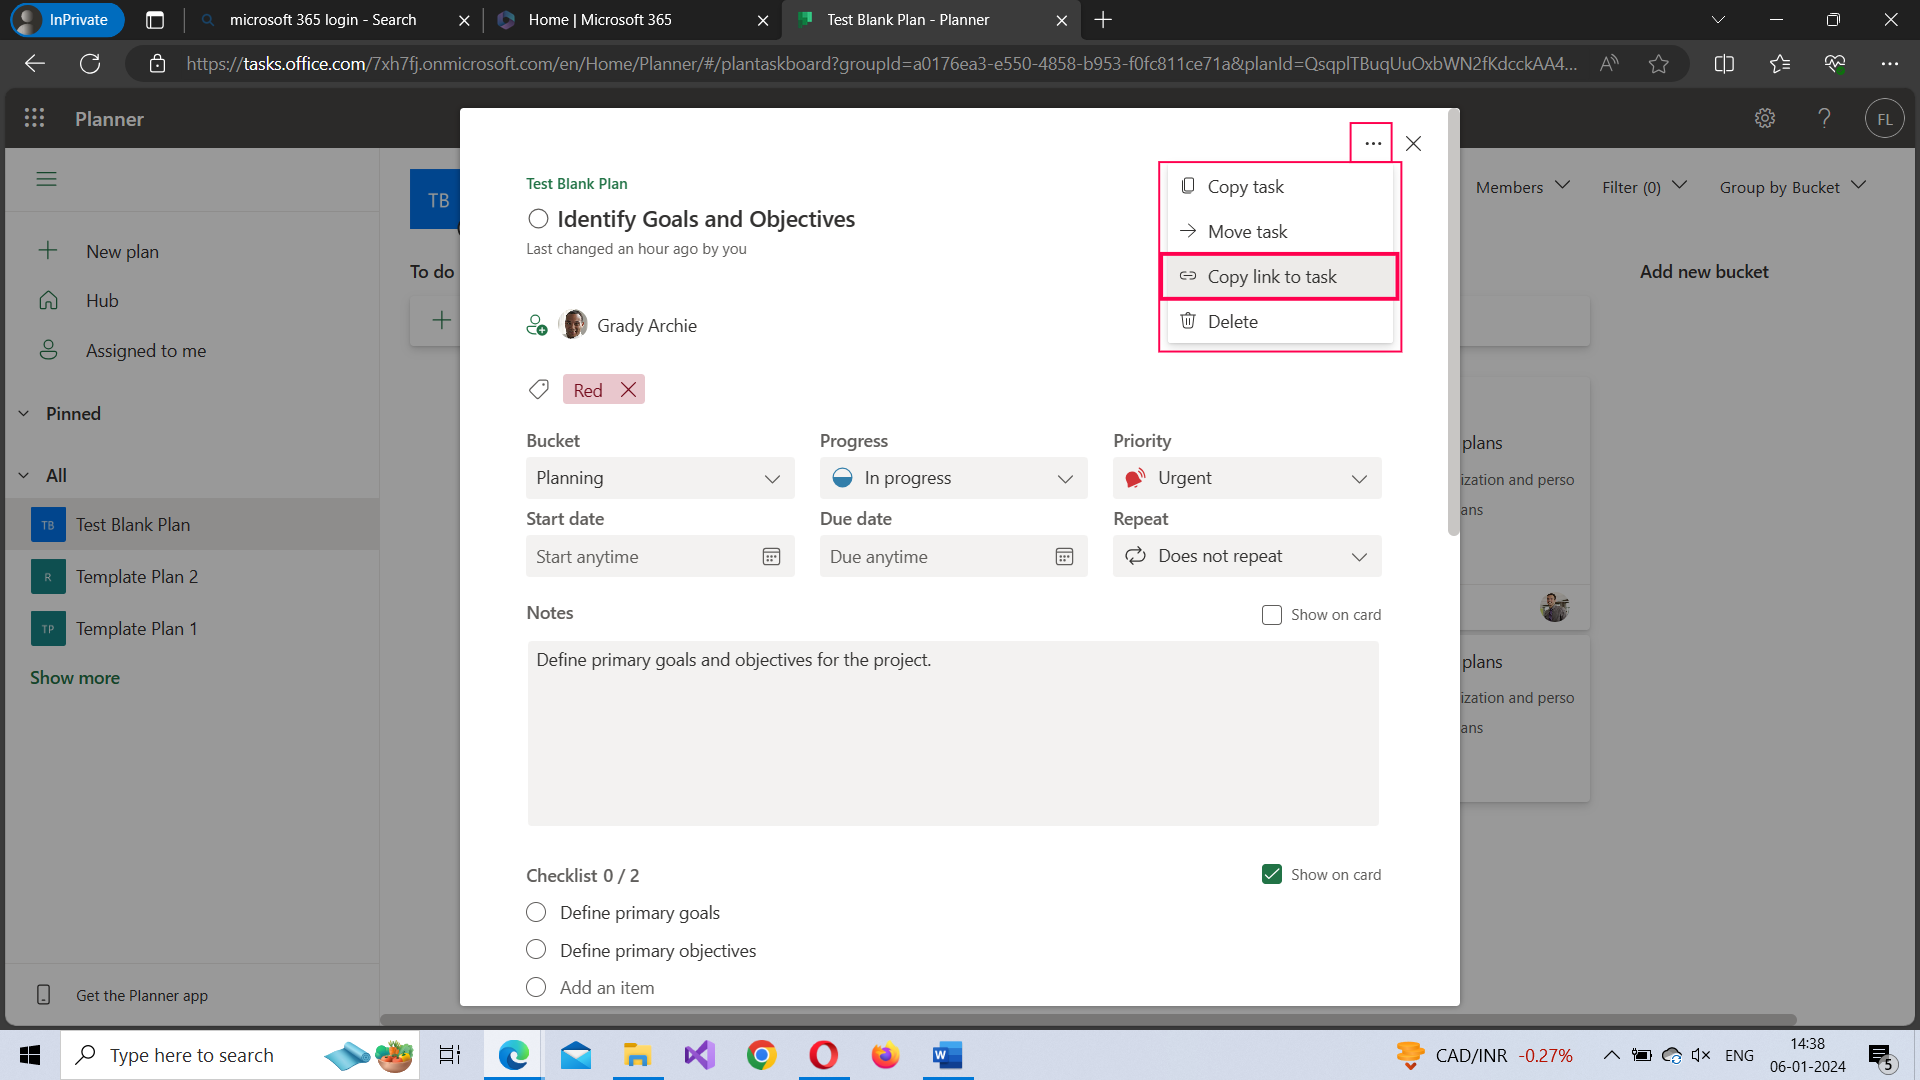
Copy link to task
You can also copy link to task so that you can share it with your members. This can be done in two ways:
- From the task card: Click the … icon >> select the Copy link to task option.
- From within the task details section: Click the ‘…’ icon (from the top right corner) >> Select the Copy link to task option.
The above procedure is explained in the form of click-and-play GIFs below, with each GIF representing a step.
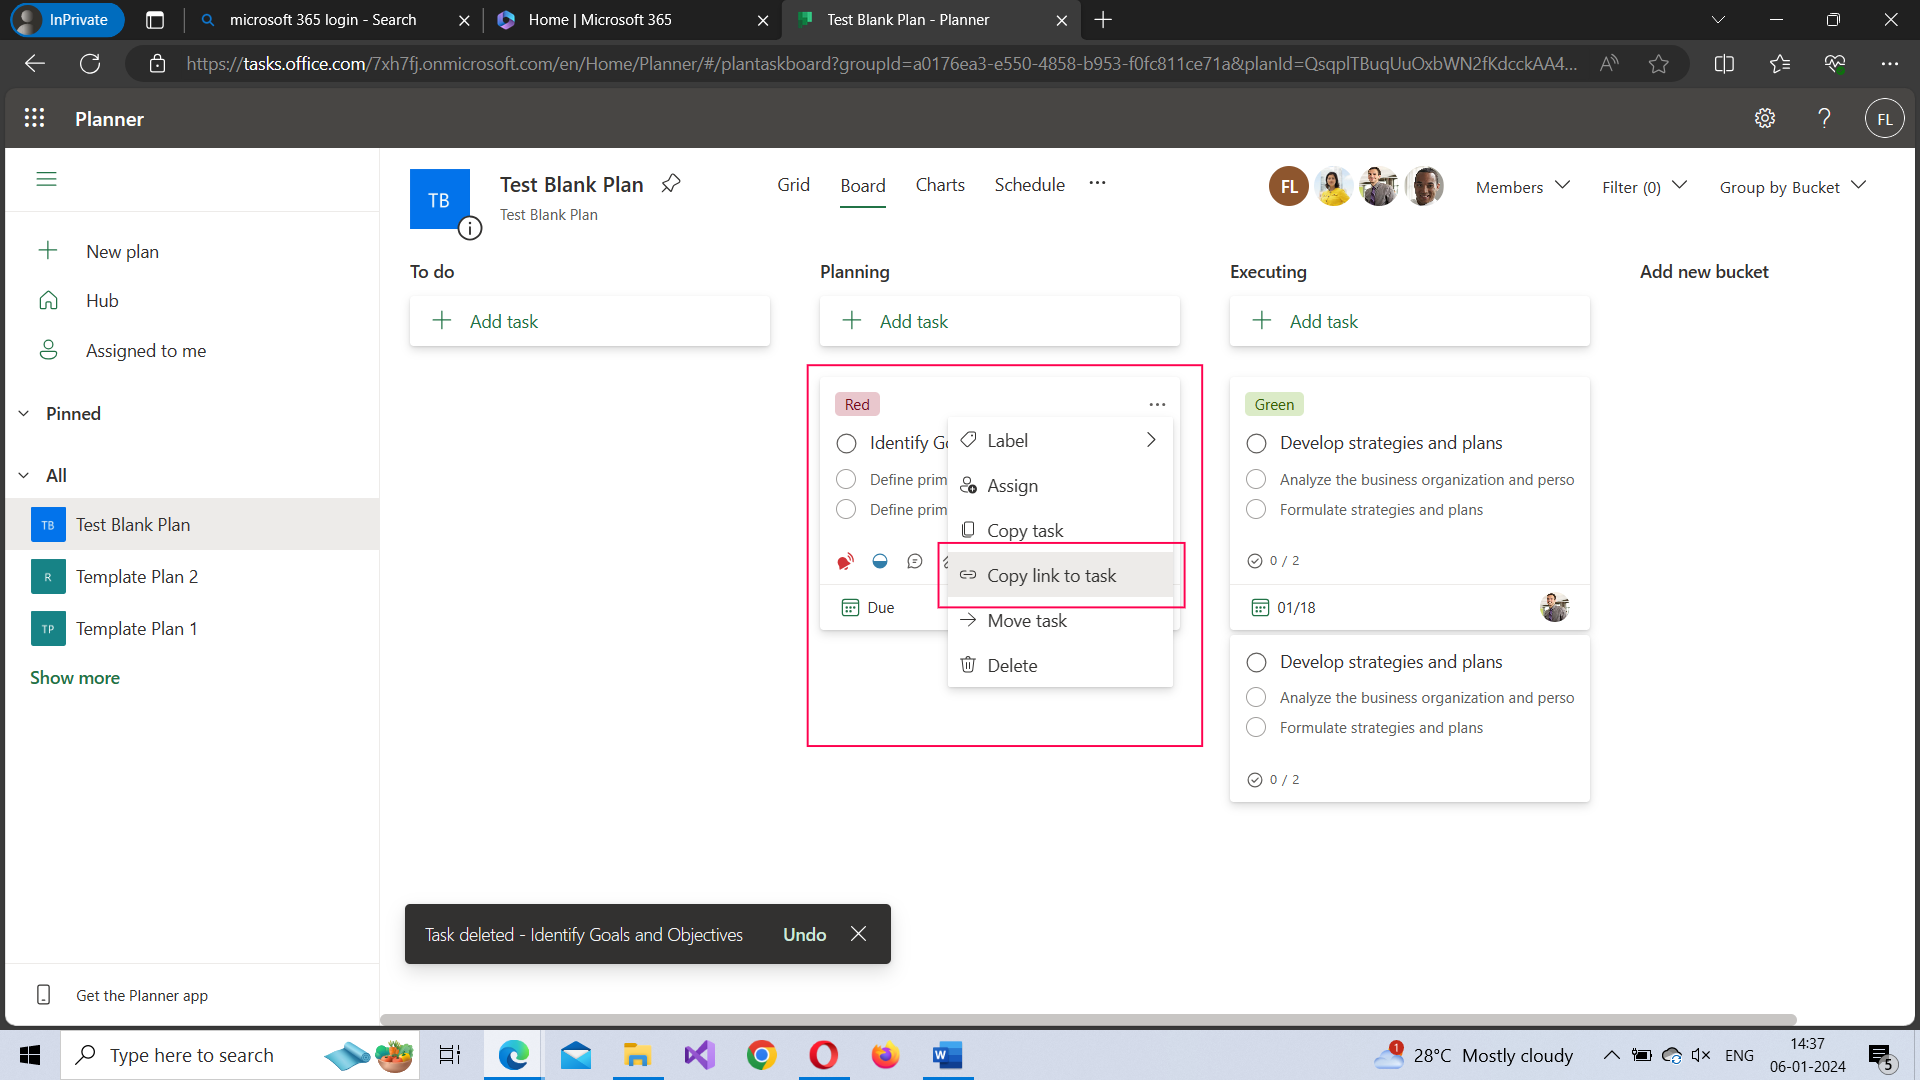
Delete task
This can be done in two ways:
- From the task card: Click the … icon >> select the Delete option.
- From within the task details section: Click the ‘…’ icon (from the top right corner) >> Select the Delete option.
The above procedure is explained in the form of click-and-play GIFs below, with each GIF representing a step.
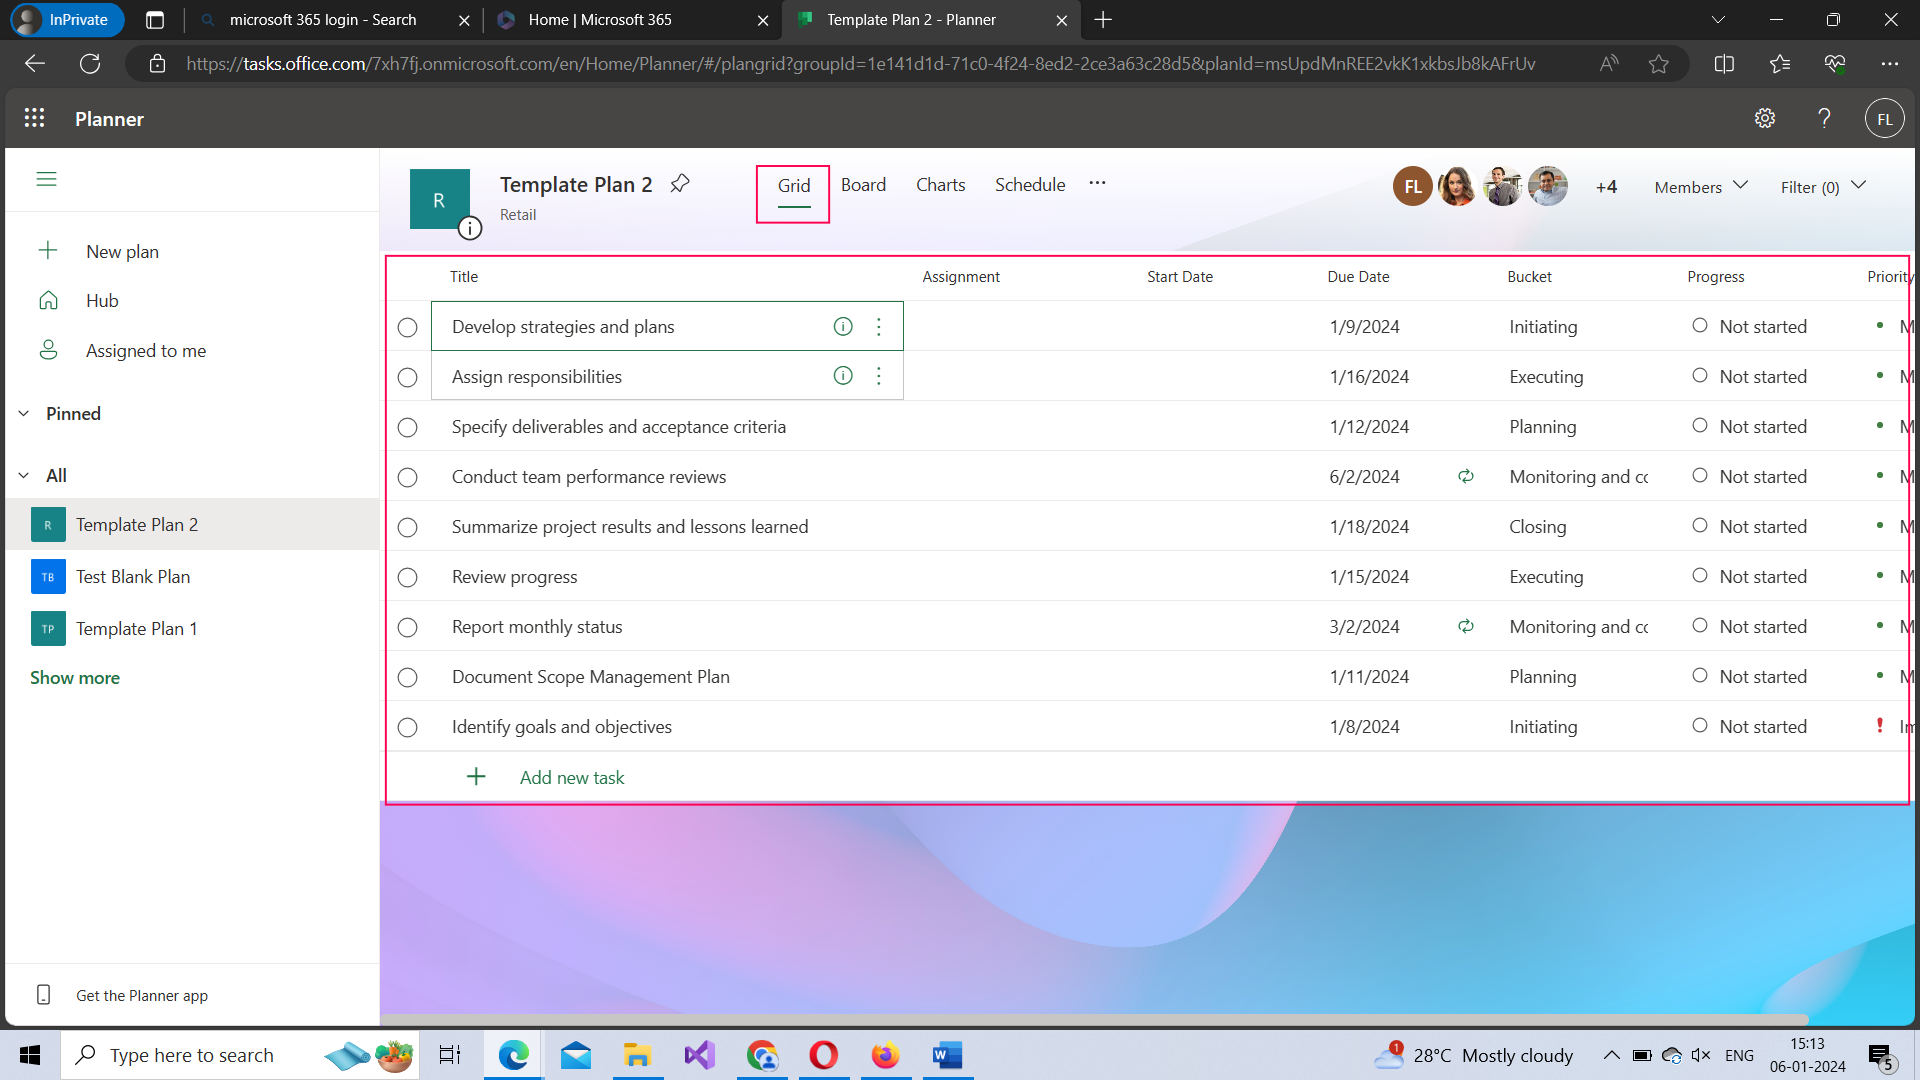
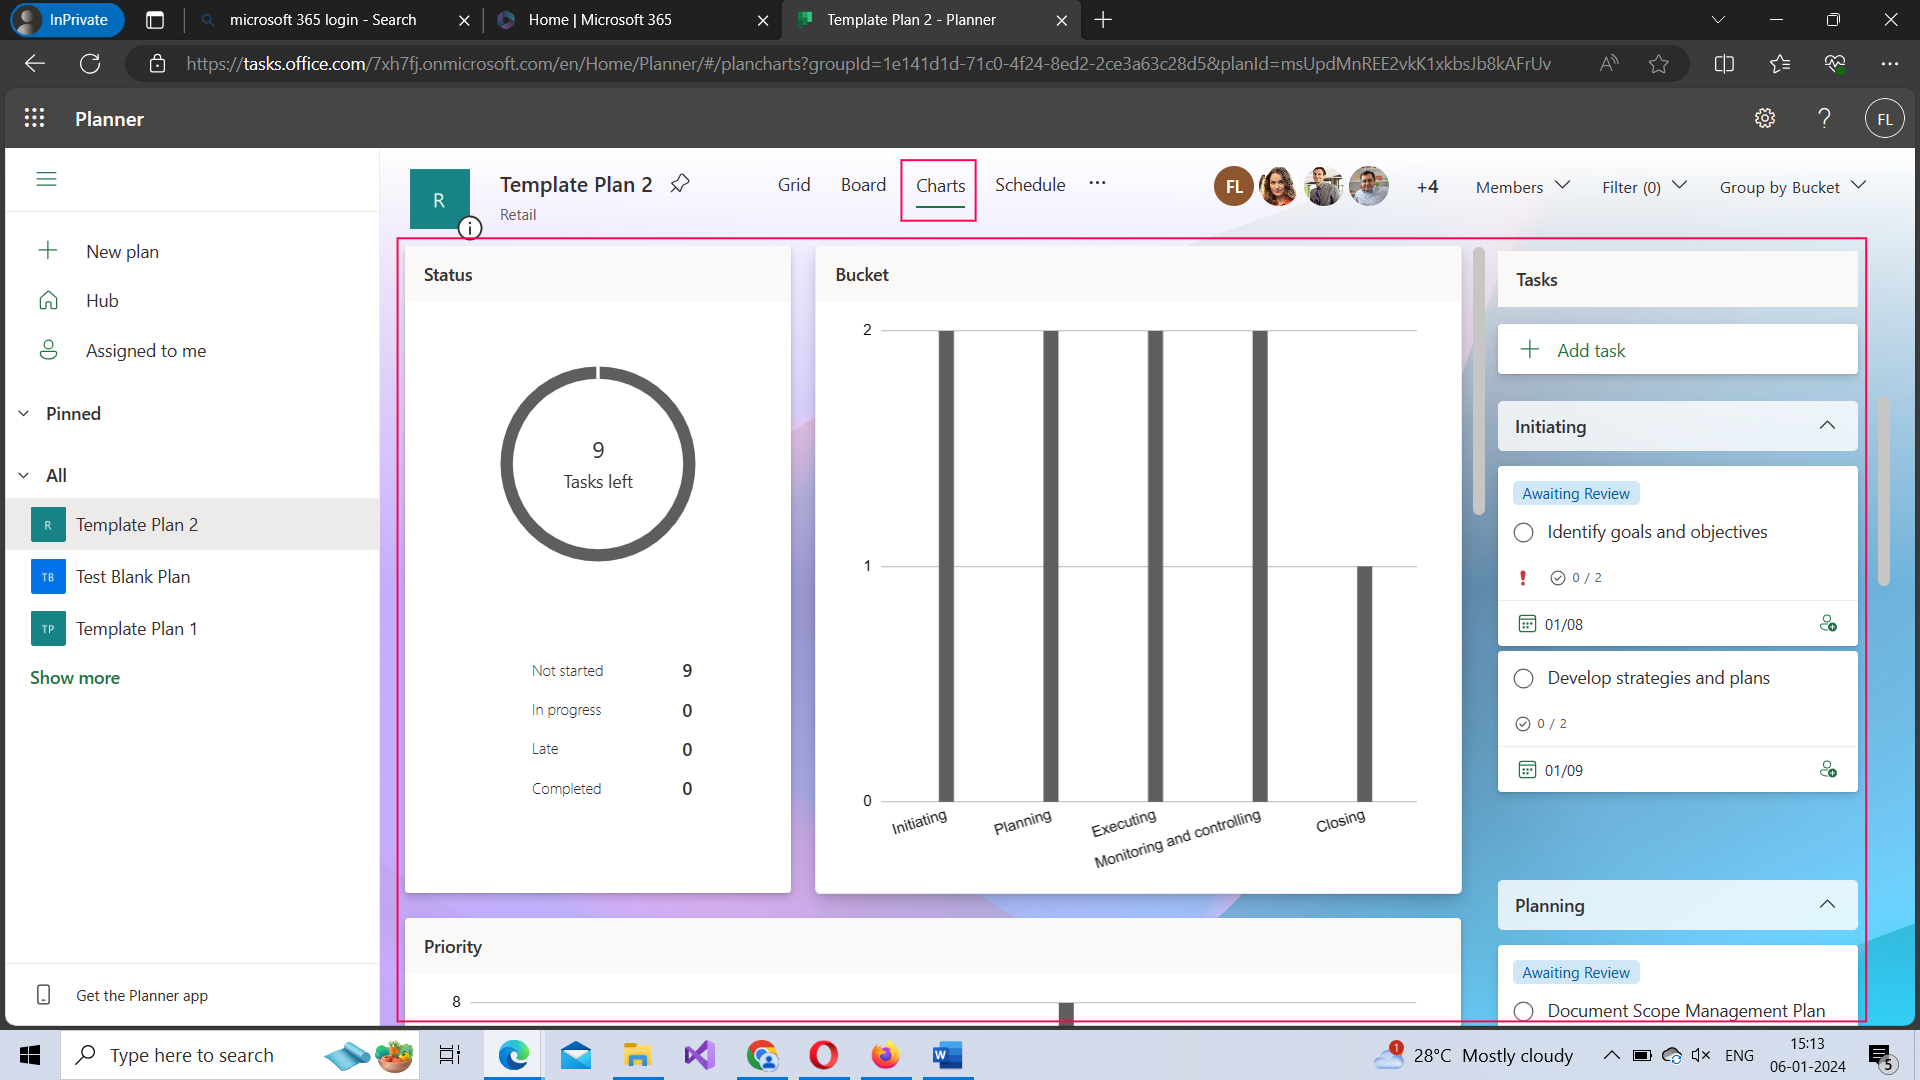
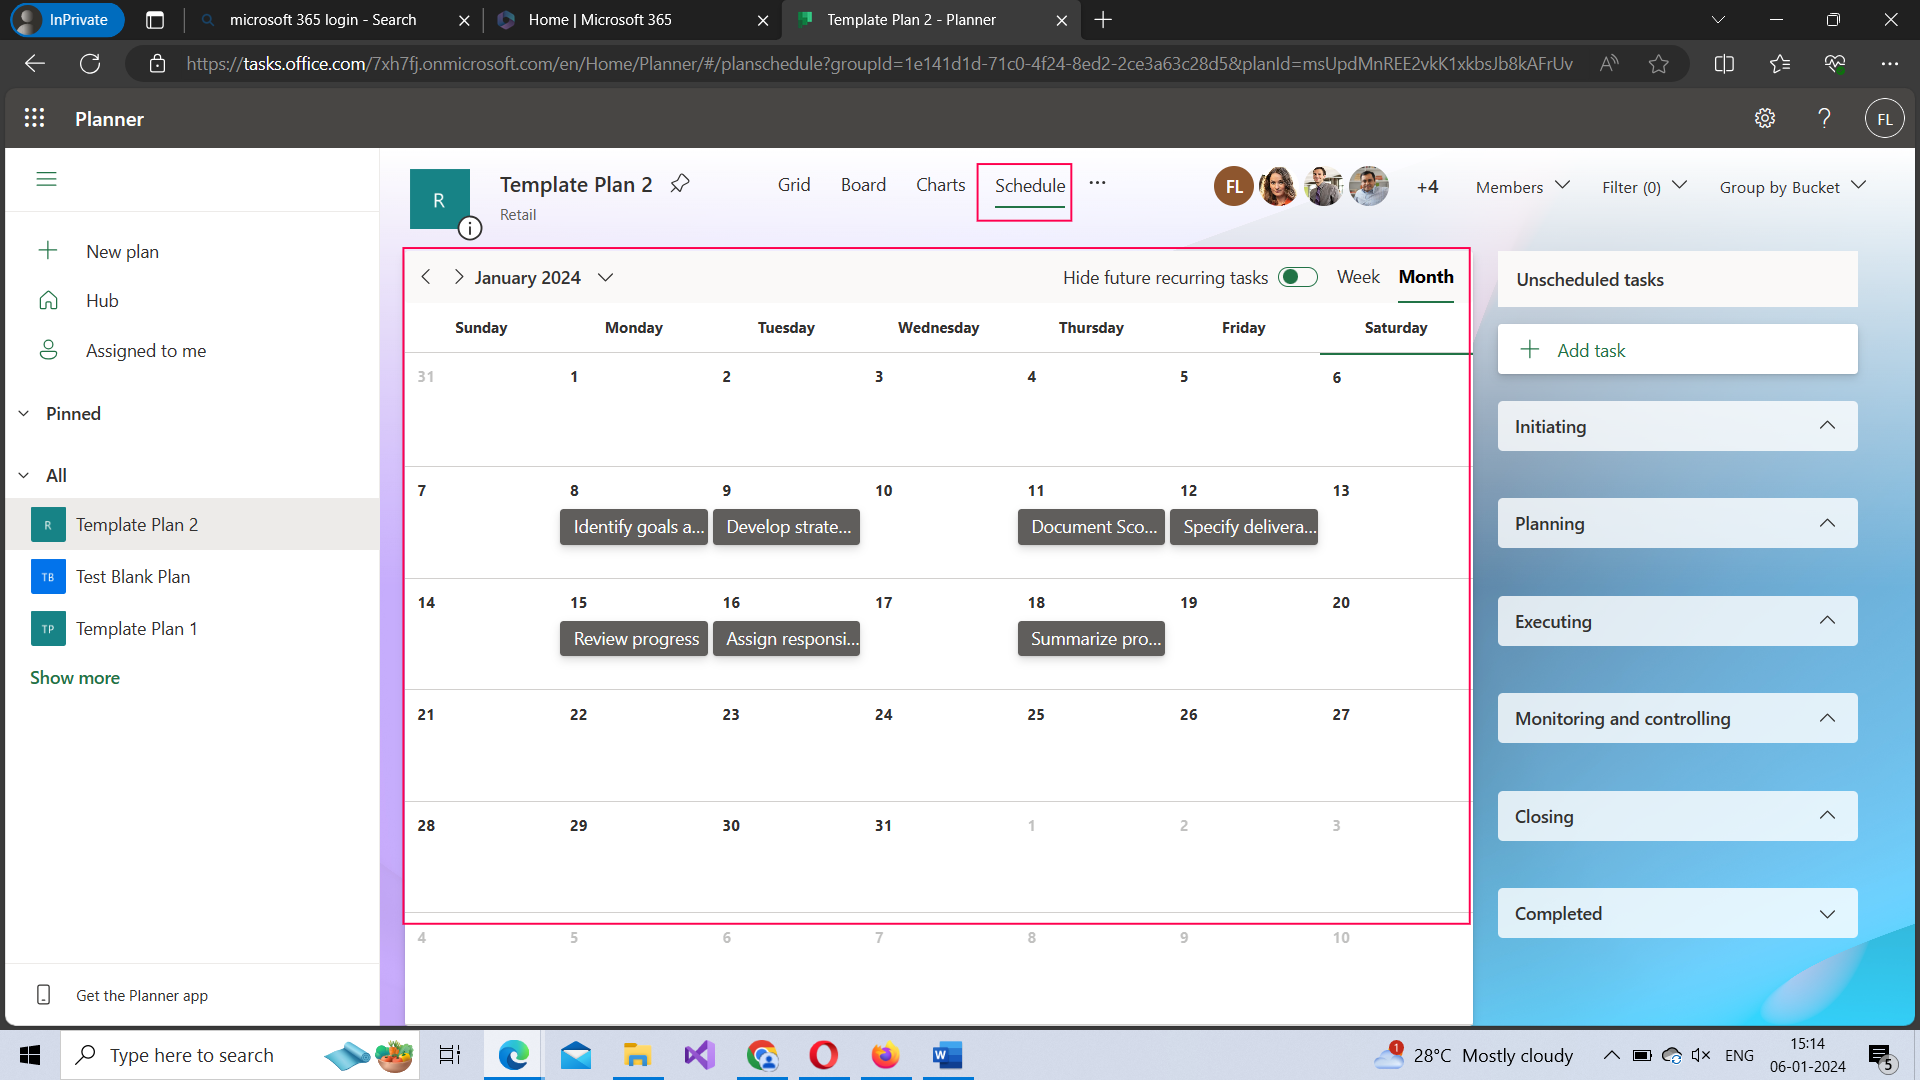
Different planner bucket/task views
You are presented with 4 different views.
- Grid view
- Board view (the default option)
- Charts view
- Schedule view (calendar view)
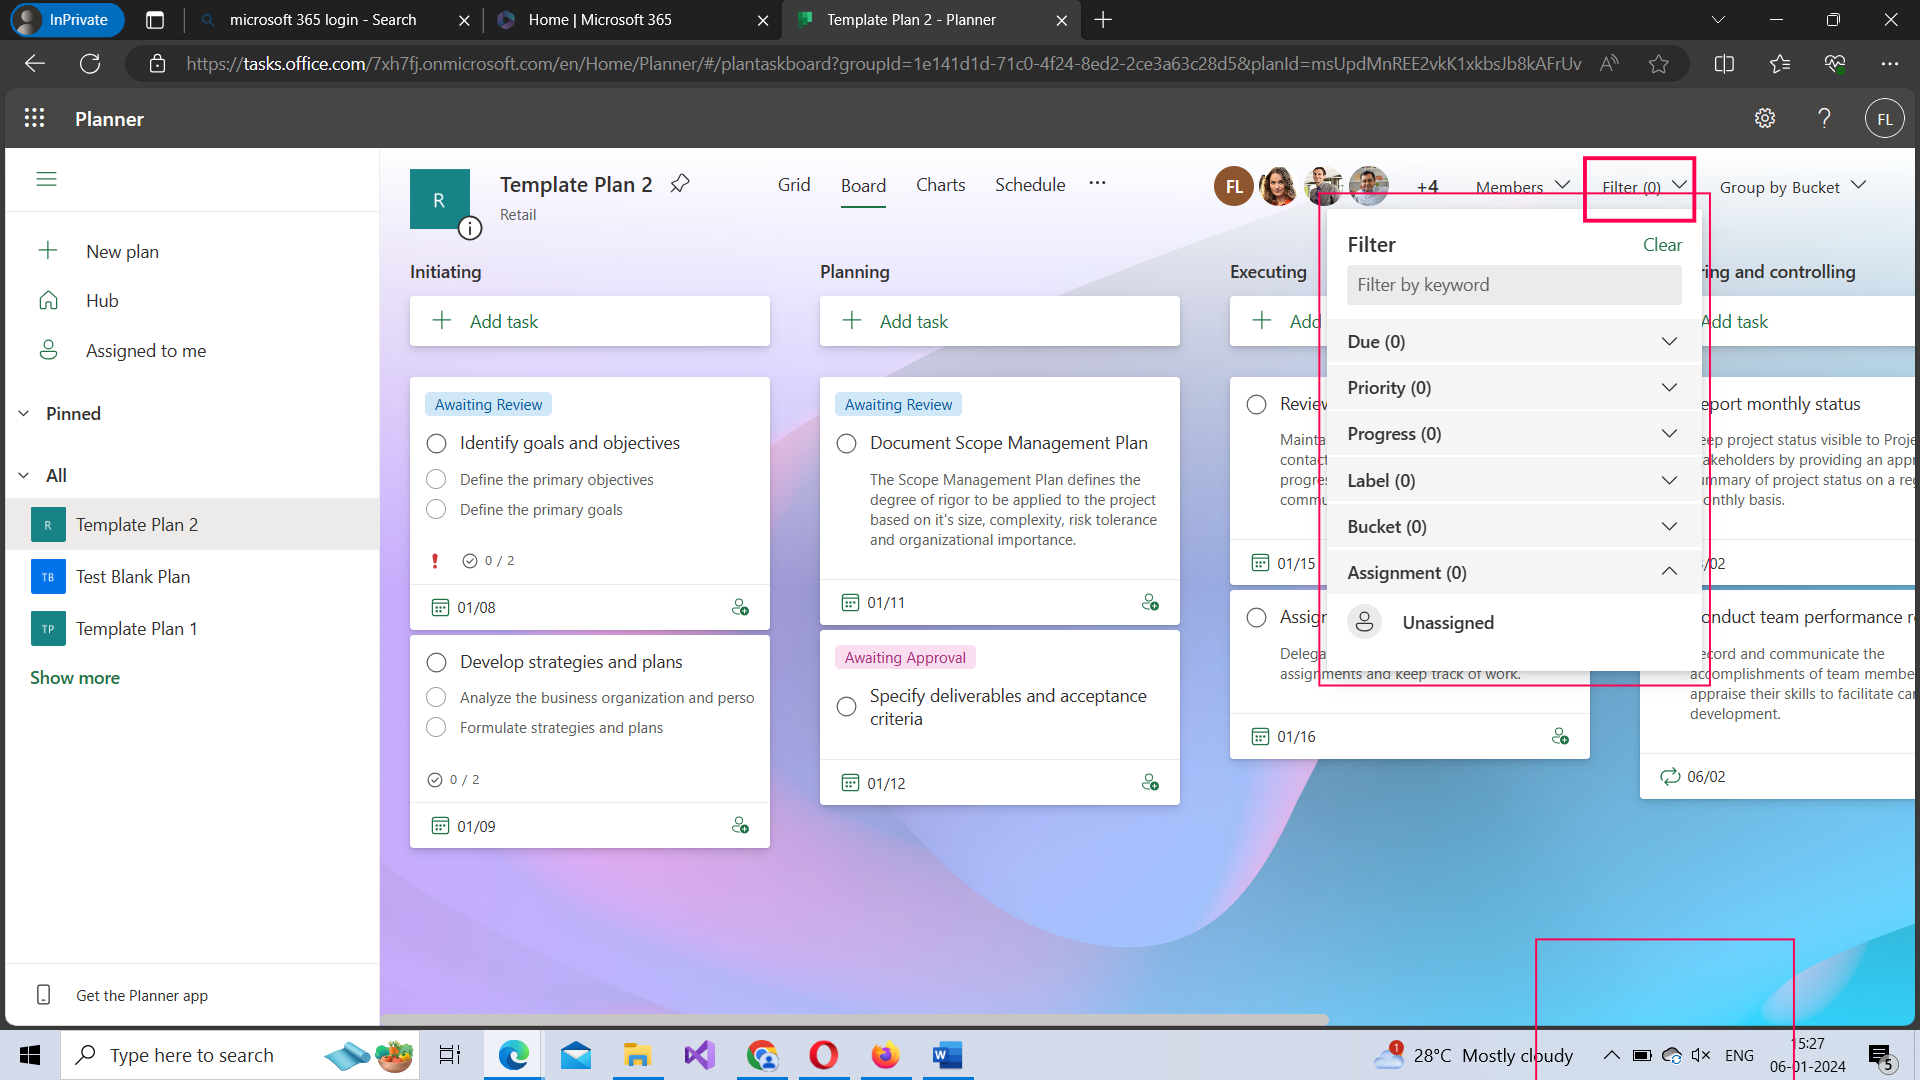
Filter Dropdown
You have 7 filters (as shown in the image below) using which you can filter the information being displayed to suit your requirements. Check the next image to understand how the filter works.

Group by Bucket Dropdown
Grouping tasks by bucket is the default option. You can modify this to suit your requirement as shown in the image below.

More Options [three dots]
When you click the more [three dots] option button, it opens the following options:
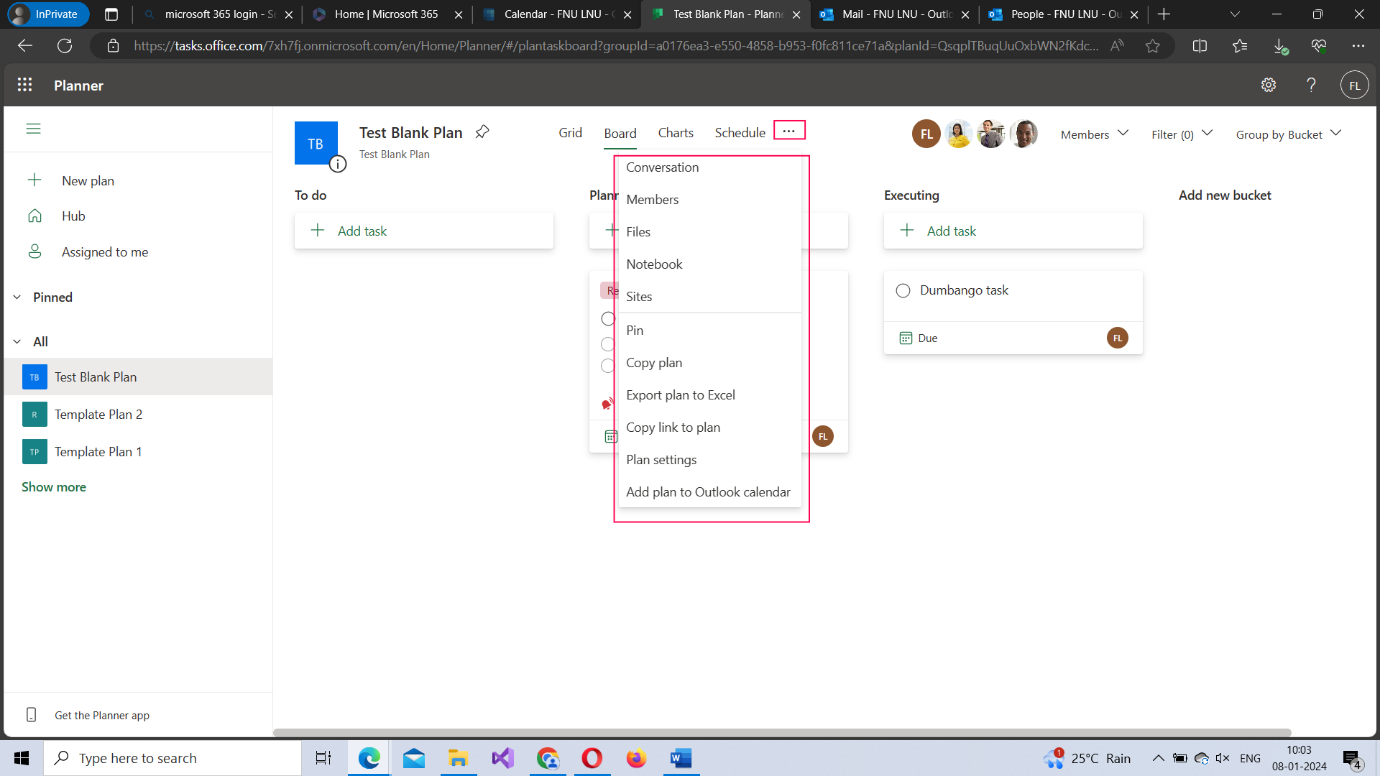
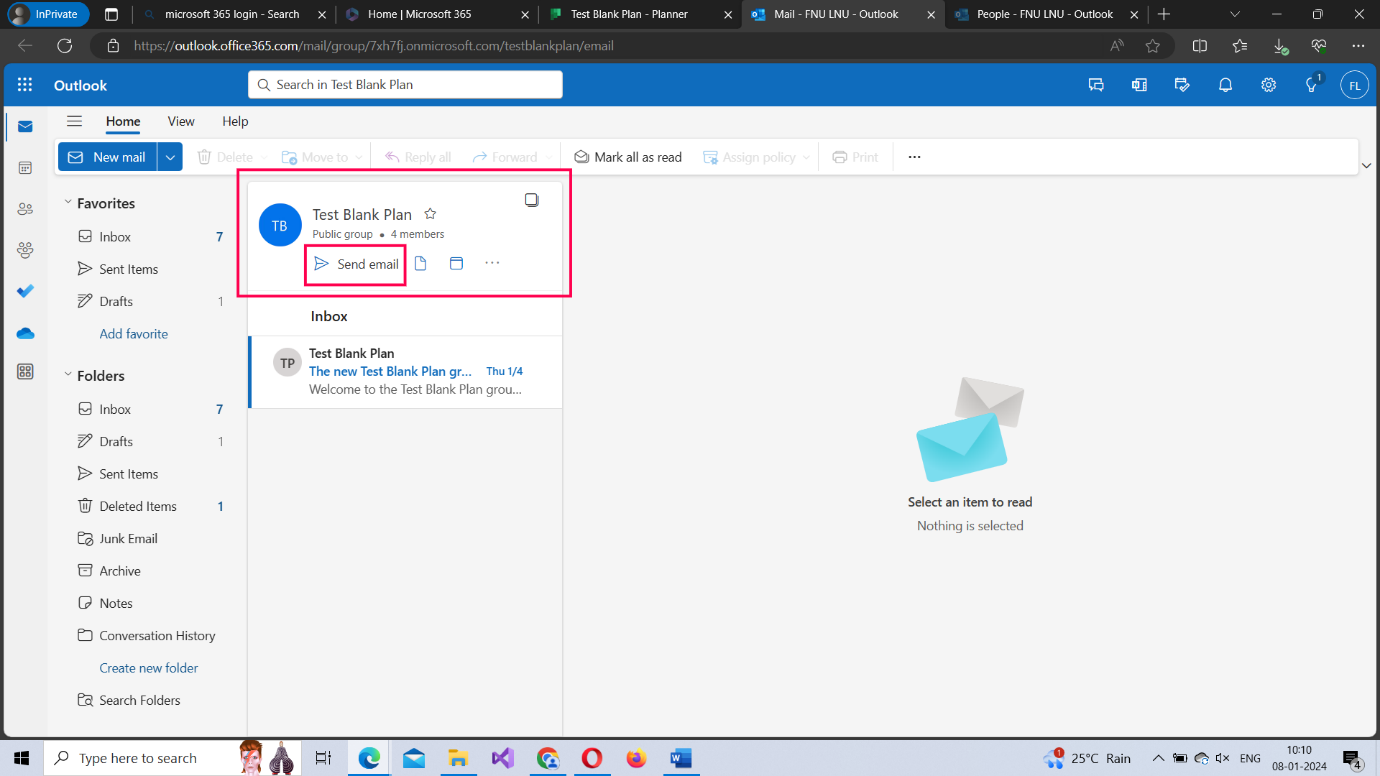
- Conversations – lets you converse with your planner group by sending mails to it via outlook that opens up when this option is clicked as shown in the image.
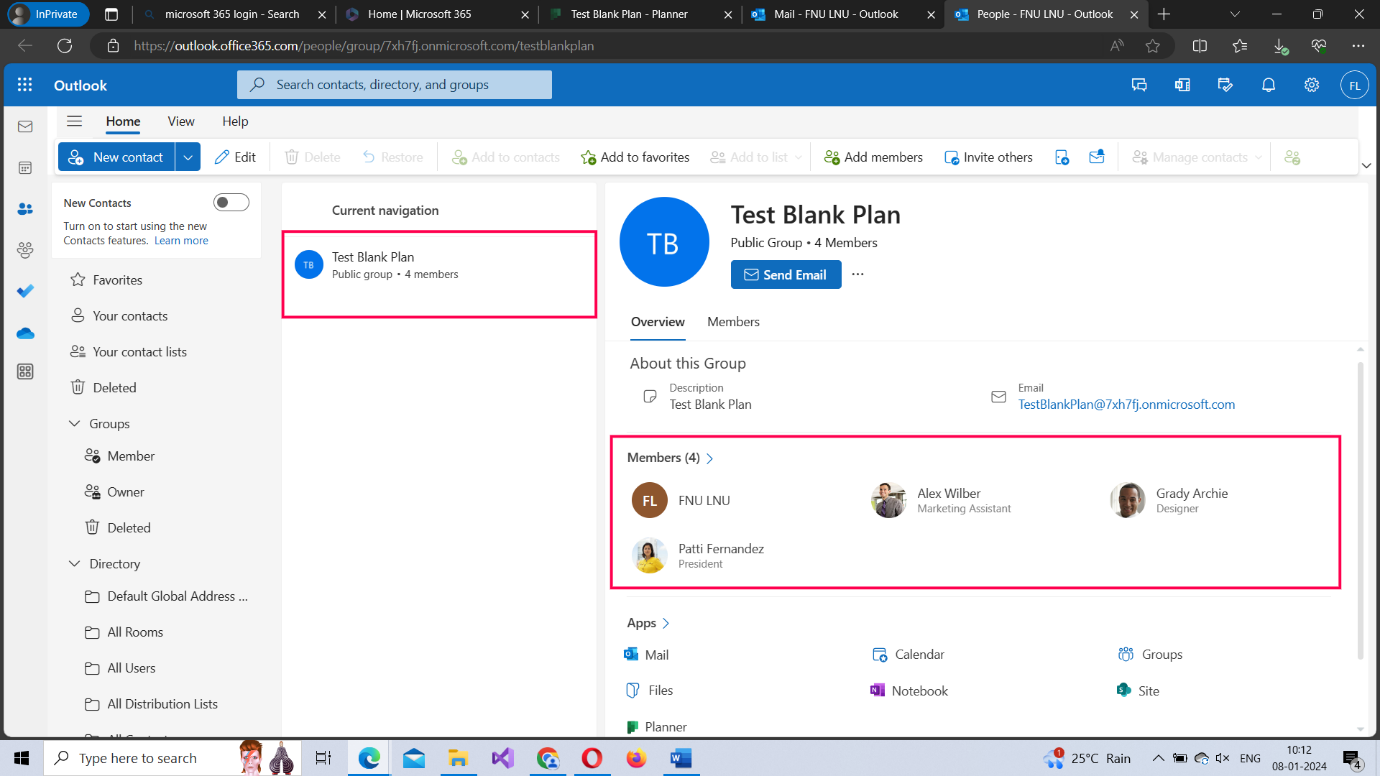
- Members – lets you chat with your planner group via outlook that opens up when this option is clicked as shown in the image
- Files – lets you access all the files uploaded to your planner group by clicking this option which leads you to the SharePoint site dedicated for your planner group.
- Notebook – lets you take your planner related notes and save them in one central location dedicated for your planner group.
- Sites – lets you access your planner group’s SharePoint site. Note: A SharePoint site is automatically created when you create a planner.
- Pin – lets you pin the planner. The pinned planner appears under the Pinned category on the left pane
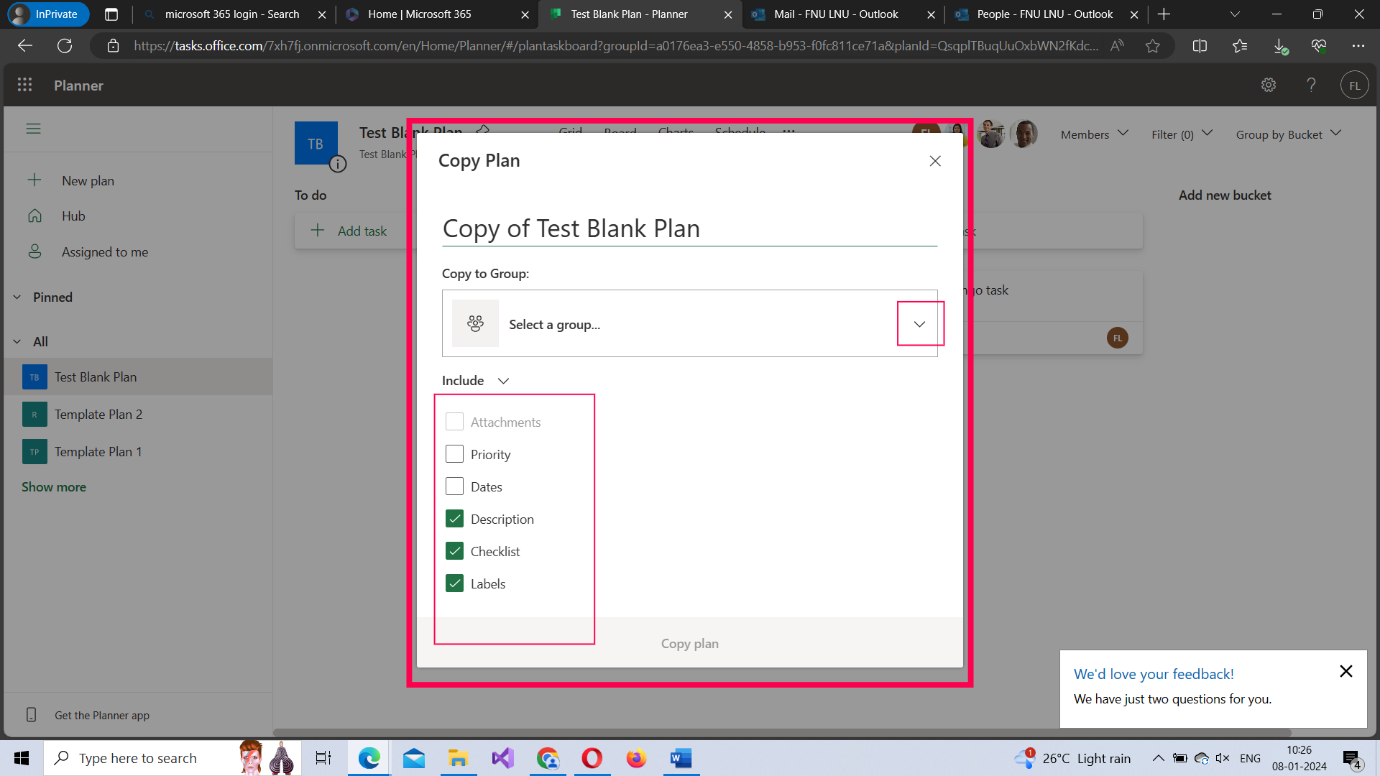
- Copy Plan – lets you clone the plan and reuse it. You can choose the settings to be copied and the group to which the planner applies as shown in the image.
- Export plan to Excel – lets you export the plan as excel file.
- Copy link to plan – lets you generate a link to the plan which you can share with others.
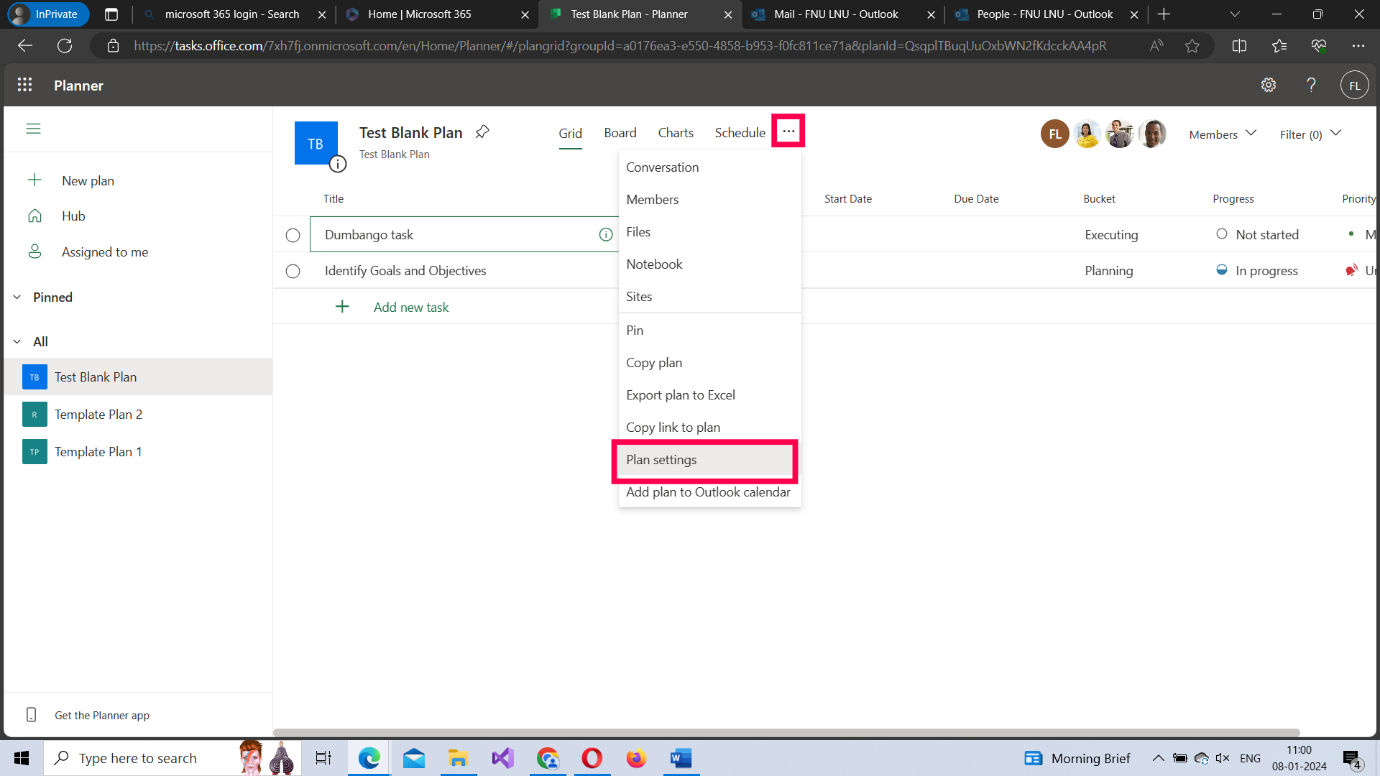
- Plan settings – lets you configure the planner settings. More on this in the Plan Settings section below.
- Add plan to Outlook calendar – allows you share the planner link with the planner group using which they can add the planner to their outlook calendar. By default, this option is not selected as shown in the image below.
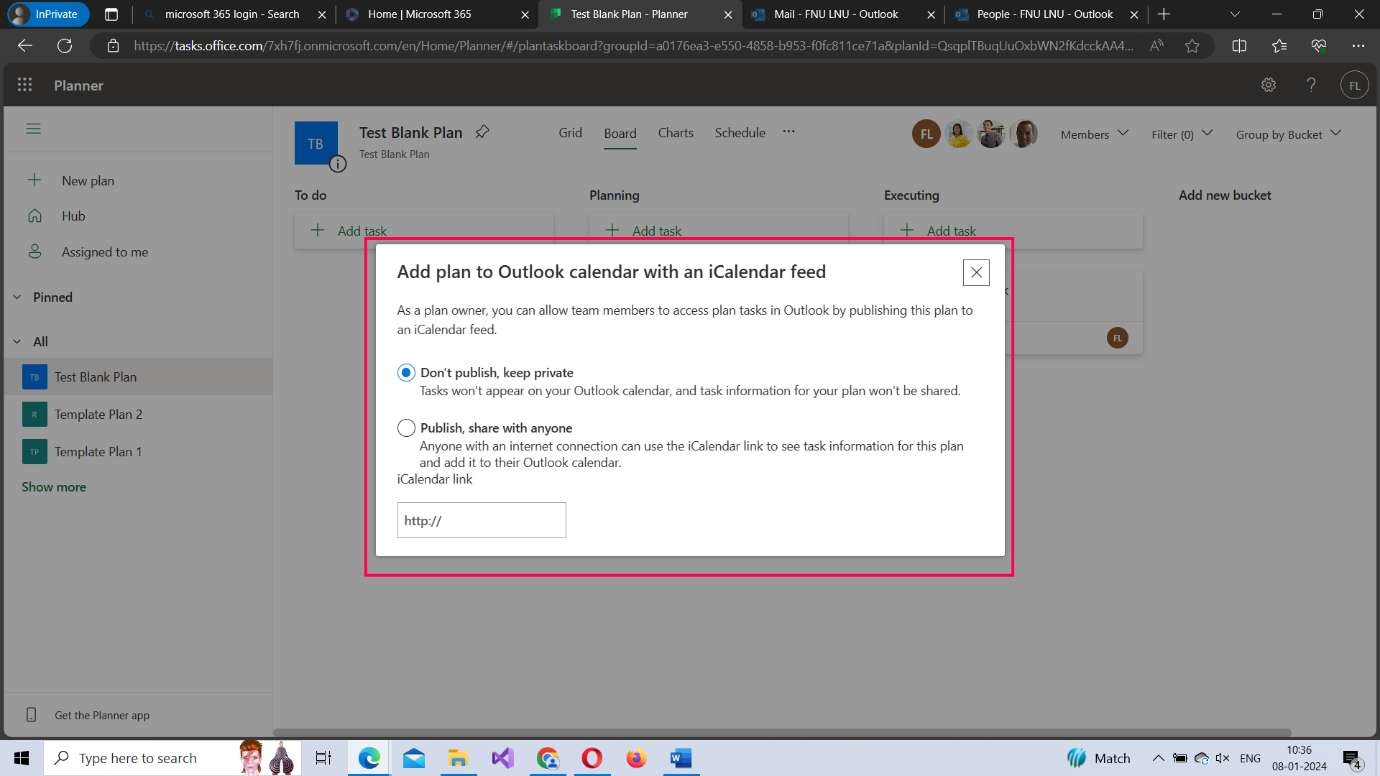
Note: Once you select the ‘Publish, share with anyone’ option, the link to be shared gets generated and appears in the box.
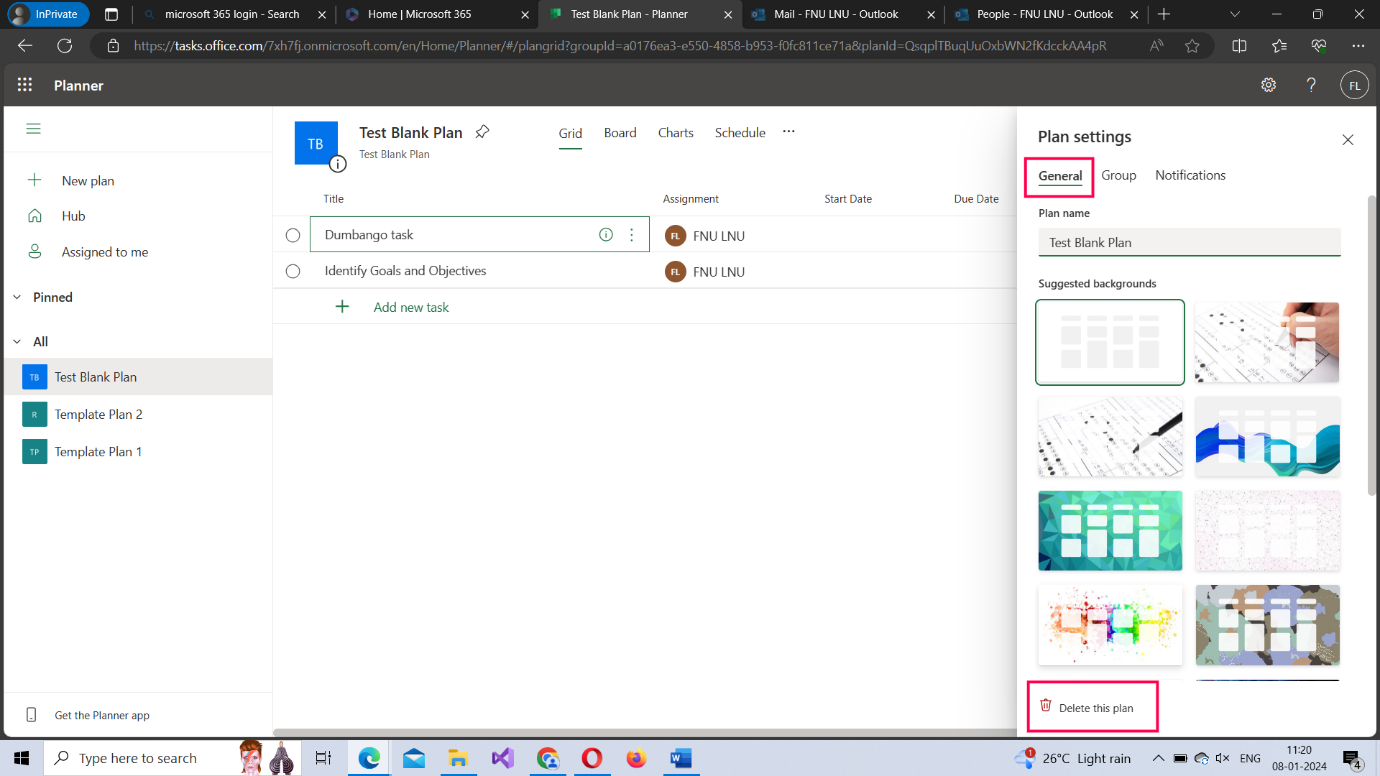
Plan Settings
In plan settings,
- you get to modify the plan name,
- change its template (or move from a blank to a pre-defined template and vice versa),
- modify the plan’s sensitivity label (the public/private options),
- enable/disable plan related notifications and,
- delete the plan if it is no longer needed
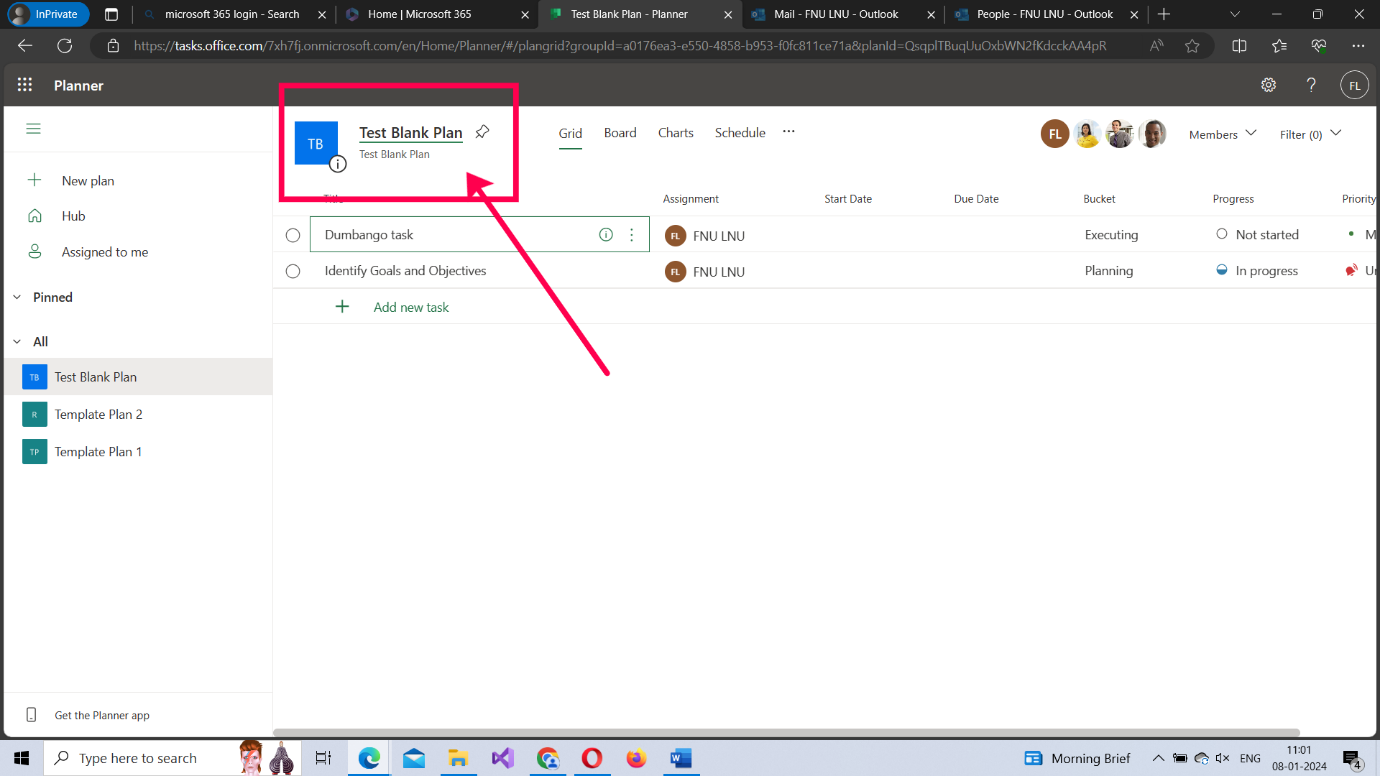
You can access the plan settings in two ways:
- By clicking the more options button in the planner overview section [or]
- By clicking the plan name itself
- Both open the plan settings pane as shown in the image.
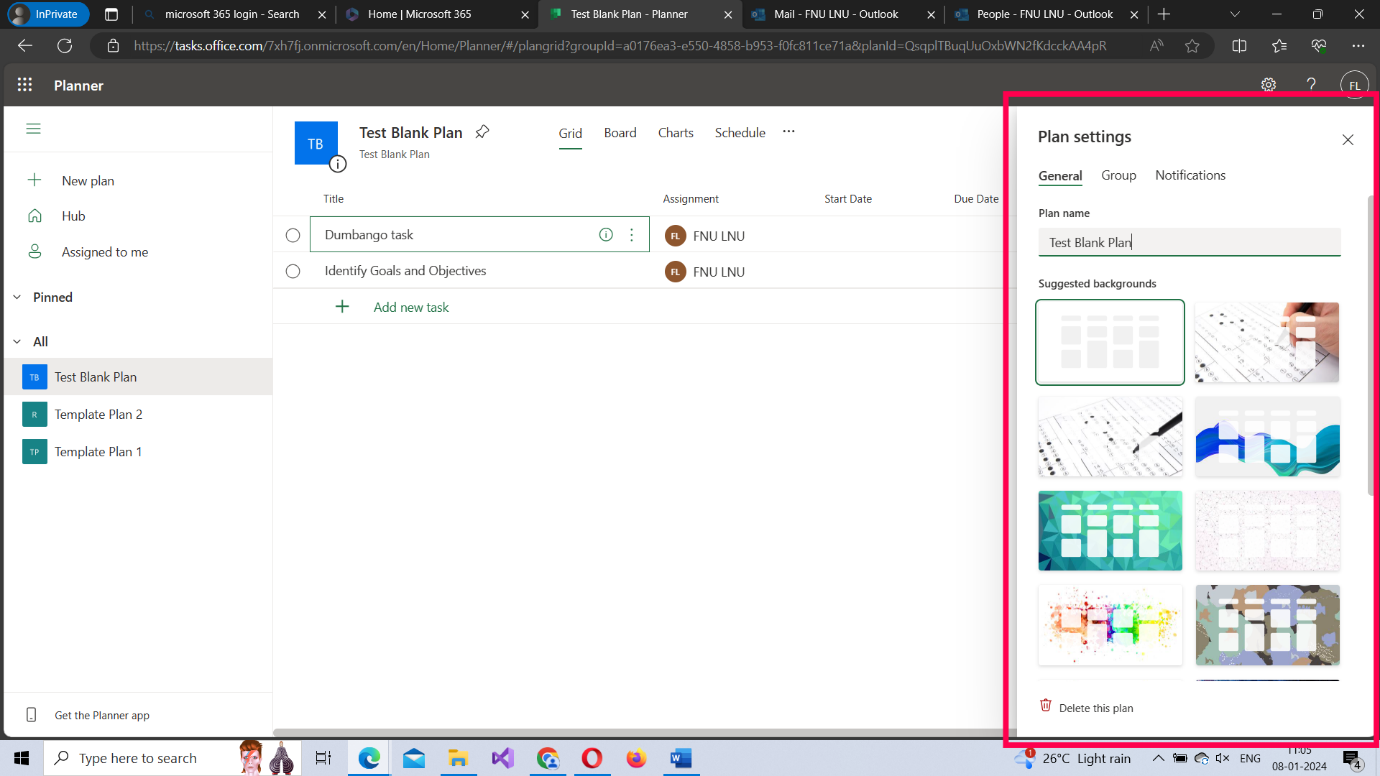
General Tab
The general tab lets you change the name of the plan and its template.
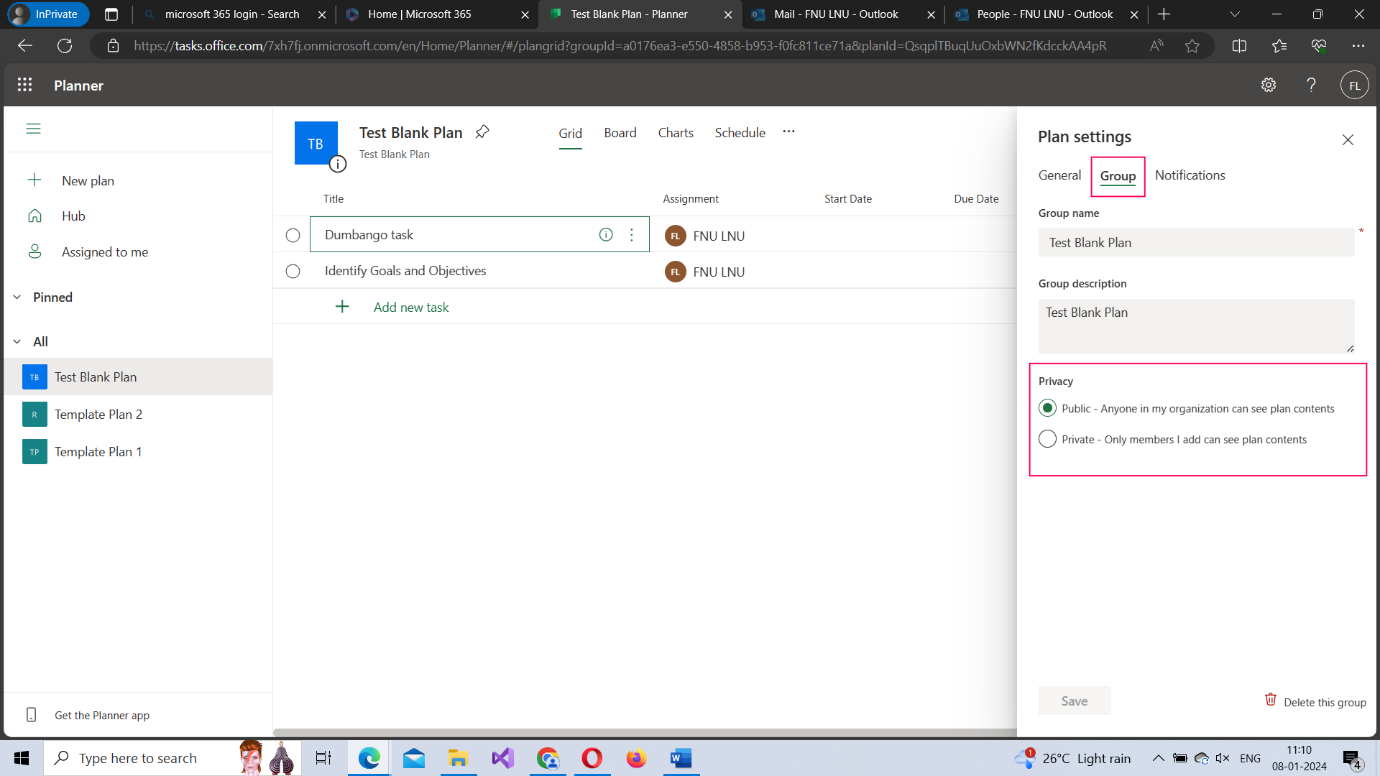
Group Tab
The group tab lets you change the plan’s sensitivity label from public to private or private to public.
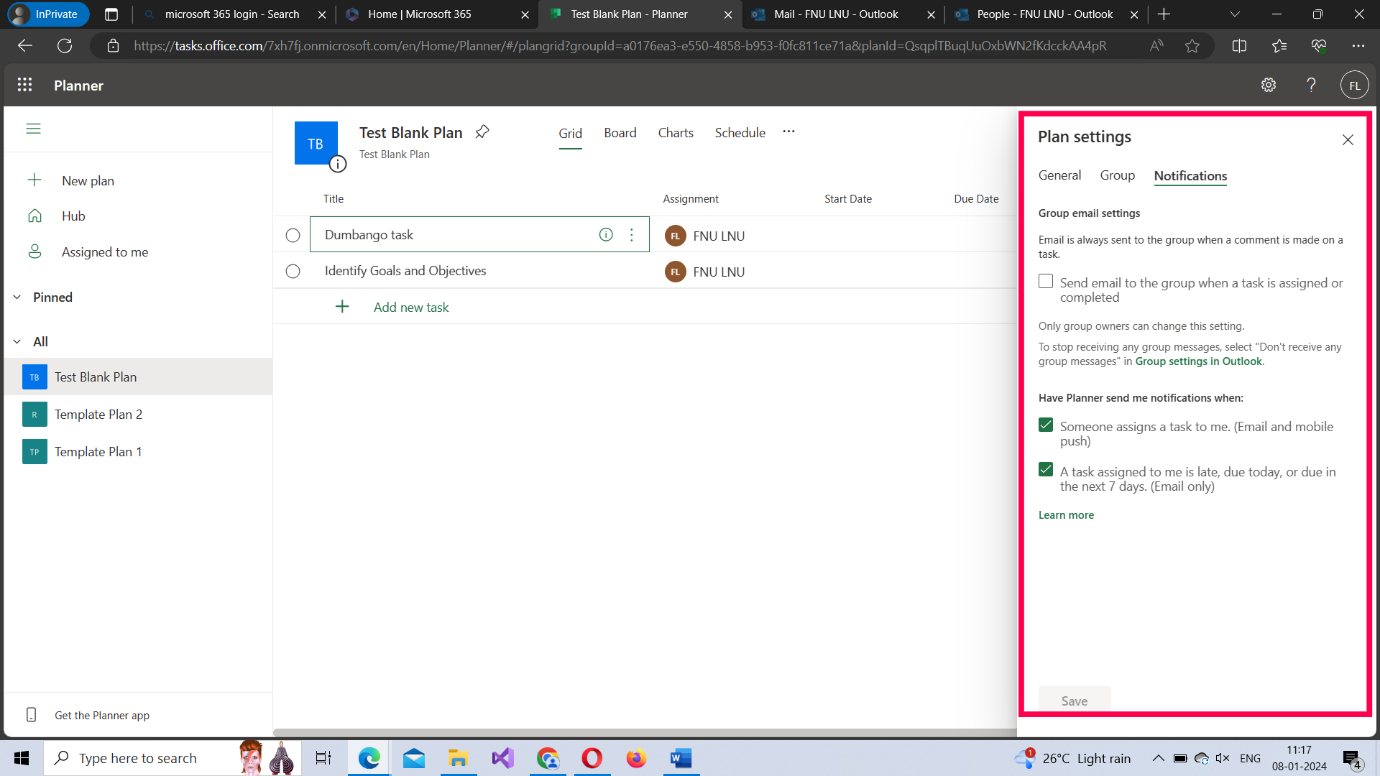
Notifications Tab
The notifications tab lets you configure planner related notifications. There are 3 notifications you can enable or disable as shown in the image.
- Send email to the group when a task is assigned or completed (not selected by default)
- Someone assigns a task to you (selected by default)
- When the task assigned to you is due or late (selected by default)
Deleting the planner
You can also delete the plan when it is no longer needed by clicking the Delete this plan button available under the General tab as shown in the image.