🔧 New: User Management Graph PowerShell Toolkit
Simplify user tasks like bulk creation, updates, password resets, deletions, license checks & more — all from one place.
🚀 Launch ToolkitHow to Create Mail Flow Rules Using Microsoft Exchange with Predefined Templates
Note: Graph PowerShell does not yet efficiently support org wide mailbox management. Using New-MgUserMailFolderMessageRule would mean you should loop each and every user for the inbox rule to be applied, which is good for development purposes, but not for efficient Microsoft 365 administration.
So, in this blog series, let’s understand how to create Microsoft Exchange mail flow rules using Exchange Admin Center and Exchange Online PowerShell.
In this four-part series, we’ll discuss the elements of a mail flow rule—available in the Exchange admin center EAC)—and explain how you can implement them in your organization.
It is recommended that you read these articles in the order they have been written.
- How to Create Mail Flow Rules Microsoft Exchange with Predefined Templates
- How to Create Mail Flow Rules from Scratch Using the Microsoft Exchange Admin Center and Windows PowerShell
- How to Create Mail Flow Rules That Reduce Outlook Meeting Notifications
- How to Create Mail Flow Rules with Exceptions
Although Microsoft Outlook inbox rules apply to emails after they reach the inbox, mail flow rules help administrators act on emails while they are in transit. (For example, emails containing business-critical information can be redirected to a moderator who can then approve or reject the mail based on the company’s policy regarding sensitive information being sent through mail).
Mail flow rules come equipped with a richer set of conditions, exceptions, and actions that help administrators implement robust messaging policies. In this article, we will explain the basic elements that make up a mail flow rule, and then go on to configure one using the following:
- The Microsoft Exchange admin center (EAC)
- Windows PowerShell
Basic Elements of a Mail Flow Rule
The basic elements of a mail flow rule are:
- Conditions. Help you specify the event that will trigger the mail flow rule. For example, “all the mails from johndoe@contoso.com” is a condition.
- Actions. Help you specify what must be done when a configured condition is met. For example, “block mails or send the mails to a moderator for further action.”
- Exceptions. You might also have exceptions, which are conditions that override the configured rule. For example, allow emails from johndoe@contoso.com if and only if the subject or the body of the message contains the words “action required immediately.” This scenario illustrates a circumstance where johndoe@contoso.com is allowed to send mail, although the rule prevents him from sending emails by default.
- Properties. Help you define whether to enforce the rule immediately or run it in test mode first; they also help you define the time period for which the rule is going to be active.
Accessing Mail Flow Rules Using the EAC
To access the mail flow rules feature:
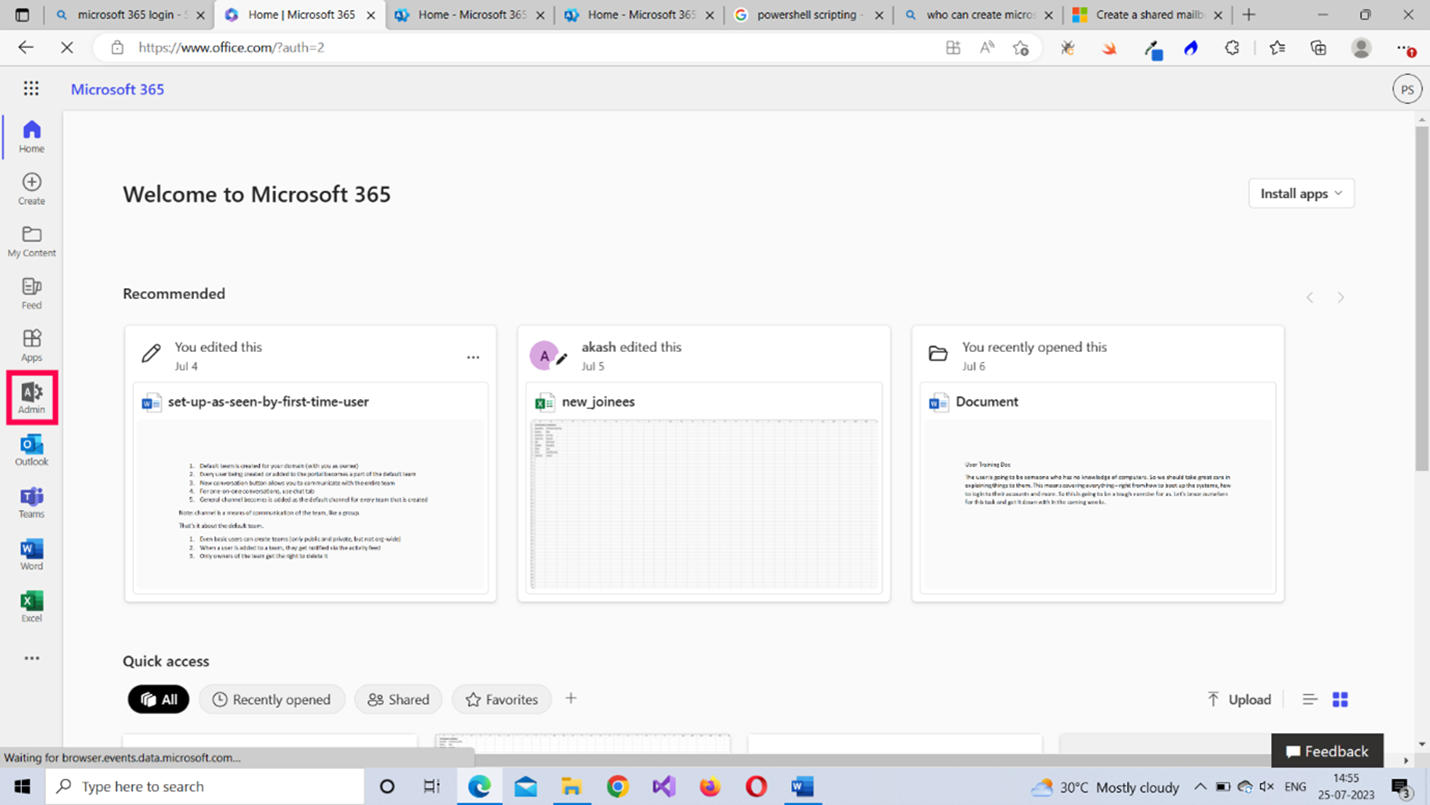
- Sign in to your Microsoft 365 tenant using your credentials. From the left pane, select the Admin icon, as shown in Figure 1. Doing so opens up the Microsoft 365 admin center.
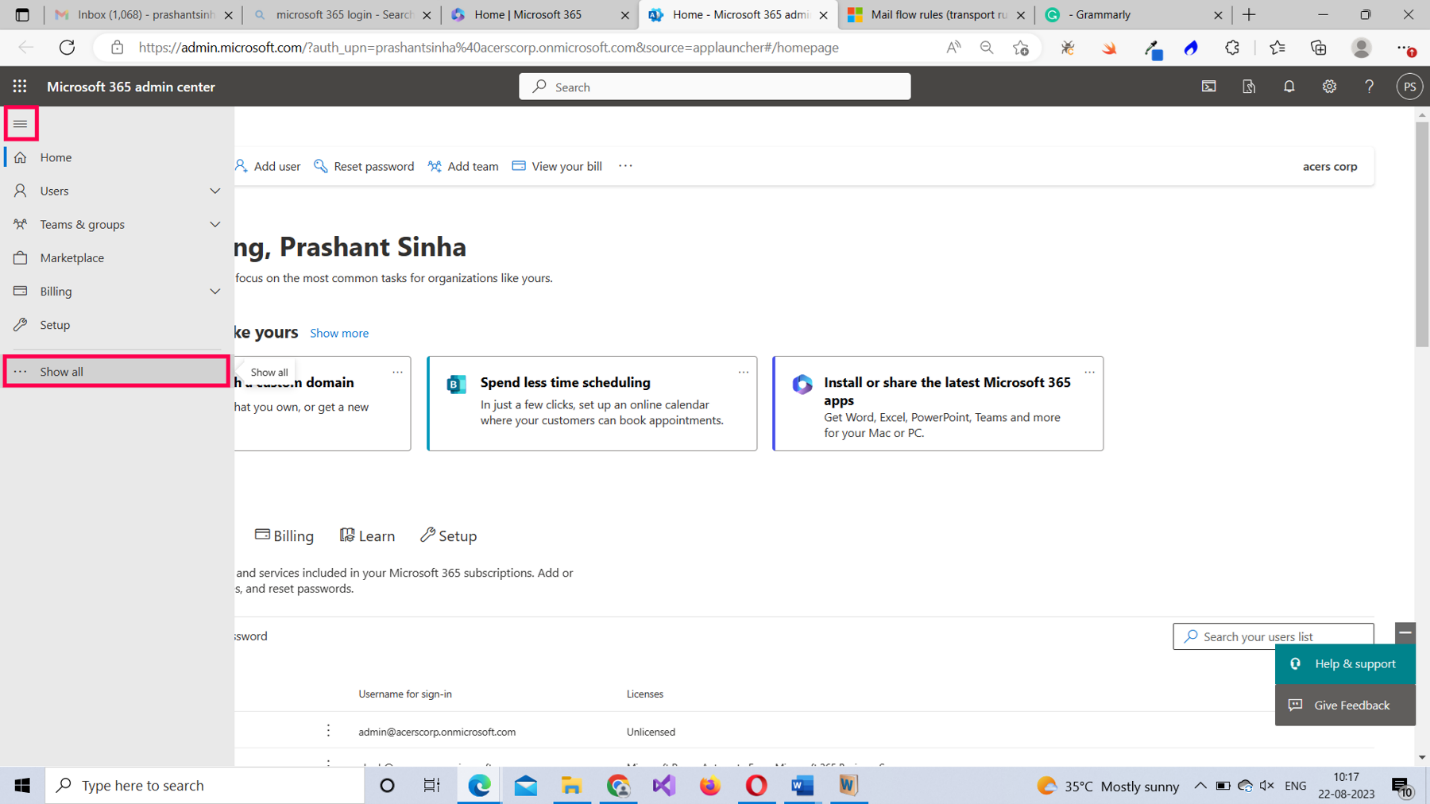
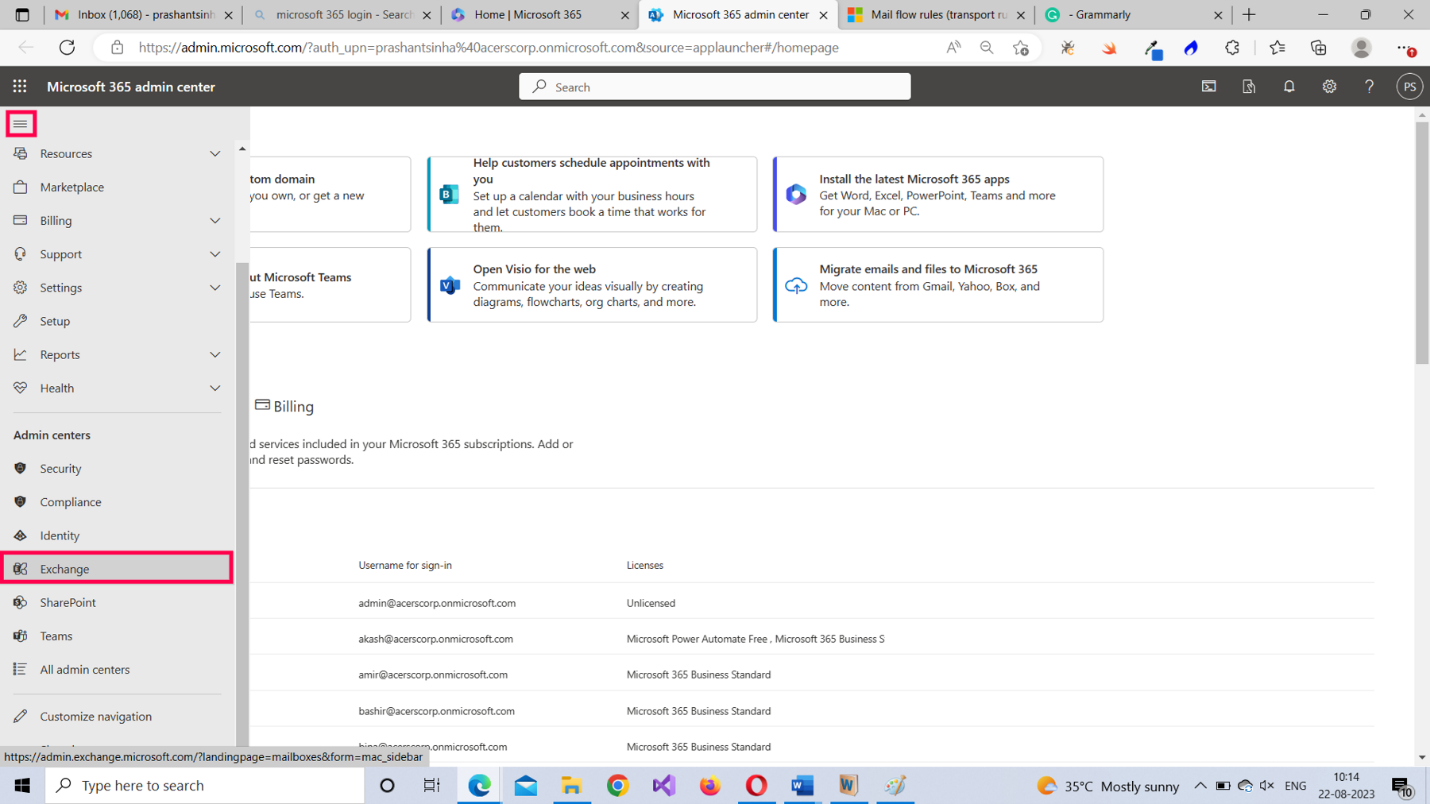
- From the menu in the Microsoft 365 admin center, select Show all, and then select Exchange, as shown in Figures 2 and 3, respectively.
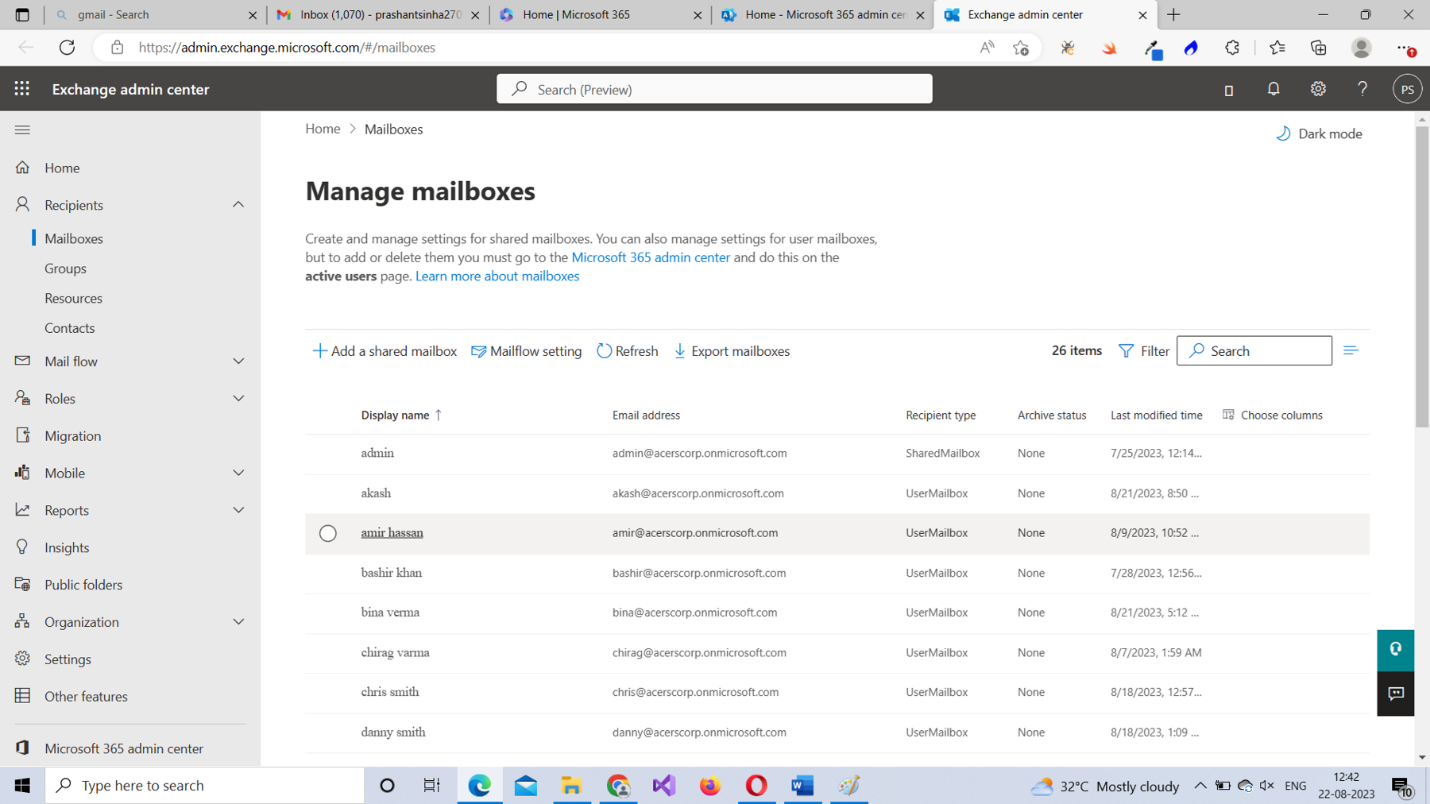
- The Exchange admin center opens, as shown in Figure 4.
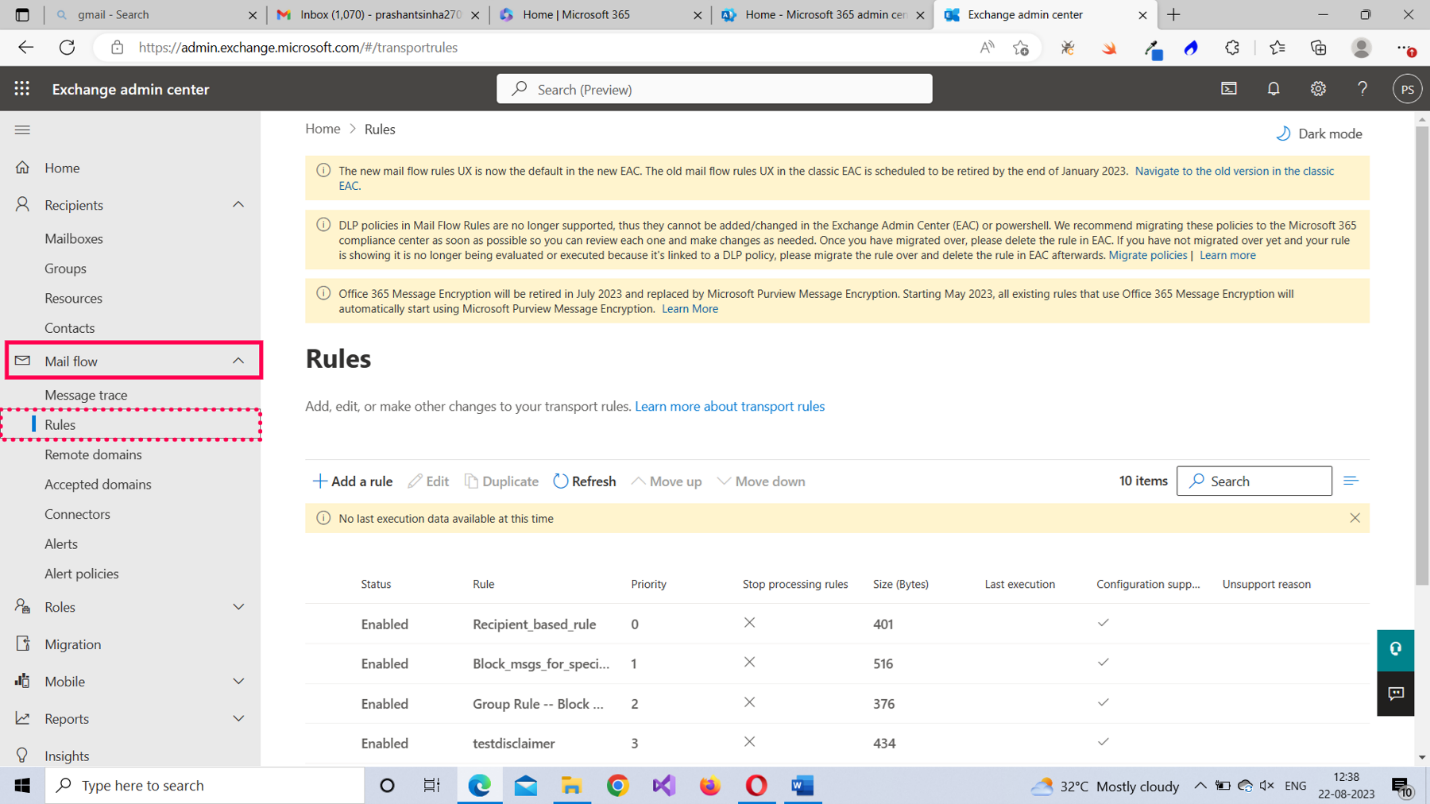
- Select Mail flow > Rules. Doing so opens the Rules page, as shown in Figure 5.
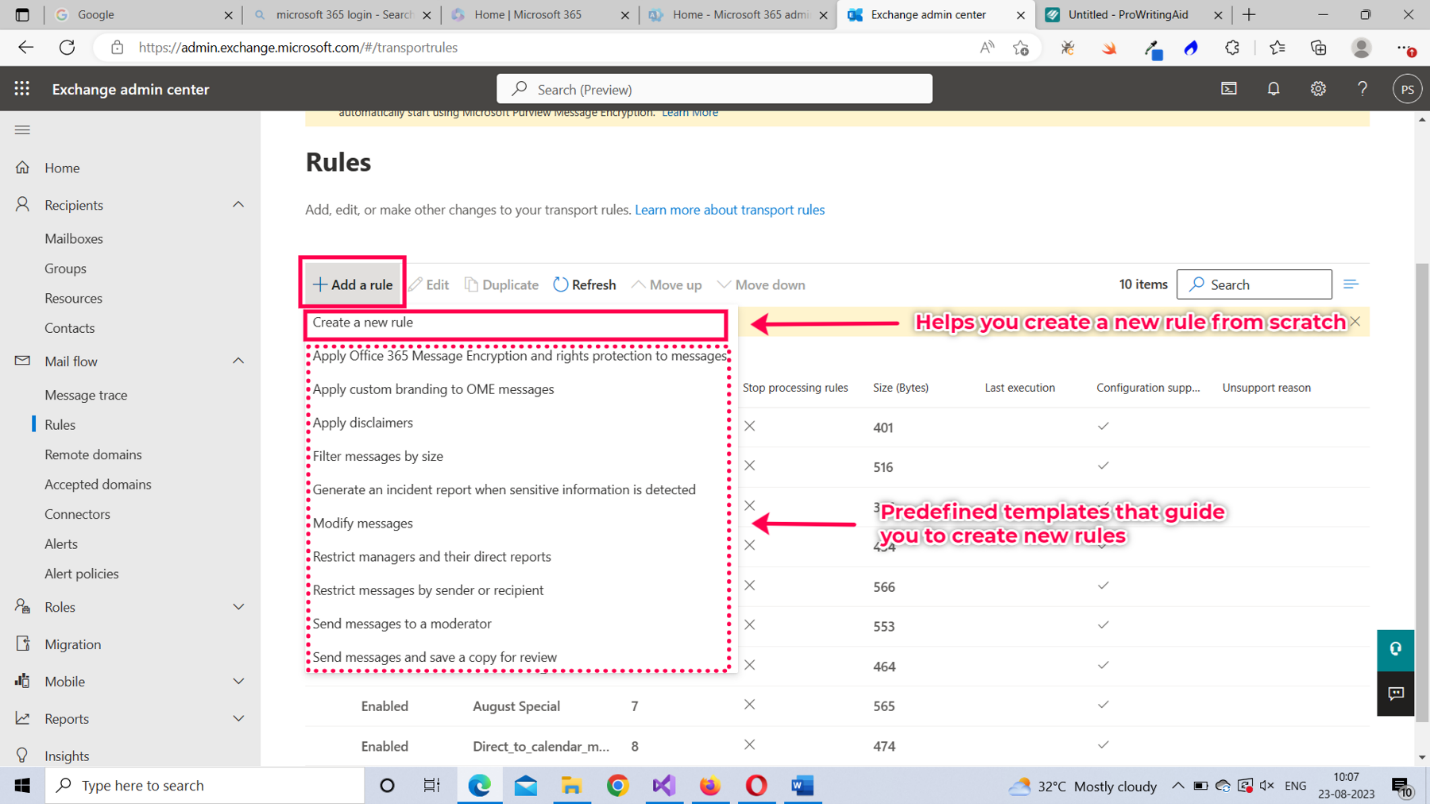
- You can use the predefined mail flow templates to create your organization’s mail flow rules or create them from scratch, as shown in Figure 6.
Creating a Mail Flow Rule Using an Existing Template
Follow the instructions provided to create a mail flow rule that appends disclaimers to your organization’s emails by using the Apply disclaimers predefined mail flow rule template.
To create a rule from the template:
- Select Add a rule, and then select Apply disclaimers, as shown in Figure 7.
- The New transport rule pane opens, as shown in Figure 8. As you’ll notice, the action—that of appending a disclaimer to your emails—is preset for you, since you are using a template. You just have to select the condition or rule that is going to trigger the action and apply exceptions if any.
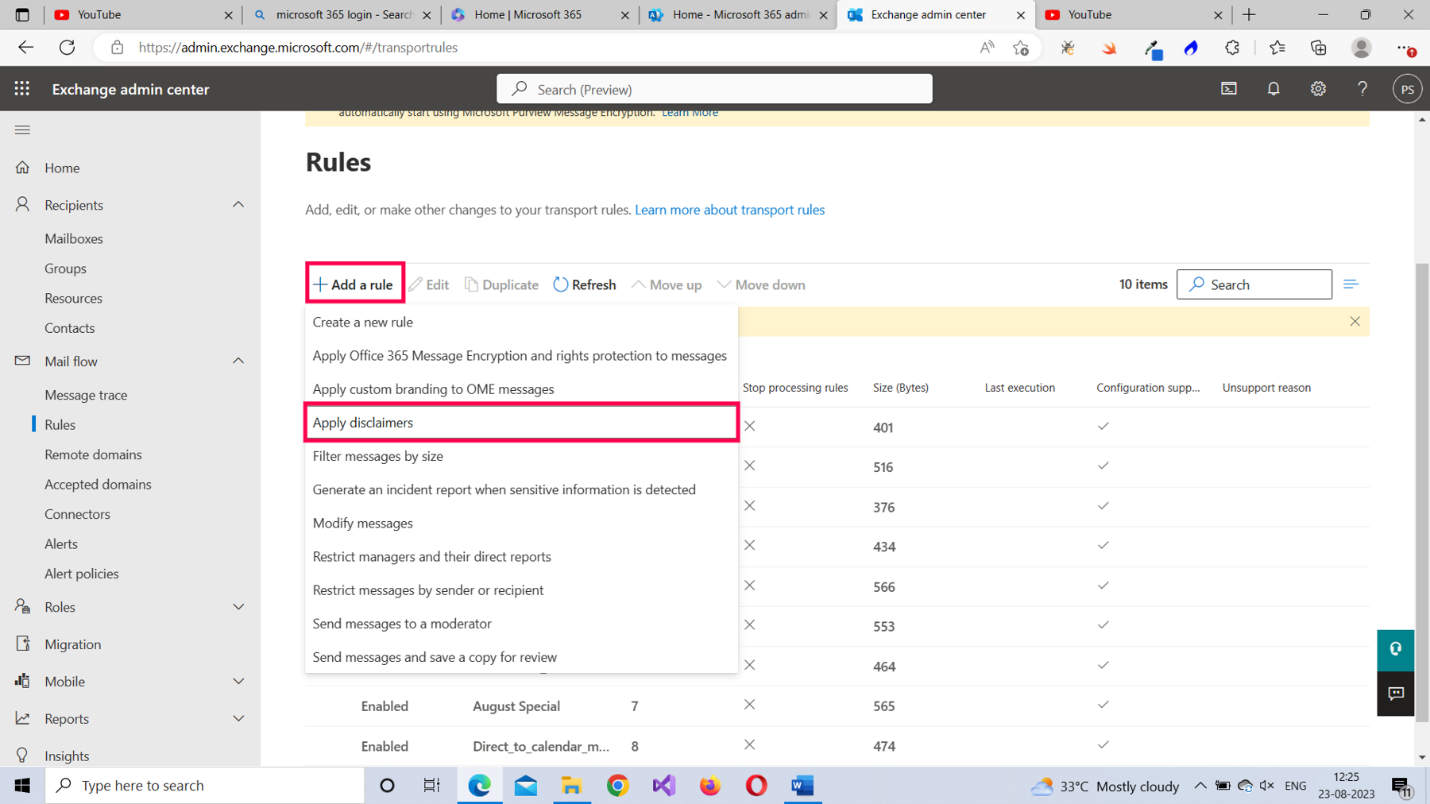
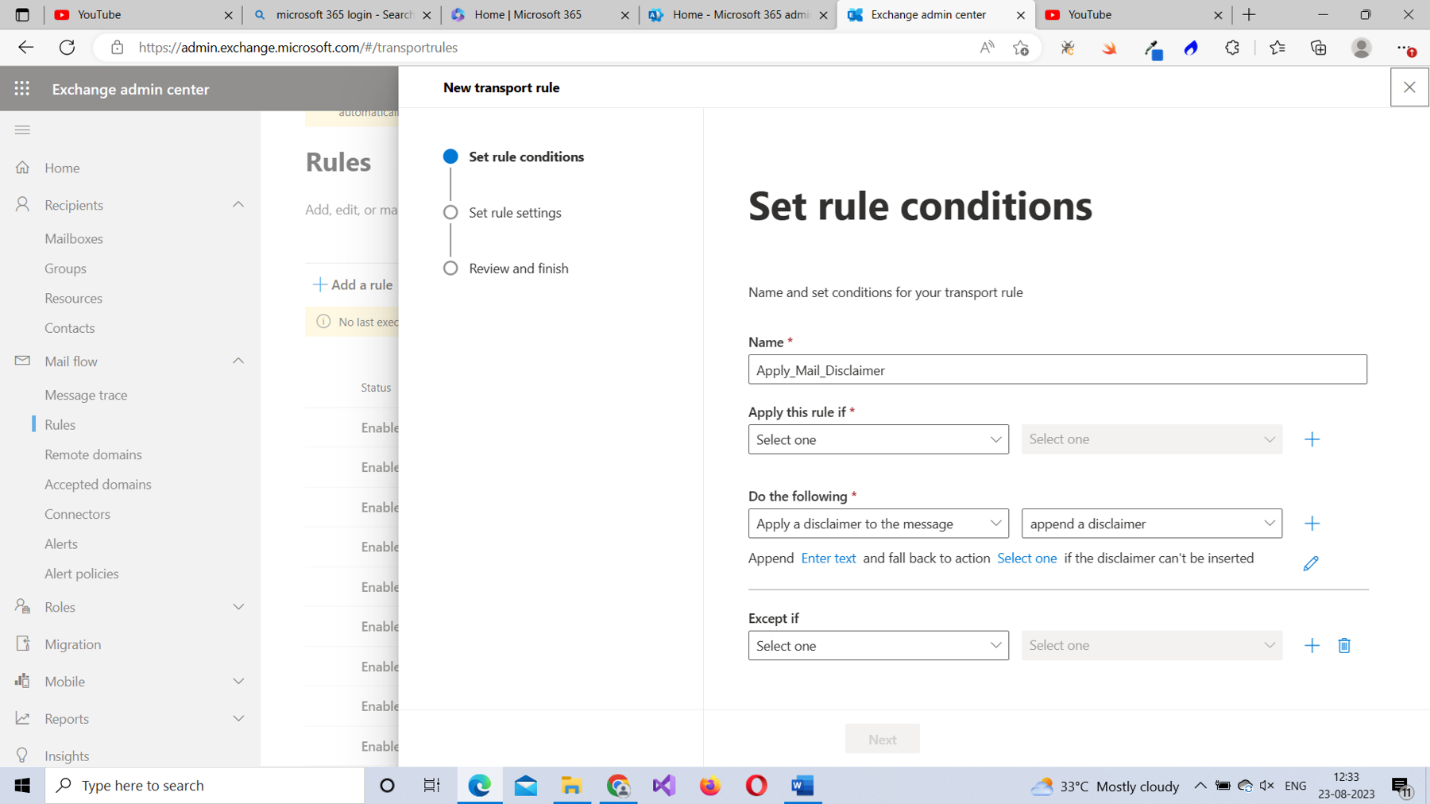
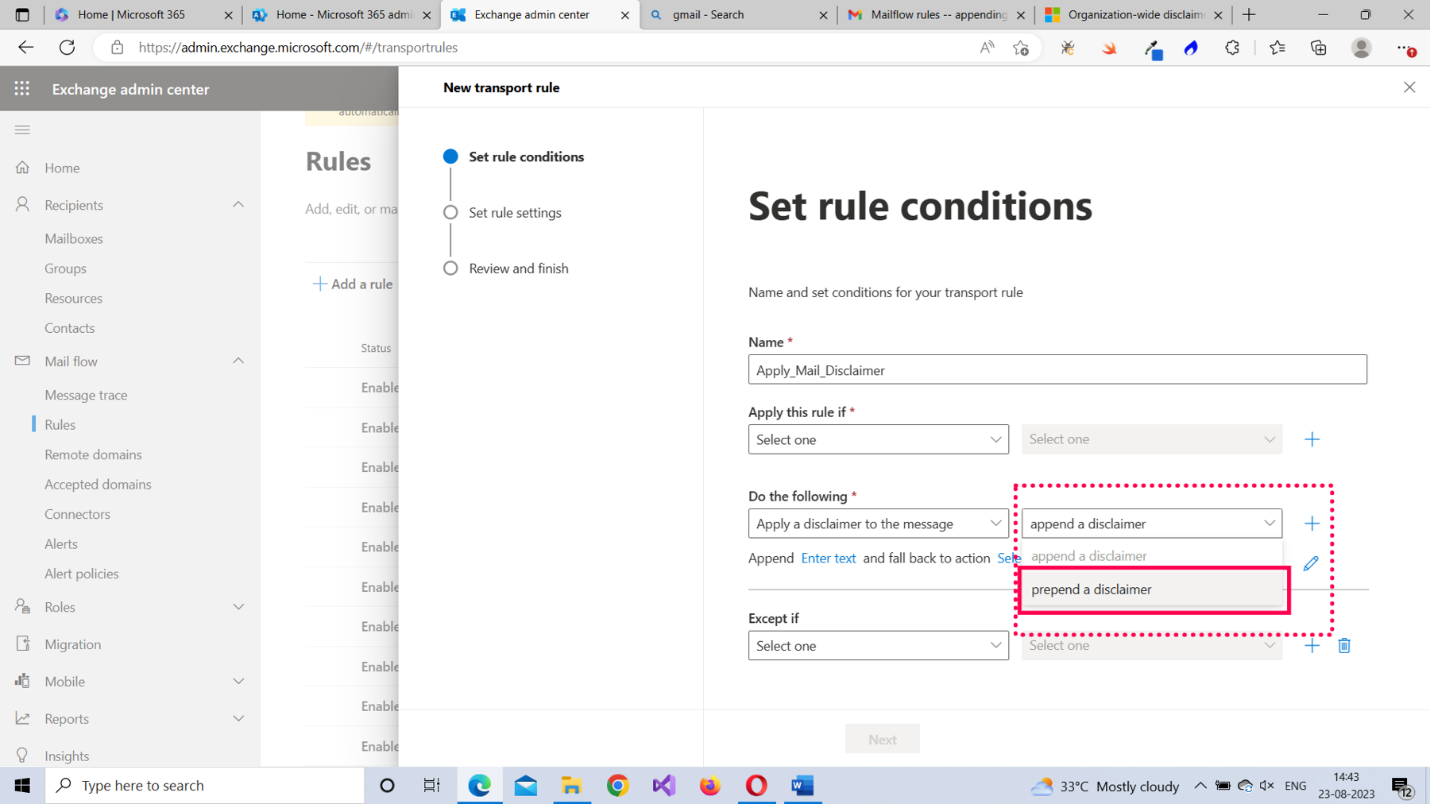
Figure 8: Preconfigured action for the mail flow rule. | Used with permission from Microsoft.
Note: You also have a prepend a disclaimer action setting, as shown in Figure 9. Selecting prepend a disclaimer means that your disclaimer gets placed at the beginning of the message. Selecting append a disclaimer means that your disclaimer gets placed at the end of the message.
- Provide a suitable name for the mail flow rule without any whitespace.
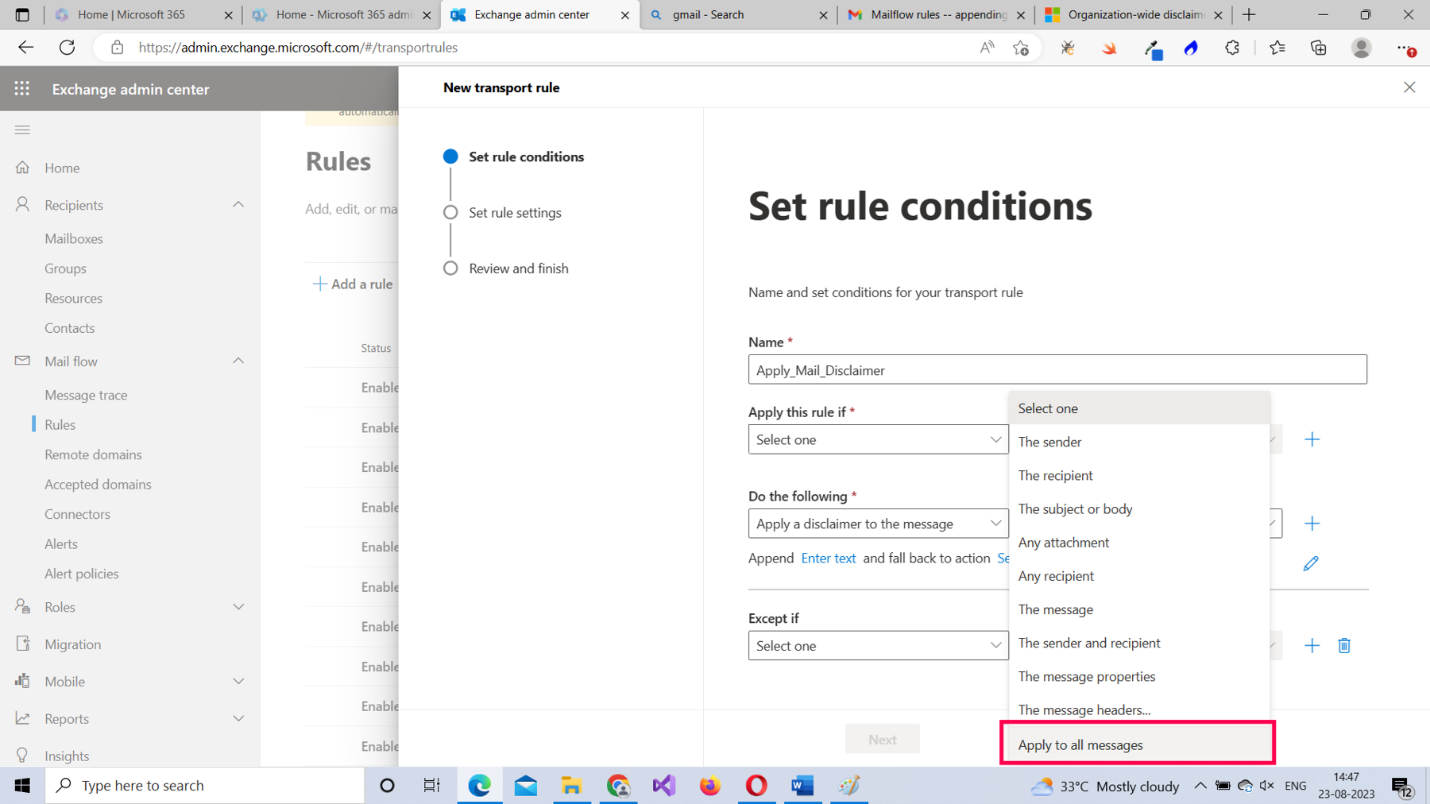
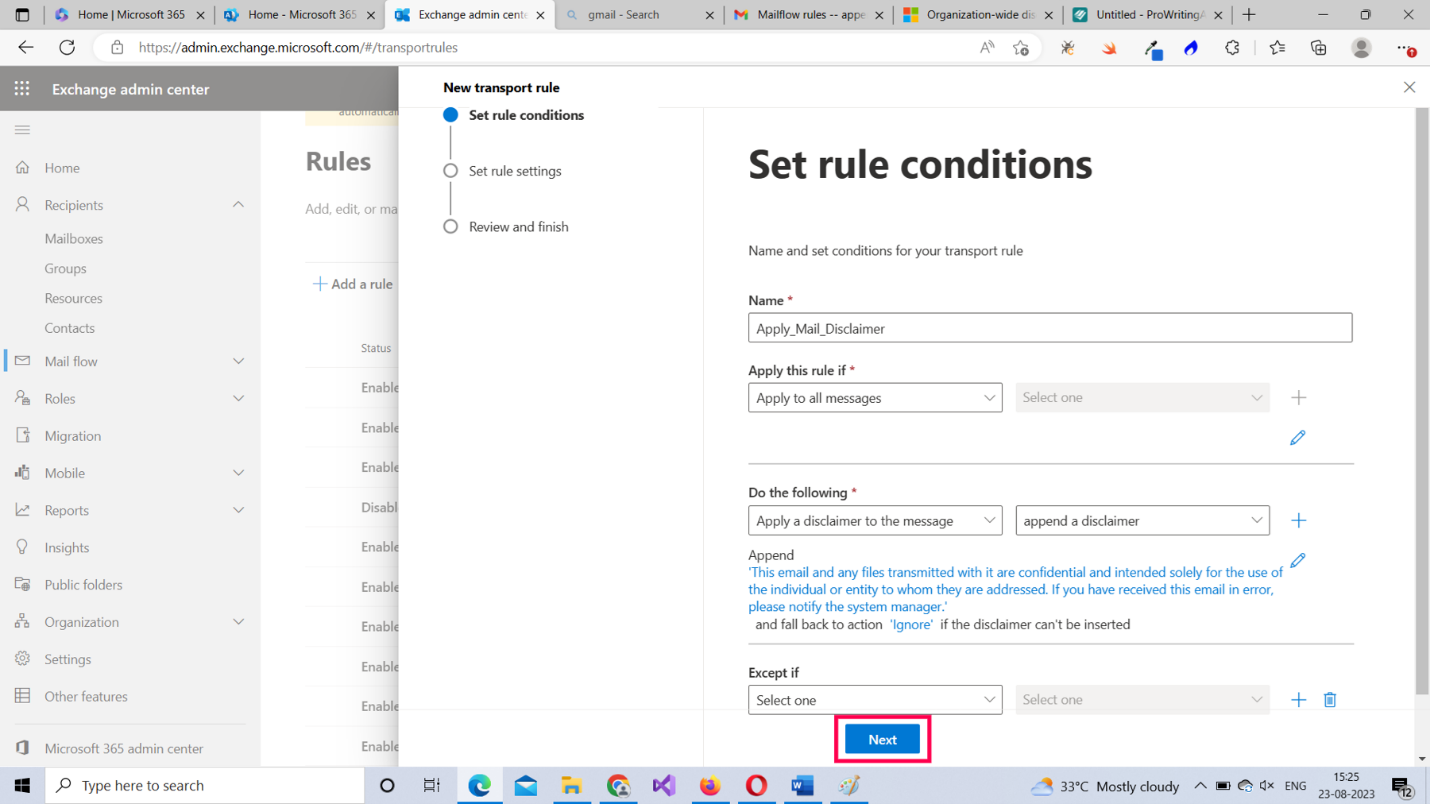
- From the Apply this rule if dropdown, select the condition Apply to all messages, as shown in Figure 10.
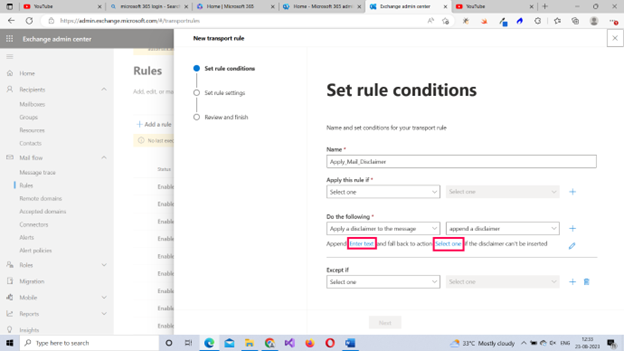
Click the Enter text link shown in Figure 11. (If the disclaimer can't be inserted, click the Select one link.)
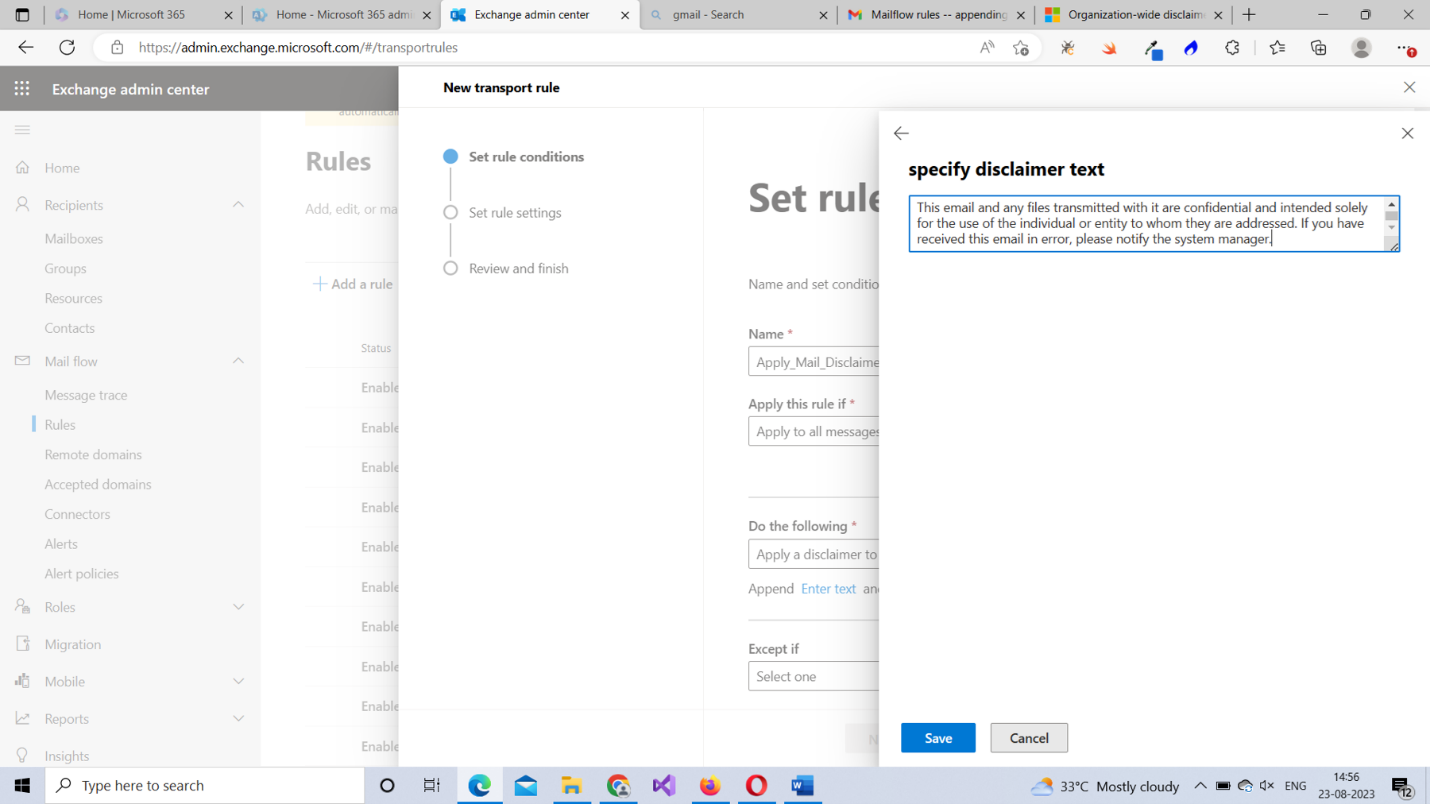
Specify your disclaimer content, as shown in Figure 12, and save it.
If you clicked the Select one link (from the preceding Figure 11), pick a fallback action as shown in Figure 13, and save it.
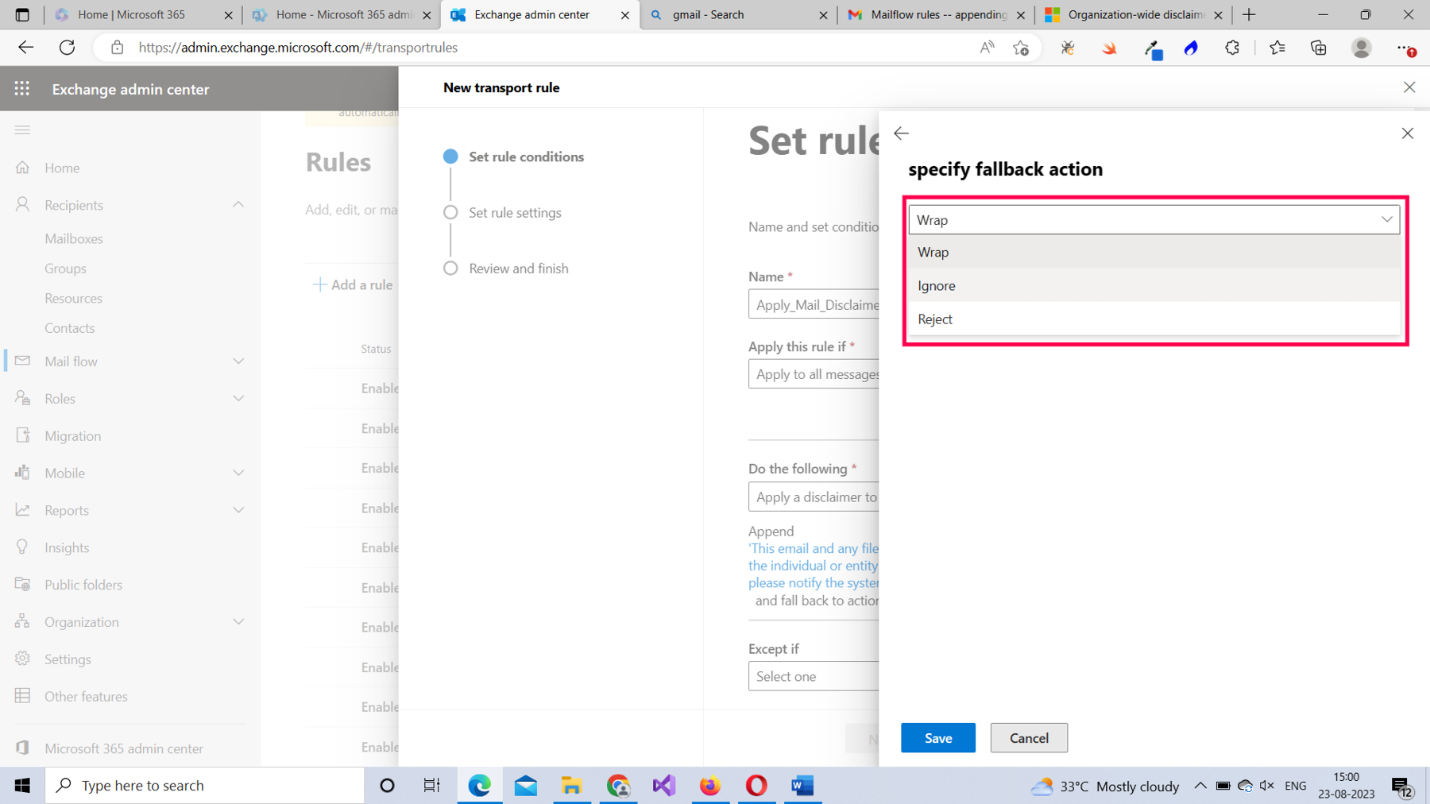
Note: Fallback options help you choose what should be done if the rule cannot be run for some reason. You are provided with three fallback options:
- Wrap. The rule wraps or appends the original mail as an attachment to the disclaimer.
- Ignore. The rule gets ignored and the mail is sent without the disclaimer content.
- Reject. The rule rejects the mail and sends it back to the sender.
Let’s set the fallback option to Ignore for now.
To proceed to the rule settings section, select Next, as shown in Figure 14.
Note: Since this is a disclaimer rule that applies to the entire organization, I am not going to set any exceptions for it.
The rule settings pane is shown in Figure 15. Let’s configure the rule settings with the bare minimum requirements for now.
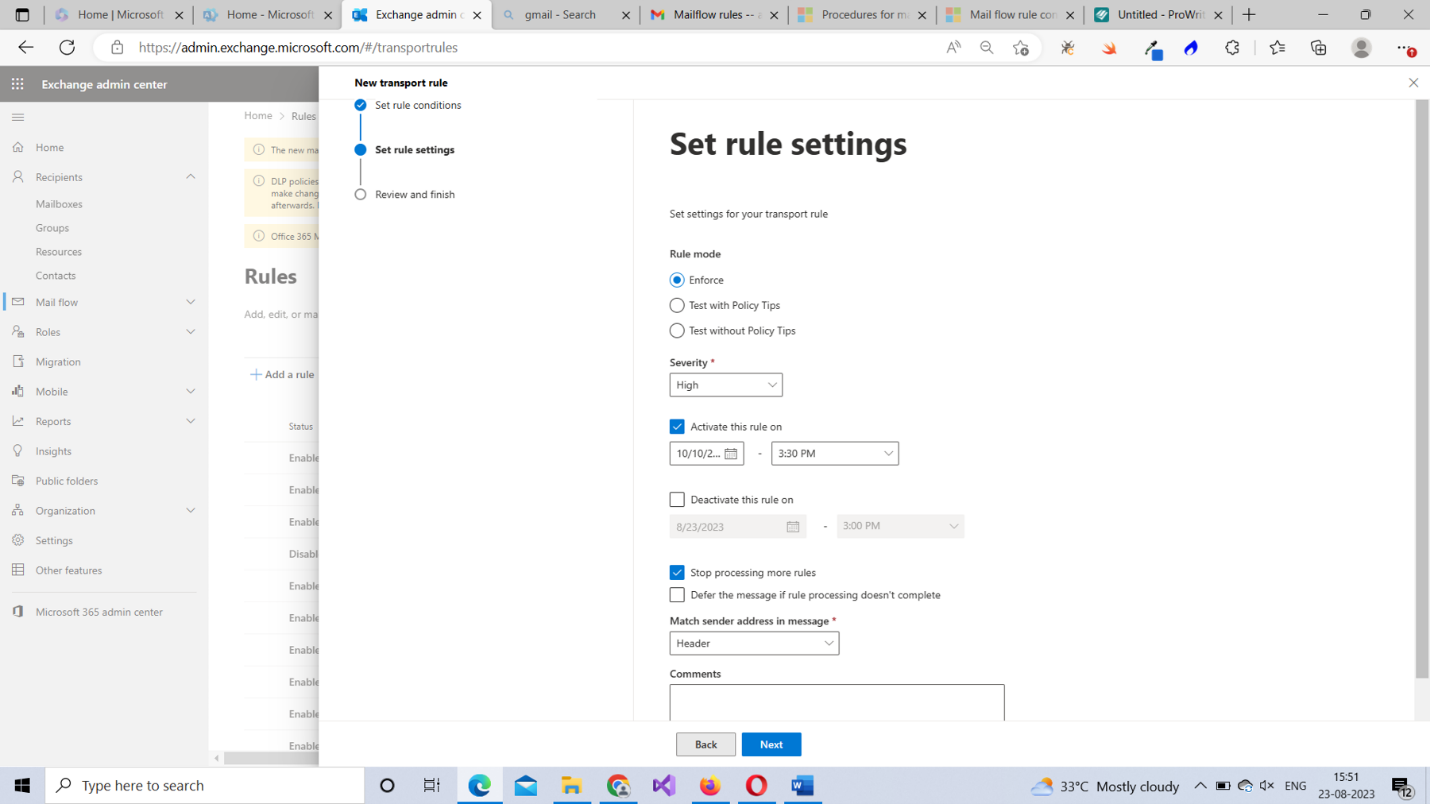
Set the rule mode. You have three different options to choose from:
- Enforce. Enforces the rule immediately.
- Test with Policy Tips. Test runs the rule with policy tips.
- Test without Policy Tips. Test runs the rule without policy tips.
Note: Since this is a demo lesson, I am going to enforce the rule without any testing. Please note that this is not recommended for practical deployment.
Set the severity for the rule. You have five options to choose from:
- Low. For rules that demand low priority.
- Medium. For rules that demand medium priority.
- High. For rules that demand high priority.
- Not audit. For rules that you don’t want to audit.
- Not specified. For rules that don’t demand any kind of priority.
Note: Remember that rules with high priority are run first. So, let’s give our rule a high priority.
- Enable the Activate this rule on checkbox , and then select the date and time at which the rule gets enforced.
Note: You also have the option of deactivating a rule by specifying a date and time for it.
- Enable Stop processing more rules checkbox for now. This ensures the rules that follow are ignored. Whether to enable or disable this rule depends on how important the rule is that you are configuring. To proceed to the Review and Finish section, select Next.
Note: Leave the Match sender address in message as Header for now. You don’t have to worry about this.
- After reviewing your newly configured mail flow rule and confirming that everything is right, select Finish. The mail flow or transport rule gets created successfully. To close the pane, select Done.
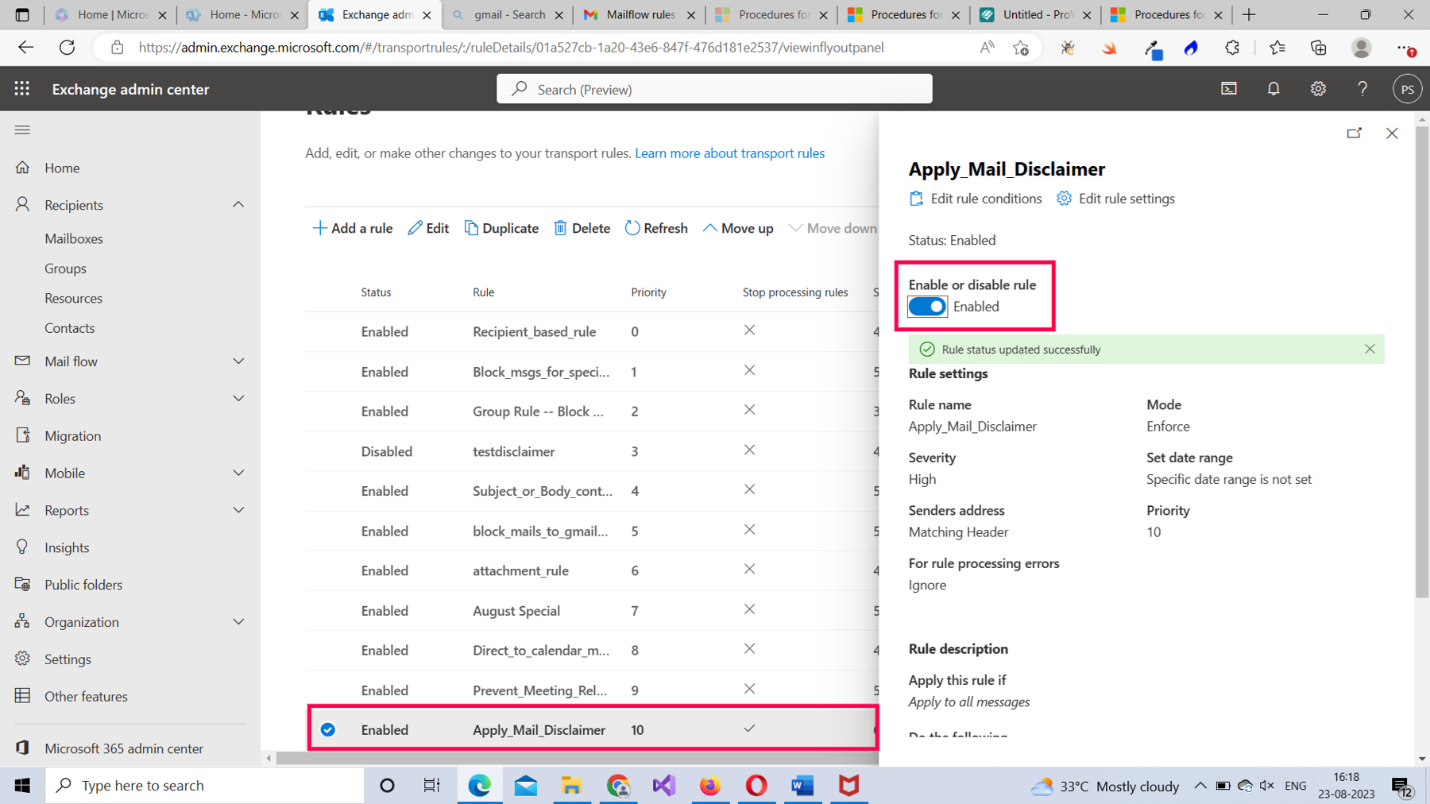
Important
Mail flow rules are not enabled by default. You must click on the rule and manually enable it, as shown in Figure 16.
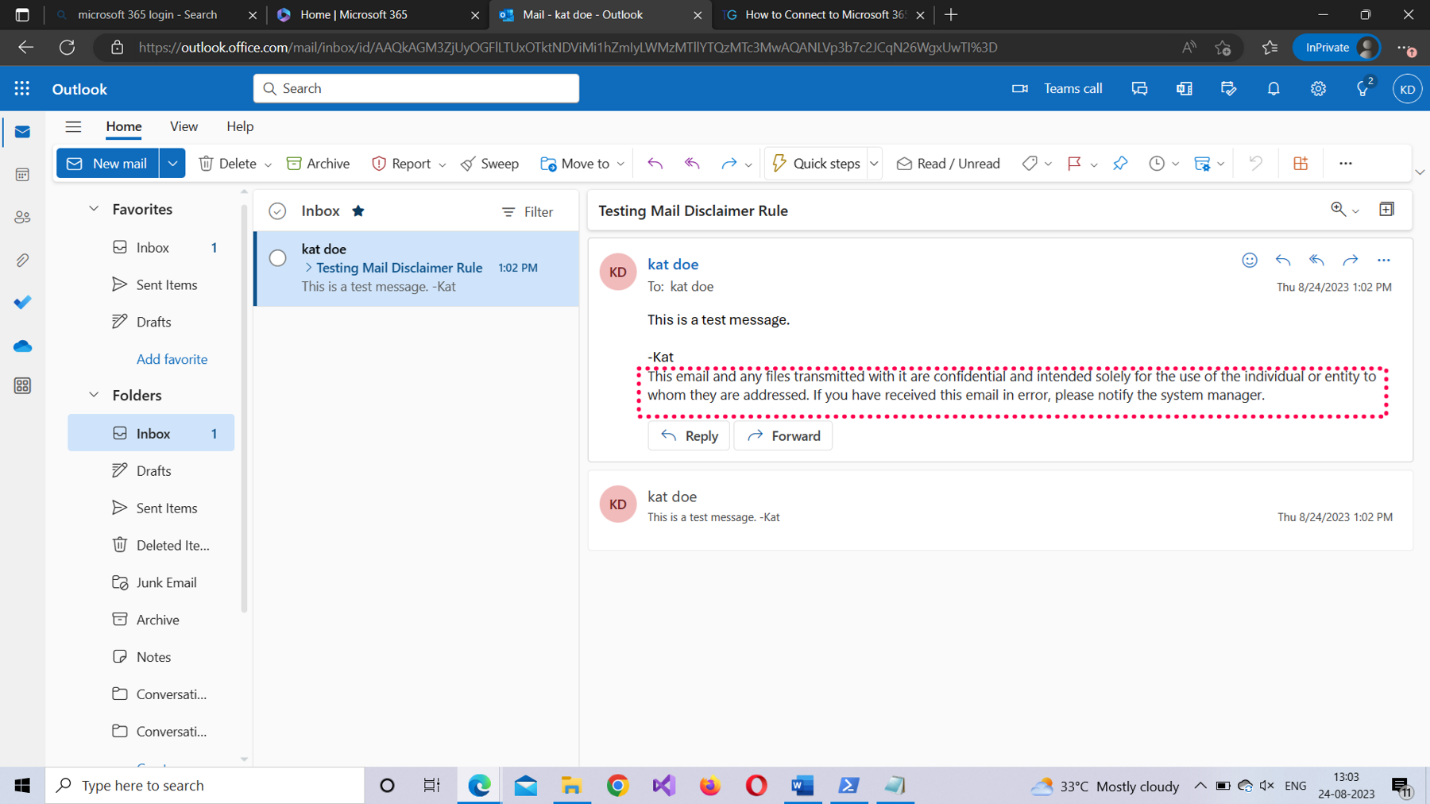
How to Check Whether the Mail Flow Rule You Created Works
Send a test mail to yourself using the Microsoft 365 Outlook web app. The disclaimer you just created should appear in the mail at the bottom, as shown in Figure 17.
Creating a Mail Flow Rule Using Windows PowerShell
To create a mail flow rule using PowerShell:
- Run PowerShell as an administrator.
- Connect to Microsoft 365 Exchange Online using the Connect-Exchange cmdlet. For more information, read How to Install and Connect to Microsoft 365 Exchange Online using PowerShell.
- As an example, run the following cmdlet, as shown in Figure 18, to create a mail rule that restricts email communication between two Microsoft 365 users:
New-TransportRule "Restrict Mail" -From
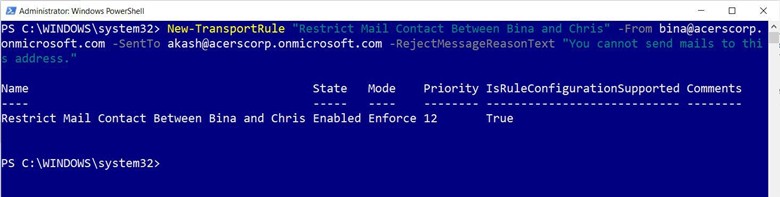
Figure 18: Creating the mail flow rule using PowerShell. | Used with permission from Microsoft.
How Does the Script Work?
Let’s break down the script:
- Use the New-TransportRule cmdlet for creating the mail flow rule.
- Pass in the name of the rule within double quotes, as shown in Figure 18.
- Set the -From parameter value to testuser1@contoso.com.
- Set the -SentTo parameter value to testuser1@contoso.com.
- Specify the message to be delivered to testuser1@contoso.com (if he or she tries to mail testuserw@contoso.com) and pass that value to the -RejectMessageReasonText parameter.
To find out whether the rule has been successfully created, run the Get-TransportRule "Restrict Mail Contact Between Bina and Chris" command, as shown in Figure 19.
Note: (3) and (4) are the conditions. (5) is the action. This rule does not have any exceptions.
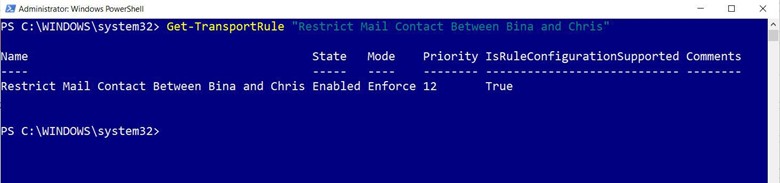
Figure 19: Checking the details of the newly configured mail flow rule. | Used with permission from Microsoft.
Possible Errors You Might Face
Here are some possible errors you might face and ways to rectify them:
- Whitespace in your mail flow rule’s name: Ensure that you name your mail rules without any whitespace between them, since this can throw errors. Remember that whitespace causes errors only when you are creating your rules using the EAC, not when you are using PowerShell.
- Not running your shell as Administrator: Select the PowerShell program from the Windows start menu, and then choose the Run as Administrator option, as shown in Figure 20.
- Execution Policy set to restricted mode: Execution policy setting determines the script execution rights for the current user. If you are signing in for the first time, chances are this is set to restricted mode. Therefore, ensure that the execution policy is set to RemoteSigned (which allows you to run your scripts). The command for doing so is the following: Set-ExecutionPolicy RemoteSigned
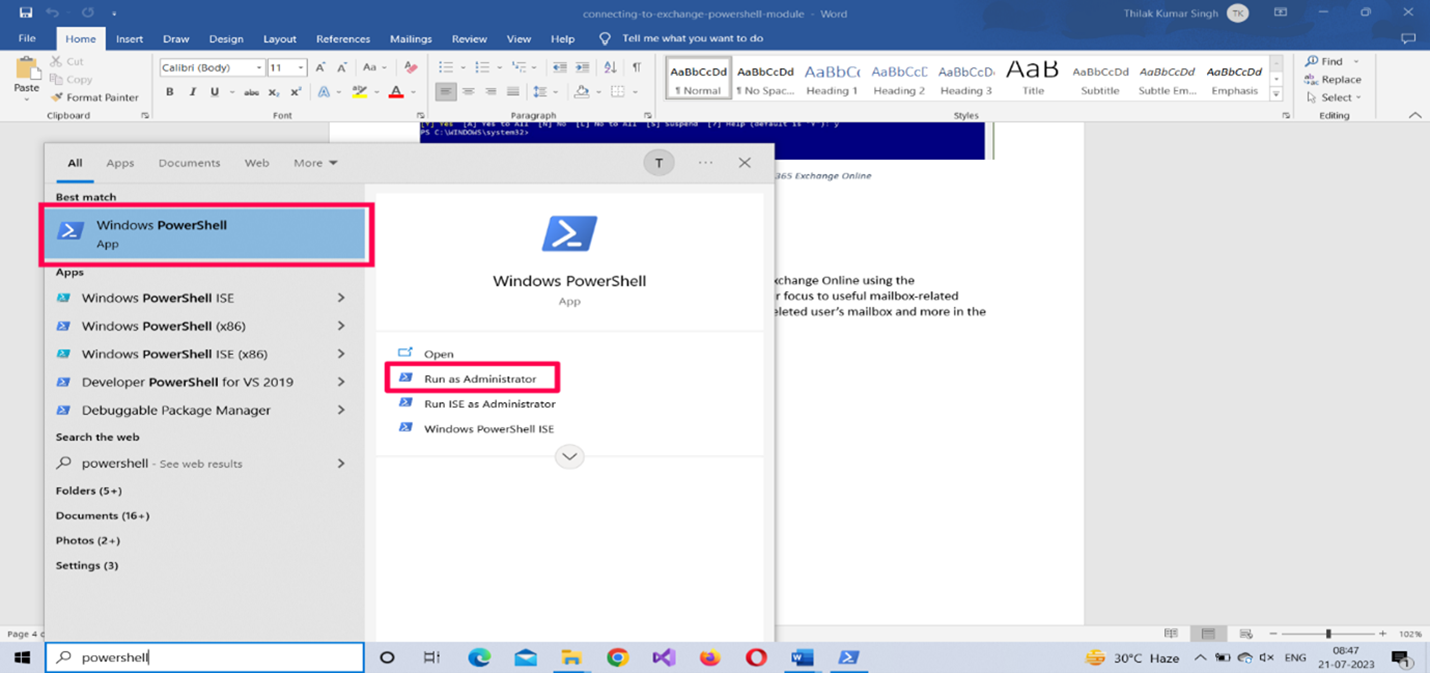
Figure 20: Running PowerShell as Administrator. | Used with permission from Microsoft.
Note: To check your current script execution rights, run the Get-ExecutionPolicy command.
Typos in your PowerShell script: You can run into typos even while copying/pasting scripts. So, it’s best to save your scripts in separate .ps1 files and run them. This not only saves time but also prevents your script from running into unnecessary errors.
Conclusion
Now that you know how to create mail flow rules, in the next article we’ll show some useful mail flow use cases and how to implement them using the EAC and PowerShell. We’ll also explain how to create custom mail flow rules from scratch, without the help of predefined templates.
Did You Know? Managing Microsoft 365 applications is even easier with automation. Try our Graph PowerShell scripts to automate tasks like generating reports, cleaning up inactive Teams, or assigning licenses efficiently.
Ready to get the most out of Microsoft 365 tools? Explore our free Microsoft 365 administration tools to simplify your administrative tasks and boost productivity.